Starting a new saltwater aquarium is a very exciting time however, the start of many saltwater aquariums is often rushed by new aquarists and this can lead to their favorite fish dying in a matter of days. Just like building a new home getting the foundation right is key and the Nitrogen Cycle is the foundation on which your new aquarium will build.
Allowing the aquarium to fully cycle is paramount to ensure that when livestock is added the eco-system is ready and able to deal with the waste the new additions will produce.
The Aquarium Cycle is a 4 step process where nitrifying bacteria multiply, consume & process harmful ammonia & nitrite toxins in the water, and convert them to less harmful nitrates. Most Reef Tank Cycles take 2 – 8 weeks depending on tank volume. Bacteria culture products can help reduce this time.
Patience is the key to first setting up an aquarium and the larger the aquarium the longer this cycle can take. By allowing mother nature to ‘Do Her Thing’ with your new aquarium it will ensure that the livestock you add in the future will be moving into a healthy home.
Imagine the Nitrogen Cycle like a new home you have just purchased but the paint that was used to paint the entire house was toxic. Would you move your family in right away and live in a toxic environment, or would you wait 2 months for the paint to become safe and then move in?
Why Do Aquariums Cycle?
An aquarium is a small enclosed ecosystem that needs to naturally balance to survive. Nature provides nitrifying bacteria to consume and process organic waste into harmless elements but these bacteria need to balance the waste produced. The bacteria multiply naturally to help provide this balance.
As soon as any livestock is added to an aquarium and begin to produce waste the nitrogen cycle begins. It is a natural process that automatically occurs and is constantly ongoing. The problems lie when people begin to add livestock before the aquarium has completed its first cycle to grow and establish its baseline population of nitrifying bacteria.
During the nitrogen cycle high levels of nitrite and ammonia will stress and kill any fish as these elements are toxic.
What Is The Aquarium Nitrogen Cycle?
The nitrogen cycle is a natural four-stage process that takes place both in nature and in your aquarium to prevent high levels of toxins from accumulating in the water. It is constantly taking place on a small scale each time you add food or livestock, but the main cycle takes place when the aquarium is first set up.
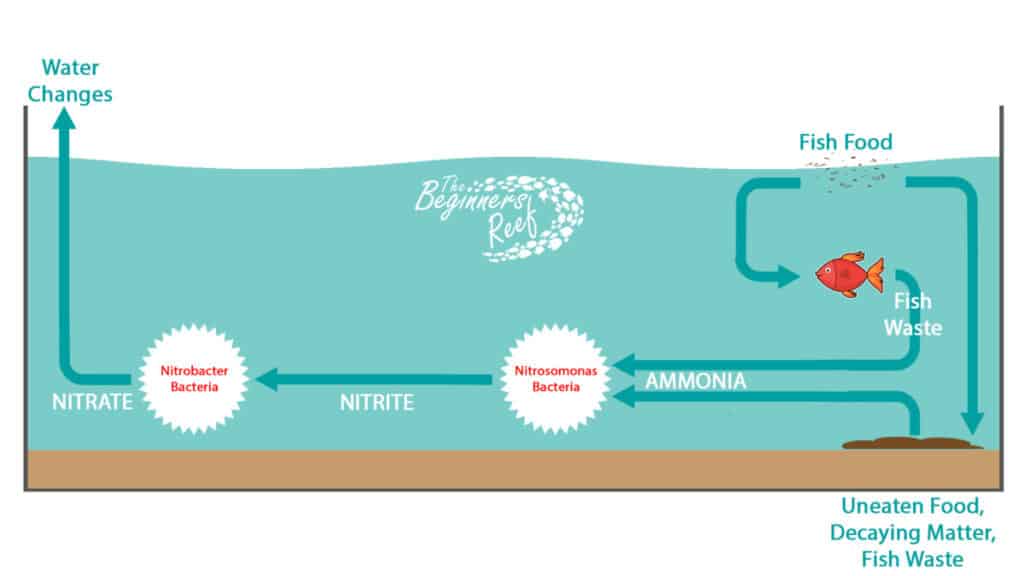
During the nitrogen cycle nitrifying bacteria consume organic waste and convert it into nitrite, then ammonia, then nitrate, and finally nitrogen. Nitrate and nitrogen are less toxic to fish and can be controlled via water changes, feeding, and stocking levels.
Stage 1 – Creating Ammonia
For the cycle to begin, a supply of Ammonia needs to be present. The main ways ammonia get produced in an aquarium are from:
- Livestock going to the bathroom
- Uneaten food breaking down & decaying
- Fish waste breaking down & decaying
- Dead animals and plants breaking down & decaying
Ammonia is the first stage in the nitrogen cycle and Ammonia is highly toxic to aquatic livestock and any amount is enough to kill your prized additions.
Stage 2 – Converting Ammonia to Nitrite
To rid the water of ammonia, mother nature has created a strain of bacteria called Nitrosomonas Bacteria that feed on ammonia. As this strain of bacteria consumes ammonia they convert it into Nitrite.
Nitrite though is still highly toxic to aquatic livestock.
Stage 3 – Converting Nitrite to Nitrate
The third stage of the Nitrogen Cycle is to deal with the toxic nitrite and a second strain of bacteria called Nitrobacter Bacteria automatically begin to multiply when nitrite starts to show up in the water.
Just like Stage Two, this bacteria consume nitrite and convert it to the safer compound of Nitrate.
Nitrite & Nitrate sound very similar – All you have to remember is that NITRITE is toxic and NITRATE is harmless, but only in low levels.
Stage 4 – Controlling Nitrate
Now that the water has been rid of toxic ammonia and nitrite, as the owner of the aquarium, we all need to control nitrates to keep the levels low enough that can be tolerated by the fish and livestock.
The best ways to control nitrate from reaching toxic levels is by regular maintenance:
- Regular water changes using high quality source water
- Using a Turkey Baster to blast trapped debris from the rocks
- Cleaning all the sand bed using a gravel vacuum
- Overfeeding prevention
- Adequate fish stocking levels
Without you controlling and exporting nitrates the amount can slowly build over time which could begin to reach toxic levels to your fish.
Now that we understand (hopefully) the process that is about to begin in your new aquarium we need to be able to monitor each stage to track the progress to be able to see when the cycle is complete and it is safe to begin adding livestock.
How Do You Monitor An Aquarium Nitrogen Cycle?
Each stage in the cycle is easy to monitor and it can vary on how long it takes, but the process is the same in every aquarium cycle:
Ammonia
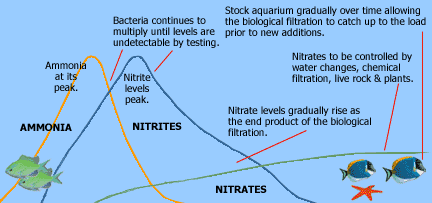
The first stage in the Nitrogen Cycle is the rise in ammonia. You can see in the diagram that the ammonia will rise then drop as the Nitrosomonas Bacteria multiply to sufficient levels and begin consuming and converting the ammonia to nitrite.
This stage can take from a few days to 2-3 weeks depending on the size of the aquarium and the amount of ammonia needing to be processed. It needs to be monitored every 2-3 days with a good quality Ammonia Test Kit.
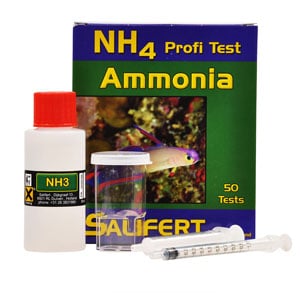
The best kits I have been using for years and recommend are from Salifert. This Ammonia Test kit will give you easy, accurate results to allow you to test and track the rise and fall of the ammonia spike.
This test kit can be used for both Freshwater & Saltwater aquariums.
You can find Salifert the Ammonia Test Kit HERE at Amazon.com.
Nitrite
A few days after the ammonia begins to rise you will need to start testing for Nitrite. As the ammonia begins to get processed you will begin to see the nitrite level start to rise. Eventually, you will see the ammonia level fall to zero as the nitrite level begins to peak. This is the Nitrosomonas Bacteria converting all the ammonia into nitrite.
Just like ammonia, nitrite will need to be tested for every couple of days to track its progress too.
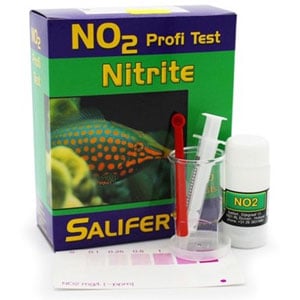
This Salifert Nitrite Test Kit can be used for both Freshwater & Saltwater aquariums.
You can find Salifert the Nitrite Test Kit HERE at Amazon.com.
Nitrate
As the second strain of bacteria (Nitrobacter Bacteria) begin to multiply and consume the nitrites you will slowly start to see this level begin to rise. Once the nitrites drop to zero and you have some level of nitrate you can now begin to do regular water changes to help maintain nitrate at low levels.
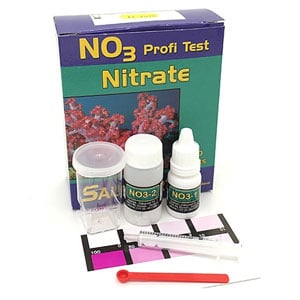
Just as with other tests, the Salifert kit is the one I recommend and can be used to test both Freshwater and Saltwater Aquariums.
This test is able to test both low and high ranges of nitrate making it great for both the initial cycle and then regular monitoring of nitrate as your fish stocking levels increase.
You can find the Salifert Nitrate Test Kit HERE at Amazon.com.
When Is The Aquarium Cycle Complete?
The main question everyone wants to know is when is the cycle complete and when can you begin to add fish??
An aquarium cycle is complete once both ammonia and nitrite have risen, peaked, and then fallen to zero, and then nitrate has begun to rise. At this point, you can complete a 25% water change and begin to slowly add new fish to the aquarium. Testing with quality test kits is used to track the cycle.
Managing the Aquarium Bioload
The main thing every new aquarist needs to understand is that each time you add another fish to the aquarium both the Nitrosomonas and Nitrobacter bacteria needs time to multiply to numbers adequate enough to process the addition in bioload.
The bioload or Biological Load is the waste the bacteria have to process. The more waste, the more the bioload, and the more quantities of bacteria are needed to process the load.
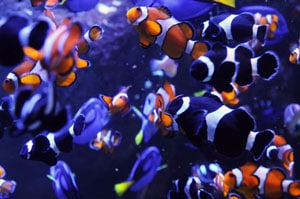
Your filter media, rock, and substrate that will house the majority of your bacteria are always trying to find an equilibrium. Bacteria need food and without food, they stop multiplying.
Think of it like going to a music festival. If 100,000 people show up and the organizers have only installed 20 portable toilets it is going to get messy!
But if the first day 10,000 people show up and the organizers bring in 200 toilets, then the next day another 10,000 join the party and another 200 toilets show up, the bioload of the music lovers will be matched.
This is what happens in your aquarium. This is why you hear many times to add livestock a few at a time and leave at least 1-2 weeks between each addition. Take it slow!
This gives your bacteria time to multiply to sufficient levels to match the bioload and reach the equilibrium. If you try and add too many fish in one go, the existing bacteria cannot cope and then you will being to see rises in ammonia, nitrite, and nitrate.
Remember all are toxic to fish when they reach the following thresholds:
| Toxin | Freshwater | Saltwater |
|---|---|---|
| Ammonia | >0 ppm | >0 ppm |
| Nitrite | >0 ppm | >0 ppm |
| Nitrate | >50ppm | >5ppm |
As you can see any rise in ammonia or nitrite is going to instantly begin to distress your fish and death will shortly follow.
The best ways to manage the bioload is the following:
- Regular water changes using high quality source water
- Using a Turkey Baster to blast trapped debris from the rocks
- Regular cleaning of the substrate using a gravel vacuum
- Prevent overfeeding
- Staggered introduction of fish
- Adequate fish stocking levels
How To Cycle An Aquarium: Step-By-Step
Because the Nitrogen Cycle is one of the most important steps to a healthy, successful aquarium it goes without saying that getting it off to the right start is paramount. Below is my tried and tested, step-by-step method that I use myself whenever I set up a new aquarium or advise people when they are setting up theirs.
The steps are the same no matter if you have a freshwater aquarium or a saltwater aquarium, just make sure you have the salt in the water if its a marine tank!
Step 1 – Install Aquarium
Get the aquarium installed, leveled and all the plumbing and lighting installed. After this step, there should be nothing you need to do to create a mess around the tank.
Step 2 – Install Aquascape
Depending on the type of aquarium you are setting up now is the time to get all the stuff into the tank that is going to create the habitat for your livestock.
This will include your rock and sand if its a marine tank, your gravel, and ornaments if its a tropical freshwater. Whatever you put in just be sure to give it all a really good rinse in a bucket or bin of clean RO/DI (Reverse Osmosis/De-Ionised) water – See Further Reading section of this article for more info.
Step 3 – Prepare water
If you have a saltwater aquarium now is the time to get the salt mixed into the RO/DI water in separate bins and get it up to temperature and mixed with a powerhead.
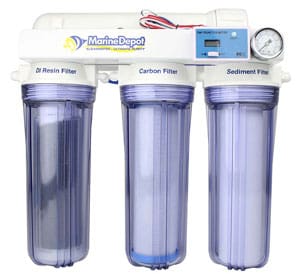
Find Them Here at Amazon.com
NOTE – This may take a few hours to prepare your water depending on how many gallons you need. It is not advisable to put cold freshwater in the tank then add the salt because if you have used Live Rock & Live Sand then you will kill all the bacteria and goodness living in it!
If this a freshwater tank get the water ready in a bin or get your RO/DI unit hose attached to the tank to prepare for filling.
Step 5 – Install Heaters, Pumps & Filters
Now is the time to mount all the life support equipment into the aquarium and ensure they are secure and ready for when the water begins to get added. Get all the cables neatly tucked away and ensure Drip-Loops are added to protect you from any potential water running down the cords.
Do not turn on the equipment yet. If it runs without water around it the unit will fail!
Step 6 – Add Water & Start Life Support
Once your water is ready it is now time to begin adding it to the aquarium. Be careful to add it slowly, to begin with so you create less of a dust storm from the sediment that remains in the substrate – Your water will be cloudy for a few days no matter how well you pre-rinse it!
Adding a dinner plate to the substrate then aiming the house onto it will help evenly disperse the water.
Once the water has covered each life support unit (heater/powerhead etc), you can turn it on. The idea is to get the water moving and keep it heated during the fill. Get the filter pumps turned on to help remove the suspended debris in the water.
Here is where I recommend you let the filters clear the water of the debris and then move onto Step 7. Dr. Tim will explain why in the video you will come to shortly!
Once the mechanical filter has removed the debris, remove it, clean it, and place it back into the filter to get ready for the cycling process.
Beginner Tip
NEVER wash your filter media (sponges, ceramic pieces, carbon etc) under the faucet. This will kill the nitrifying bacterin colonized on them. When doing a water changer empty some old tank water into a bucket then wash/shake/rinse the filter media in this bucket to remove detritus and debris. Then place the media back into the filter system. This will ensure the bacteria remain alive to continue keeping your water pristine!
Step 7 – Add Starter Culture
Gone are the days when we use fish to start an aquarium off on its nitrogen cycle. It is cruel to the fish and if you add Damselfish to an empty aquarium because they are hardy, I can tell you know you WILL be ripping your aquarium apart in 6 months to try and remove those monsters! – Trust Me!
The easiest, fastest, and most beneficial way to start an aquarium cycle is by using a starter culture purposely designed to get the cycle done fast – although we are still talking weeks!
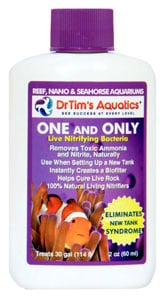
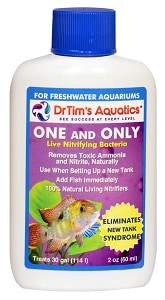
The best and most recommended product to use is Dr. Tims One & Only. This is available for both freshwater and saltwater aquariums and is an incredible product. It is simple to use and if you follow the instructions your aquarium will cycle in no time and you will have a healthy bacteria foundation on which your tank can grow.
Here is a video of Dr. Tim himself talking about it in a saltwater aquarium but the freshwater version is the same:
You can find both versions below at Amazon.com
Step 8 – Start Testing
The only way to track the progress of your aquariums cycle is to begin testing every day or two. Not only will this help you follow its progress but will also allow you to become familiar with how to test your water. Testing your water will be a weekly part of your aquarium maintenance and testing correctly to get accurate results is the only way to ensure your aquarium remains healthy.
For the first few weeks all I monitor is the following:
- Temperature
- Salinity – Saltwater Tanks Only
- PH – Saltwater Tanks Only
- Ammonia
- Nitrite
Once you begin to see nitrite increasing I then also begin to track nitrate.
After ammonia and nitrite have dropped to zero and have remained there for a week there is no need to further test for them.
Step 9 – Results Tracking
My 75 gallon reef aquarium took around 7 weeks to cycle and after a few weeks, you can forget where you are in the cycle so it is really important to note every parameter you test for so you can see when the rise and falls are happening for each compound.
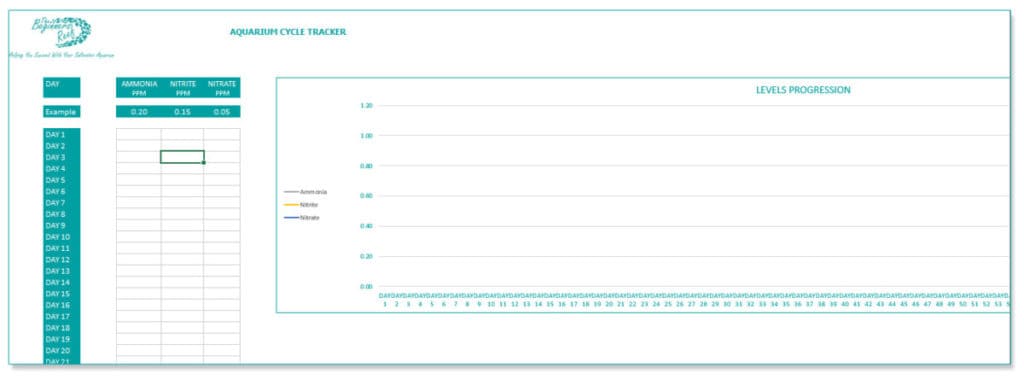
This way you can then see your cycle is progressing nicely and has not stalled or something went wrong. The best way to track these results is by using a journal or using this FREE tool I made for you.
Just enter the values you receive from your test kit into the respective column and then you can see the progress in the table or by using the handy graph!
Step 10 – Water Change
Once your tracking shows that you have had both the ammonia and nitrite rise and then fall to zero and your nitrates have started to rise, as explained earlier, its now time to do a 25% water change.
Monitor your levels for a further week and once ammonia and nitrite remain at zero and nitrate is <30ppm then its time to go and get your first fish!
How To Add Your First Fish To An Aquarium?
This is by far THE most exciting time for a new aquarium owner and if you have followed my advice in the article your new additions will be feeling at home in no time.
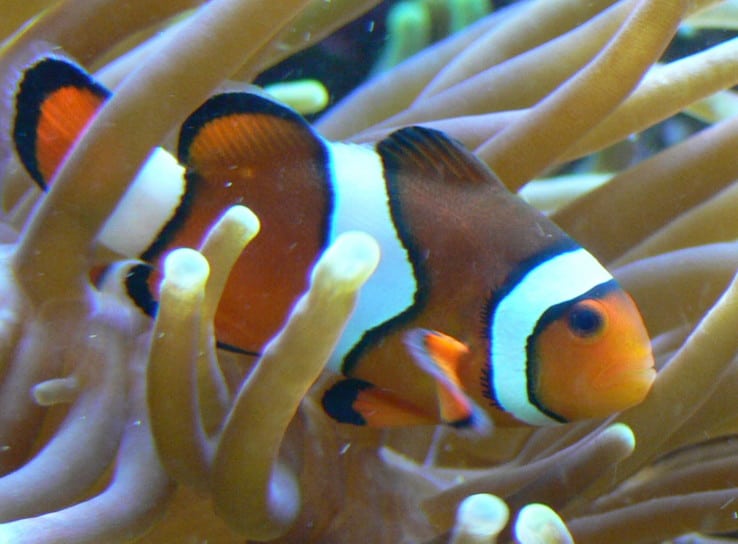
One of the best things you can do while your new aquarium is cycling is to create a fish stocking list. This is a list of which fish you CAN have in your size of the aquarium and prepare a list based on aggression. Least aggressive added first, most aggressive added last.
Start with the least aggressive and hardiest fish first and purchase no more than 2-3 fish at a time. Remember each time you add fish your bacteria has to multiply to handle the increased bioload.
After 1-2 weeks you can add another 1-2 fish. The slower and more patient you are in adding your livestock, them healthier your aquarium will be. Fish can become very expensive and then the last thing you need is to find it ‘Belly Up’ in the tank the next morning!
Additional Aquarium Cycling Methods
If you have owned an aquarium in the past you may remember a different way of cycling an aquarium and there are a few methods to get the cycle started. Here are some of the most popular ways to cycle an aquarium:
Fish Food Method
To get the first source of ammonia required to kick start the nitrogen cycle you begin to add food to the aquarium just like you had fish in there. I mentioned earlier that overfeeding allow uneaten food to accumulate on the substrate and begin to break down and release ammonia.
This is a simple way to begin the cycle but will require you to feed every day and monitor the progress. It can be slow but the main problem is that your aquarium will become covered in uneaten food before you even start adding fish!
Over time this sandbed can dramatically increase your nitrate levels because of the amount of decaying material in there.
Rotting Method
When I first set up my current 75 gallon reef it was way before I had even heard of Culture starter kits! I wanted my new reef to be as sterile and pest-free as it could be so I created the aquascape using Dry Rock and I dropped in a raw prawn from the grocery store and allowed it to rot and decay.
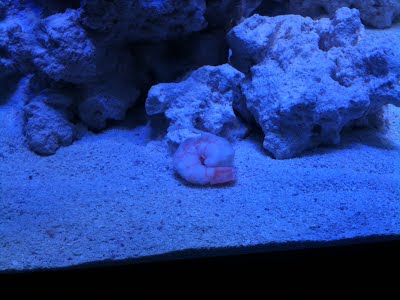
After a month I removed the remains of the prawn and allowed the bacteria to colonize naturally.
This worked well however it was a slow process (7 weeks). If I had used a starter culture like Dr. Tims One and Only that cycle time could have been halved, but way back then I had never heard of a ‘Starter Culture’!
Hardy Fish Method
This has been one of the Tried and True methods used for decades but as an advocate for animals, I have to advise against this method.
As mentioned earlier, ammonia and nitrite are highly toxic to fish and any amounts of this begin to attack the cells in an animal leading to a painful death.
This method of cycling involves adding 2-3 hardy fish straight after filling the tank with water. By feeding them they will add waste to the water and hence the ammonia will begin to build.
Not only is this cruel to the fish, it wastes money if they die and if do they survive they will not be healthy fish living in your aquarium. Fish that are not in peak condition can allow diseases and infections to run riot in an aquarium and affect other fish.
The other problem with this method is aggression. If you cycle using hardy fish like Damselfish or Oscars for example (depending on the water type) they will claim the entire tank as their territory. Any fish which you then try to add will most likely be bullied to death. I see this over and over again and trying to catch these fish can be very stressful!
To find out more on these little monsters please check out this article:
Damselfish: Are They Really That Aggressive?
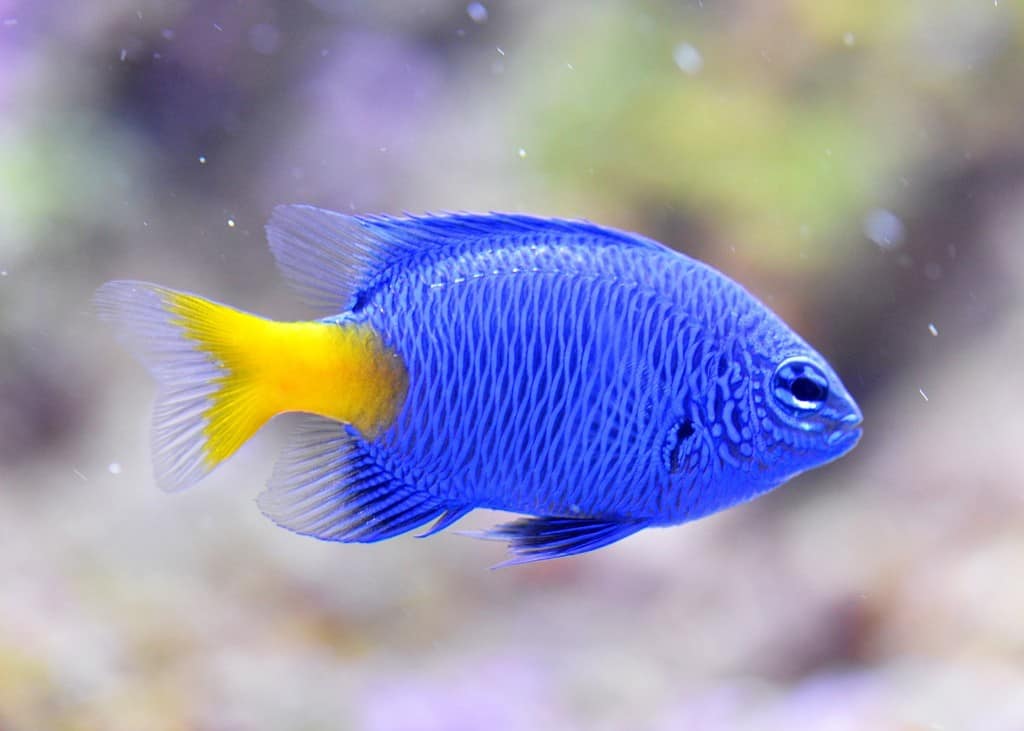
Cycling using fish is NOT recommended for many reasons!
Filter Seeding Method
Filter seeding is when you take filter media that has been on an established aquarium and set it to run in your new aquarium. The nitrifying bacteria that have colonized the filter media will then spread throughout your new aquarium but you need to provide them with an ammonia source.
Some people will add one or two hardy fish and use a culture starter.
With this method ensure your water matches the aquarium the filter media is coming from. PH, temperature, and salinity (If its a marine tank) all need to match to ensure the bacteria do not die from a dramatic difference in water parameters.
Another thing you have to ensure with this method is introducing pests and nuisance algae from the mature established tank. If the tank that is seeding your filter is full of algae and pests and the owner does not maintain pristine conditions then I would stay away from this method.
Battling nuisance algae because you did not want to spend $15 on a starter culture is a decision you will come to regret!
To Finish
The nitrogen cycle is one of the most important steps for any new aquarium and one that should not be overlooked. By allowing mother nature to build a solid foundation in your biological filtration your fish will be able to live a happy, healthy life for many years to come.
By skipping this essential process and adding fish right into the tank at day one is a sure-fire way to ensure many fish fatalities and a lot of wasted money – Not only that, the look on your child’s face when their new friend is lying dead in the tank!
A few months of patience will allow the new additions to your family to do what they do best – Provide a stunning showpiece for your home!
Further Reading
If you would like more information to help you increase your knowledge in this area I highly recommend our following articles:

