RECENT ARTICLES

Can Aquariums Be Safely Kept in a Bedroom?


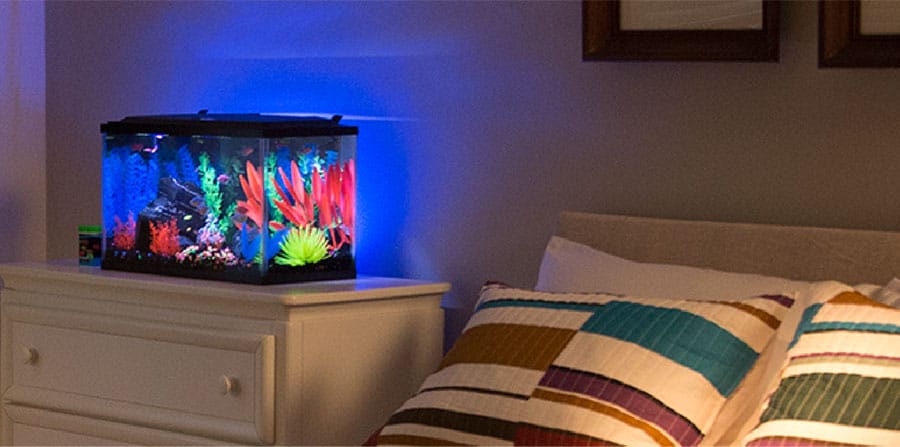
I see the question of putting an aquarium in a bedroom so many times, with so many different points of view. I grew up with an aquarium in my bedroom for my entire teenage years so I have a few tips and tricks to pass on if this is something you wish to do.

Having an aquarium in a bedroom, especially a child’s bedroom can be a great start to teaching them many things. Responsibility, cleaning, researching, understanding, planning, financial budgeting, and most of all calming.

A friend of mine has a son with autism and the calming effect it had on him when he got his own aquarium for his birthday was incredible. There are so many benefits to having an aquarium in a bedroom, but there are many things that need to be taken into account before installation to ensure the aquarium is a success.

Here are 12 things to think about…

1. Size of the Room Vs Aquarium Size

Before you purchase an aquarium, you should take into account your room size so you can install an appropriately sized tank. A smaller fish tank is generally a better option as bedrooms tend to be smaller and have lots of furniture within them.

Bedroom Aquarium Location

However, a larger fish tank is great for bigger bedrooms as the amount of livestock you can have in it greatly improves, and the water stability will fluctuate far less with more water volume.

There are so many types of aquariums that are ready to go on the market today that finding one to suit your room’s decor is simple. Just be sure to leave enough room all around the tank to access it for maintenance. A tank that is a pain to work on will become neglected as time goes by – Trust me!

2. Accessing Water

One of the great things about a bedroom aquarium is that there is usually a bathroom very close by. This gives quick and easy access to water for water changes and a drain for water removal.

Care must be taken in this situation though, as a large volume of water spilled in the upper level of a home or apartment can soon create a huge mess of the ceiling below! Be also very mindful if you are planning to set up a saltwater aquarium as salt granules or saltwater spilled on the carpet is a nightmare to clean up – Another ‘Trust Me’ moment!

One of the best devices I highly recommend is a Python Substrate Vacuum. It allows you to easily remove water from the tank with no spillages.

It is also great for re-filling by attaching it to a pump in your new water container.

Just be sure to secure the end of the hose so it doesn’t drop out of the aquarium or bathtub when you are moving water! A hobbyist’s or carpenter’s clamp works well.

You can find the Super Helpful Python Vacuum Here at Amazon.com

3. Noise From the Aquarium

Bedrooms are presumed to be peaceful and quiet so you can rest after a tiring day no matter your age. Having an aquarium in your room should ensure this peace remains undisturbed, this is why a little planning is required.

Aquariums do create some noise and depending on the size of the aquarium, the noise generally gets louder the larger the aquarium becomes just because the water pumps become larger and/or multiple.

For me personally, I love the AIO (All-In-One) aquariums as they have all the filtration built into the back of the tank and with smaller pumps, they run almost silent!

By setting up the aquarium correctly many people actually enjoy the faint trickle of water that the filter’s return nozzle creates to help improve the tranquility of the bedroom.

4. Noise at the Aquarium

This is especially important when it comes to kids’ and teenagers’ bedrooms who wish to install an aquarium. Fish are easily stressed by loud bangs, knocks on the tank, and vibrations from loud music, especially music with deep bass.

A constant barrage of noise in the bedroom with the tank can easily lead to fish illness and death, which, depending on the disease can spread like wildfire throughout the tank and decimate your livestock.

A little education with the child making them understand the needs of the fish they wish to have is all that is needed to ensure a healthy aquarium. Kids play and love loud music so there is no getting away from it, just being mindful of this can give them that added bit of extra responsibility which aquariums are great for.

5. Aquarium Lights

To increase the beauty of any aquarium its needs to be lit. If you are planning a saltwater aquarium with coral, then the correct light is essential for them to live.

Red Sea Max 250 Aquarium
Tanks With Canopies are Great For Bedrooms

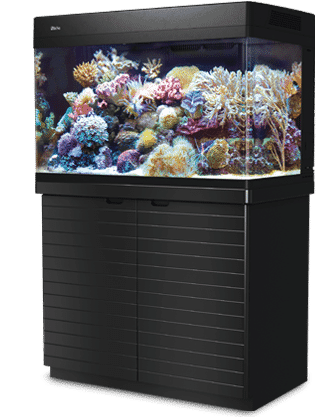
Depending on the style of aquarium you wish to install the aquarium lights may be housed in a canopy on top of the tank or hung above it if it is a rimless style aquarium.

On reef tanks especially these lights are bright, I mean really bright, especially if you are sitting/lying lower than the light and in its field of spread.

Correct placement of your aquarium has to be made to ensure the light spread is not distracting for owners with a desk in their room, for example.

The second factor you need to consider is the light duration. For freshwater fish, the light can be on only in the evening when you are in the room for viewing pleasure.

For aquariums with corals, they will need light periods of up to 12 hours so timers must be used to ensure the aquarium lights turn off before your regular bedtime. A lighting period of 10am – 10pm works well for corals and you.

When I had my aquarium in my room as a teenager I used to love getting into bed and watching my fish for around 20 mins. My timer on the lights would shut off automatically after this time. As I got older I would adjust the timer to suit my bedtime my parents had set. It was great and very relaxing!

If you wish to set up a reef tank then this article will help you pick the right lights for the types of coral you wish to have:

Best Reef Tank LED’s – Your Guide For Softies, LPS & SPS

6. Tank Odor

When you wish to keep an aquarium in a bedroom you have to be extra diligent in its cleaning and maintenance. An ill-maintained tank can soon begin to produce a foul smell by releasing very small amounts of ammonia, nitrogen, and hydrogen sulfide which are smelly.

Teenage boy’s bedrooms can be stink pits at the best of times and adding another smell to the room just is not going to go down well with parents!

Even if the aquarium is in pristine condition, it will produce bio-waste in the form of dead organic matter, dead fish, or food leftovers which can produce a bad aroma if left unattended. Regular maintenance and water changes help to keep aquariums stink-free!

Another concern regarding odors is that most people apply deodorants, perfumes, and colognes in the bedroom and are worried about these smells polluting the water. Providing these are not being applied directly over the tank and are not in excessive quantities then the aquarium will be fine.

Running activated carbon in the filter media will help to pull any of these pollutants from the water if any does become absorbed.

This article can help give you a little more information on airborne pollutants:

Are Candles, Scented Oils & Air Fresheners Aquarium Safe?

7. Humidity & Temperature

Bedrooms are meant for sleeping and to do that they need to be dark, quiet, the correct temperature, and humidity to provide meaningful rest. We have already spoken about the noise and light side of a tank in a bedroom, now we need to address the last two.

Humidity levels in a bedroom should be kept between 30% – 60% with a temperature of around 66°F for optimal sleep. When a large aquarium is placed into a bedroom and its water temperature is around 80°F, you can bet the temperature and the humidity is going to rise.

Selecting an aquarium of appropriate size for the room and keeping the room well ventilated will help control the humidity and temperature of the room. Excess humidity without it being controlled can lead to mold which then becomes a health risk.

In all my years as a teenager, I never came across this problem but when I moved to where our winters drop to -40°F, humidity on the windows was noticeable, so depending on the climate where you live, it may be something to consider.

This article can help give you a little more information on Mold & Aquariums:

Can Aquariums Cause Mold? This Could Be Serious!

8. Direct Sunlight & Aquariums

Try not the put your aquarium in the path of direct sunlight because it can be harmful to your livestock. Sunlight works as a radiator on the aquarium and will gradually heat the water causing stress among the fish. This is especially so in small aquariums where temperature fluctuations happen faster.

Direct sunlight can cause you another problem; the increased growth of algae which can be quite unpleasant and bothersome. More work is required to control your nutrients to keep algae at bay, but adding sunlight to it can just make your battle that much harder!

9. Aquariums & HVAC

No matter where you live, there will be times of the year where either heating or A/C will be required to run 24/7 to keep your home livable. Fish need a stable, temperature-controlled environment in their aquarium and a HVAC system can play havoc with that stability.

One of the best precautions you can make is to ensure you do not place the aquarium near an HVAC outlet or inlet or by a radiator if your home is a hot water loop system. If you can keep your bedroom at a constant temperature year-round then that will really help maintain water stability. Having a room temperature fluctuating 5 degrees or more each day could cause you problems, especially with a reef tank.

10. Weight of Aquariums

Bedrooms are mostly on the second floor so you have to consider the weight of the aquarium. If you have an old house then anything heavy upstairs can be risky. The bigger a tank becomes, the heavier it gets!

Filled saltwater aquariums weigh 8.56 lb. / 3.88 kg per gallon and 2.26 lb. / 1.03 kg per liter.
Filled freshwater aquariums weigh 8.34 lb. / 3.78 kg per gallon and 2.20 lb. / 1.00 kg per liter.

For example, a 50 gallon aquarium will weigh around 425 lb. / 190 kg for the water alone, then add the tank itself, stand, and canopy. Now, if you wish to put a 200 gallon aquarium in your bedroom then the weight dramatically jumps to 1,700 lb. / 760 kg!

Not only is it smart to look into the structure of the floor, but also the stand itself. Most aquariums come with a purposely designed stand to help with this. Other tips include placing the aquarium near an outside wall where the floor joists join the wall. Placing the aquarium across multiple floor joists, or placing the aquarium over supporting walls on the floor below.

This article can help give you a little more information on the weight of Aquariums:

How Much Do Aquariums Weigh?

11. Kids & Aquariums

When you have kids, they likely create havoc in the house running and playing around, their bedroom is no different. I know my kids do!

Young kids should always be supervised around aquariums! An aquarium in a house with small children is one thing, placing it in their bedroom might be problematic. This is why smaller aquariums are always recommended for children’s bedrooms.

A bump to an aquarium can cause it to topple over, a launched Hotwheels car into the glass can cause it to burst (When my son was 3 years old he did this toward my 75 gallon reef tank – Luckily it hit the stand but my heart sank when I saw his rendition of Smokey & The Bandit off the arm of the couch!)

If you have lively children, just be aware!

12. Aquarium & Therapy

Aquariums have a calming nature which is why many offices (which I consider is stressful environments) have them in their setting. In a bedroom, it can be a great idea to have because it will soothe the strain on your mind and body leaving you feeling relaxed.

The National Marine Aquarium conducted research and found that blood pressure and heart rates of people who watch aquariums get reduced. So, for senior citizens, it will be great to have one in their bedroom as it will be a constant source of peace for them. I used to maintain an aquarium in a retirement home and it was the highlight of their common area!

Another study was conducted at Purdue University stating that aquariums with colorful fish can pacify disruptive habits of Alzheimer’s patients along with improvements in their eating habits. It was also found in the same study that aquarium had an impact on their aggression levels making them more relaxed. So, having an aquarium in the bedroom of Alzheimer’s patients can have a life-changing impact on their health and habits.

Aquariums are Amazing! 

To Finish

Aquariums are a great addition to a bedroom, not only from a peaceful and relaxation point of view but also to help teach our children compassion, responsibility, and education.

Most homes require none or very minimal changes to safely add an aquarium, but some thought is required to ensure you get the best possible experience from your tank and it leads you to a life where fish stay with you for many, many years!

I know it did for me!

Further Reading

You may also find the following articles helpful:

This Is Why Aquarium Filters Need To Run All The Time!


Many newcomers to the aquarium hobby have the question of whether the aquarium filter needs to be on all the time and it is a very valid question, but with one simple answer, Yes. But, perhaps the filter is too noisy, or there is concern about the electricity consumption.

Aquarium filters need to be running all day, every day. They provide mechanical, chemical & biological filtration as well as oxygenation of the water. Turned off, decaying food & fish waste will build causing Ammonia, Nitrite & Nitrate levels to rise which are all toxic to aquatic livestock.

Providing the cleanest and healthiest environment for your new aquatic family members is paramount so let’s go and look at why aquarium filters need to run all the time.

Why Do Aquarium Filters Need to Be On All The Time?

Your fish, shrimp, crabs, plants, and coral living in the aquarium are living and because of that they are consuming food and excreting 24/7. The filter/s we install on our aquariums are there to remove and convert the waste they produce to prevent it from becoming toxic to the livestock.


Because the waste being produced is happening 24/7, the aquarium filter/s need to be working 24/7.


When the filter on an aquarium is not running, the toxicity levels in the water begin to rise. The longer the filter is turned off, the higher these levels will rise. Even a small rise of ammonia will instantly kill your livestock!

Fish Compatibility
Stunning Aquariums Have Great Filtration Running 24/7

Aquarium filters work in 3 main areas, with a 4th benefit:

  1. Mechanical Filtration
  2. Chemical Filtration
  3. Biological Filtration
  4. Aeration

The Aquarium Filters Role in Mechanical Filtration

Mechanical filtration refers to the physical removal of the debris & detritus in an aquarium. Debris & Detritus can be uneaten food, biological waste from the livestock, or decaying organic matter from dead animals, plants, coral, and any other organic sources.

For any stretch of time that the filter is off, debris starts accumulating in the tank. As this debris and detritus accumulate they begin to decay. As they decay they release ammonia into the water. Ammonia is highly toxic to your livestock and the only way to prevent this rising is to physically remove the waste material yourself, do a water change, or let the filter do it.

The most common ways that filters mechanically remove waste material is by using filter socks and sponges to physically trap suspended particles in the water. As the owner, it is your responsibility to remove and clean/replace the filter media, thus removing the trapped waste matter before it has chance to breakdown and releases ammonia.

This is why weekly filter cleaning is recommended!


Beginners Tip:

NEVER wash your filter media under a running tap. This will kill any beneficial nitrifying bacteria living within it. When doing a water change, fill a bucket with old tank water, then thoroughly rinse the filter media in that bucket, then dispose of that water. This will keep your bacteria alive!

This is especially important in small aquariums with small filters!


The Aquarium Filters Role in Chemical Filtration

If your filter has media in it like Activated Carbon, Purigen, Chemi-pure, Bio Pellets, Granular Ferric Oxide (GFO), or something similar then this is the chemical filtration part of keeping your aquarium water clean.

Chemical filtration helps to absorb pollutants from the water. Odors, heavy metals, nitrates, ammonia, and airborne pollutants entering the tank are all processed by these chemical filter materials.

When the filter system is turned off the filtering of these pollutants stops. Although the speed at which your aquarium water will foul is a lot slower than the mechanical filtration part, it will still begin to decrease in quality which will begin to affect your livestock over time.

Chemical filter media can be in the form of chemically impregnated sponges, granules in a mesh/cloth bag, or for large aquariums, dedicated media reactors that have tank water pumped through them.

The Aquarium Filters Role Biological Filtration

Biological filtration is the use of naturally occurring bacteria that consume and convert ammonia, nitrite, and nitrate in the aquarium water. When you hear ‘Nitrogen Cycle’ or ‘Aquarium Cycle’, this is the biological bacteria establishing and multiplying in your aquarium and filter.

Here’s a super-fast review of the nitrogen cycle: Dangerous ammonia is produced by decaying organic matter and fish waste in the aquarium. Beneficial nitrifying bacteria called Nitrosomonas Bacteria consume and convert this ammonia into less toxic nitrite.

Nitrite is then consumed and converted to nitrate by the second strain of nitrifying bacteria called Nitrobacter Bacteria. Nitrate is the least toxic pollutant in your aquarium water.

Nitrate is then controlled by regular water changes. Without the water changes, the nitrate will accumulate which will become toxic to your livestock if at high levels.

These beneficial bacteria, also known as nitrifying bacteria, don’t have to be added to your aquarium they will just naturally grow in it. Although most aquarists will jumpstart their nitrogen cycle by adding a starter culture when first setting up the aquarium.

Dr. Tims One And Only Live Nitrifying Bacteria cultures are one of the most popular. They are available in both Freshwater & Saltwater versions:

For Freshwater
Here at Amazon.com
Dr Tims Bacteria
For Saltwater
Here at Amazon.com

These beneficial bacteria can be found all over your aquarium. In the substrate, the rocks, and in the filter media. The more surface area a filter media has, the more beneficial bacteria it can house.

As the aquarium water passes through the filter media, the beneficial bacteria do their important work of getting rid of ammonia and nitrites. Should you turn off your filter this process is halted. Biological filtration doesn’t come to a dead stop since the tank does have beneficial bacteria in the substrate and on the rocks, but the level of biological filtration will be diminished.

While biological filtration is reduced, the rate of ammonia and nitrite production continues as before. This imbalance will result in a more toxic environment in your tank as these toxins increase because water is no longer being passed through the filter and the bacteria housed within it.

The longer the filter remains off, the higher the levels of ammonia, nitrite, and nitrate will become.

The Aquarium Filters Role in Aeration

As I mentioned earlier, the added benefit that most aquarium filters add is aeration. Aeration simply means injecting oxygen into a material. In the case of aquariums, this means oxygenating the water.

The filter oxygenates the water as it sucks or pumps it through the filter system. As filter/s remove water from the tank, push it through the filter media, and returns it back to the tank, the water naturally churns. This pulls oxygen into the water and releases gases like nitrogen and carbon dioxide.

As the water is returned back to the tank it causes surface agitation which further improves gas exchange of the entire tank volume. The returning water also creates a current in the tank to help bring up water from the lower levels and towards the surface. This improves gas exchange and keeps detritus suspended in the water for removal by the mechanical part of the filter.

Oxygenated water is vital to the livestock in your aquarium. Fish, invertebrates, plants, corals, and also beneficial bacteria require a constant supply of oxygen to survive. Even if you have separate aeration equipment, like an air bubbler on a freshwater aquarium, turning off the filter reduces the aeration levels of the tank.

Is Aquarium Filter Electricity Consumption a Concern?

If the reason you want to turn off your filter is because you want to save electricity, it is worthwhile to take a look at the electricity consumption for a typical aquarium setup.

A small aquarium of, say, 50 gallons, would consume 450 kWh of electricity a year. This is for the entire aquarium setup including the filter, the lights, and the heater. If you look at just the filter alone, this counts for only around 150kWh each year!


The Average Electricity Consumption of an American Household is 11,000 kWh Per Year. 

Source: U.S. Energy Information Administration


This means that running a filter for the entire year comprises 1.4% of the total average electricity consumption of your home!

For Example:

To do the math yourself here are the equations:

Rate Examples:
California Electrical Rate Average 2019 = 19.90 ¢/kWh
Florida Electrical Rate Average 2019 = 11.37 ¢/kWh

Selected Filter: Fluval 307 Canister Filter (Amazon.com)

Pump Power = 16 Watts.
It runs 24 hours Per Day.
Example Electricity Rate = 13.45 ¢/kWh.

16 Watts/1000 = 0.016 kWh – KiloWatt Hours (How many 1000 watts per hour)

0.016kWh x 13.45¢= 0.22¢ to run each hour
0.22¢ x 24 hours= 5.28¢ to run each day
5.28¢ x 7 days= 36.96¢ to run each week
39.96¢ x 4 weeks= $1.48 to run each month
$1.48 x 12 months= $17.76 to run each year

Therefore, the electricity consumption of your filter is negligible and you should not worry about keeping your filter on all the time!

How To Make An Aquarium Filter Quiet?

Another reason that you might want to turn off your filter is that the sound of it can be disturbing, especially if your aquarium is located in a bedroom. Honestly, I had an aquarium in my bedroom for my entire teenage life, and although they can have a hum or noise to them it is something you will soon become accustomed to.

Bedroom Aquarium Location

In fact, whenever there was a power outage the stillness sounded and felt very strange! But, if the aquarium is bothering you here are a few things you can do to try and lower its audible footprint:

  • Ensure there is no debris stuck in the filter making it louder than it should be. Regular maintenance and cleaning will ensure all parts get cleaned and inspected for wear. A worn impeller shaft on a second-hand pump can soon vibrate very loudly.
  • Maybe the water return system of your filter is through a waterfall or an external hose splashing the water into the tank. In cases like this, submerging the return nozzle could help solve the issue. If you have an external filter that uses a waterfall to return the water then raising the water level in the aquarium so the fall is not as far will help reduce noise.
  • Another cause of filter noise is the water flow rate set to maximum. If your filter has a flow rate control mechanism or an adjustable pump speed, the solution could be as simple as selecting a lower flow rate setting.
  • When buying a new filter be sure to read the reviews regarding its noise level. Try it out in the store, if able, and compare it with other models. Ask the store owner for their advice on which filter to choose if its noise output is of concern.
  • Having filters in the base of the aquarium stand can cause the stand to act as an amplifier. Try moving the filter outside of the stand or placing the filter on a silicone mat or mouse mat. If the filter sits on the side of the aquarium and is vibrating, try placing some rubber feet or a piece of rubber between the filter and the tank.

What Kinds of Aquarium Filters Can You Use?

If you are unhappy with your current filter and are considering switching, let’s talk about the different kinds of aquarium filters available on the market.

Protein Skimmers

Protein Skimmers are used solely on saltwater aquariums. They are the backbone of mechanical aquarium filtration and in my opinion, no reef tank should be run without one.

Parts of a Protein Skimmer

Protein skimmers work by using bubbles to physically remove proteins from the water. If you’ve ever walked on the beach and noticed the foam gathering near the shore and how it contains some ocean gunk, protein skimmers work along the same lines. 

They mix water and microscopic air bubbles to create a massive surface area that proteins and other waste materials within the water to stick to. As each bubble rises it transports the waste to the neck of the protein skimmer and then the bubble bursts, releasing the waste that was stuck to it. This waste material is collected in a cup and disposed of by the owner.

For more detailed information on Protein Skimmers check out my article:

What Is A Protein Skimmer And Do I Need One?

HOB Filters

HOB means Hang-On-Back and this is exactly how these filters are located on an aquarium. Also known as Power filters, they just hang on the top rim of the tank and can be situated on any side which best suits you.

HOB filters are a great choice if you want simple, inexpensive, and easy-to-maintain filters. Maintenance is pretty much a matter of taking out the filter media from the easy-to-access compartment and cleaning or putting in a new one.

HOB filters are compact, with the pump and filter media in one unit which sits outside of the aquarium, and a submerged tube or hose that extracts water from the tank. The water passes up through the filter media, and goes back to the tank through a chute. The chute produces a laminar waterfall effect that helps aerate the water and reduce noise.

HOB filters are recommended for smaller tanks and may be used to work in tandem with another HOB filter in bigger tanks.

For more detailed information on HOB/Power Filters check out my article:

Can You Use A HOB Filter For A Saltwater Tank?

Canister Filters

Canister filters are an ideal filter for those who want silent filters since they are renowned for being super quiet. They are also a great choice if you want a hidden filter since canister filters can be stored out of sight – typically below the tank in the stand.

Aquarium Canister Filter

Canister filters siphon water from the tank via a hose and pass it through several stages of filter media before returning it to the tank via a return nozzle or spraybar. Canister filters are great for freshwater aquariums and have been used on smaller saltwater aquariums, but you must make sure you clean them regularly to prevent the buildup of debris and detritus in the base of the canister.

The multiple media chambers allow you to select various types of filter media to achieve the filtration you require. Be sure to get a self-priming filter to ensure it starts and regains suction after a power outage.

For more detailed information on Canister Filters check out my article:

Can You Use A Canister Filter For A Reef Aquarium?

To Finish

Aquarium filters should be operating all the time since they contribute four key things to an aquarium: Mechanical Filtration, Chemical Filtration Biological filtration, and Aeration. These four things must be present in an aquarium 24/7 to combat the constant production of waste material by your livestock.

There are many great filters out there in every configuration you could need for an aquarium, so finding one is a simple task. By reading the manufacturer’s descriptions, asking other aquarium owners for recommendations, and reading product reviews you will have no trouble selecting the perfect filter for your setup and allow it to run 24/7.

Further Reading

To further help you in your aquarium research, I highly recommend these other articles:

Best Saltwater Urchins for Beginners – Top Picks!


Are you looking for something a bit different to add to your aquarium? Have a problem with algae, and are wanting an algae grazer? Then look no further as you have stumbled across the perfect article for you!

Sea urchins are invertebrates, with a soft body and a hard exoskeleton usually covered in spines. Even though these crawling critters can sense light and dark, they will mainly use their sense of smell to navigate around your aquarium, and even though they appear to be slow, they soon get around!

The Best Urchins For a Beginner Saltwater Aquarium Are:

  • Pincushion Urchin
  • Long-Spined Urchin
  • Short-Spine Urchin
  • Blue Tuxedo Urchin

Sea urchins will scavenge the aquarium for unwanted algae and detritus that build up in your tank, often carrying things and burying themselves in the substrate. This means they like to overturn rocks, which can damage other aquarium residents (especially corals), the tank, or even themselves, therefore extra care is needed when keeping urchins.

Always be careful when handling them as they can puncture the skin – their spines can break into tiny pieces once inside your skin, making them difficult to remove and painful! Trust Me! The Long-Spined Urchin is the usual culprit!

Urchins are sensitive to water changes and cannot tolerate copper-based medication, so making sure their water parameters are within range is really important!


For success with Urchins, your first priority is to keep your water parameters in the following ranges:

  • Temperature: 22.2 – 25.5°C or 72 – 80°F
  • Salinity: 30.5 – 33.2 ppt or 1.023 – 1.025sg
  • pH: 8.1 – 8.4
  • Alkalinity: 8 – 12 dKH

Beginner Tip: Signs of Poor Water Quality is Spine Loss


My Top Beginner Sea Urchins:

As a beginner, it can be overwhelming what urchin(s) to start with. You will want ones that are peaceful, hardy, and easy to care for to ensure you have the greatest success in keeping them. If you have a big enough tank (over 100 gal), you can have more than one – they are solitary animals but do not seem to be aggressive toward each other.

They are scavengers so I would ensure your aquarium has lots of algae for them to feed on. I would recommend you wait at least 6 months after your aquarium cycle has finished before adding your first urchin.

Below are my Top Urchins you can start with that are great for beginners!

Pincushion Urchin

(Lytechinus variegatus)

  • Max. Size: 8”
  • Diet: Herbivore & Omnivore
  • Care Level: Easy
  • Temperament: Peaceful
  • Min. Tank Size: 20 Gallons
  • Priced from: $10.00

These nocturnal urchins, which range in colors from red, white, and blue, are easy to care for, peaceful, and super affordable – which is why they are my favorite for beginners!

Stay away from the Purple Pincushion Urchin as these are not beginner-friendly!

They love hiding, so you will want plenty of hiding spots for them during the day. When they come out at night, they can be seen moving around searching for algae to graze on – particularly live rock. If you do decide to buy a pincushion urchin, make sure that any rock formations are stable, so your urchin does not get stuck between them. 

As you can see in the photo, they love to pick up shells, rock rubble, and bits of coral on their spines that they use for camouflage. It can be quite amusing to see how they decorate themselves!

Long-Spined Urchin

(Diadema setosum)

Source: Matt Kieffer
  • Max. Size: 10”
  • Diet: Herbivore
  • Care Level: Easy
  • Temperament: Peaceful
  • Min. Tank Size: 25 Gallons
  • Priced from: $30.00

Also known as the Black Long-Spined Sea Urchin, this one gets its name from the long black spines that are mildly venomous covering its body – no need to worry, they do not threaten us humans, they just sting a little!

They are easily identified by their bright orange anus in the center of its mass of spines. – Officially known as the Periproctal Cone for any science nerds out there like myself!

These guys grow a lot larger than other sea urchins, so ensure you have enough space for them to move around. These guys will take up a lot of room in a nano aquarium so those size tanks are best avoided.

One great thing about these urchins is that they have a symbiotic relationship with Bangai Cardinalfish (Pterapogon kauderni) who will ‘Hang Out’ in the urchins’ spines for protection.

Short-Spined Urchin

(Echinometra sp.)

  • Max. Size: 3”
  • Diet: Herbivore
  • Care Level: Easy
  • Temperament: Peaceful
  • Min. Tank Size: 20 Gallons
  • Priced from: $12.00

Also called the Rock Burrowing Urchin, these round-bodied urchins have hundreds of white/red/orange spines with long tube feet to move around your aquarium.

They get the name ‘Collector Urchin’ as they like to camouflage themselves by covering their body with seaweed and small rocks therefore you will want plenty of live rock for them to graze on and stable rock formations for hiding.

Their diet should also include dried seaweed/nori, especially if your aquarium is still unmatured and relatively algae-free.

Blue Tuxedo Urchin

(Mespilia globulus)

  • Max. Size: 3”
  • Diet: Herbivore
  • Care Level: Easy
  • Temperament: Peaceful
  • Min. Tank Size: 20 Gallons
  • Priced from: $33.00

Also known as the globe urchin – these are very peaceful, easy to care for, and do not grow super big making them suitable for most aquariums. Tuxedo urchins are reef safe and hardy, making them easy to care for, and perfect for beginners.

Tuxedo urchins are covered in hundreds of sort uniform spines that are sharp and can puncture human skin, so handle these guys with care!

As they do not grow too big, they are one of the less ‘clumsy’ ones so will not be knocking over everything in your aquarium – but they are keen scavengers, so will still move small objects around as they search for food.

Tuxedo urchins do not tolerate fluctuations and high levels of nitrate, so it is recommended you supplement your tank and take extra care when acclimatizing them into their new environment.

They are also very sensitive when transporting, so drive carefully with these urchins on board!

Are Urchins Reef Safe?

Urchins are reef-safe and make a great addition to your aquarium. They are good at feeding on nuisance algae and detritus while adding a unique-looking creature to your tank. They can knock corals over as they move so be sure to secure all corals with reef/coral epoxy or similar.

Urchins are slow movers around the tank and do have the nickname of ‘Bulldozer’ because of the fact they just push things out of the way. Urchins like the Long-Spined urchin can take up a lot of real estate with their spines so this is something to consider before purchasing.

To ensure your corals do not get pushed off into the abyss at the back of the rockwork I highly suggest you use a reef-safe coral epoxy like these here:

How Do You Care For Sea Urchins?

To best care for an urchin you need to have an aquarium with sufficient food. An aquarium that is over 6 months old should provide sufficient algae and detritus to ensure the food supply does not run out. Urchins do not do well in new aquariums with little algae and/or coralline growth.

After selecting the correct urchin to match the available space in your aquarium they generally like the same temperature and salinity levels as their tank mates. around 78-80°F with SG around the 1.025 level.

They can be given supplemental food by placing a few pieces of Mysis Shrimp not to them if required, but generally, they will do great so long as the aquarium is mature.

For any urchin ensure your aquarium is at least 20 gallons or larger. Small aquariums make it difficult for an urchin to physically move around which causes them to not be able to find food and eventually, they starve.

Only keep one urchin in an aquarium under 100 gallons. Too many urchins in a small aquarium can exhaust their food supply leading to starvation. On bigger aquariums, more than one urchin is recommended to help with janitorial cleanup.

Who Can Sea Urchins Share A Tank With?

Urchins should not be sharing a tank with aggressive predators such as pufferfish, triggerfish, and octopus. These animals naturally prey on urchins in the wild and will soon decimate any urchin you place in the tank. Urchins are generally compatible in most reef aquariums.

Basically look at the fish in your aquarium, if they look like they have a hard beak-like mouth, then they usually prey on urchins in the wild.

You should also avoid small predatory fish that will swim between the urchin’s spines injuring themselves. As long as you have enough space and food for them, you can have more than one sea urchin as they are generally very peaceful creatures.

What Do You Feed Sea Urchins?

Generally, urchins do not need any feeding. Providing the aquarium is over 6 months old and has a sufficient covering of Coralline and algae then they will have enough food. Urchins are grazers and will move around the tank feeding on Coralline, algae, and detritus.

Most of these spiny critters enjoy munching on algae, but some prefer something a bit ‘meaty’ from time to time. If you are specifically looking for an algae cleaner, then the Tuxedo Urchins are a great choice!

Make sure you do not overfeed your urchins as a build-up of uneaten foods leads to harmful toxins in the water like ammonia – this will not only affect your urchins but their tank buddies too!

Urchins To Avoid & Why!

Some urchins are not compatible with reef fish or corals so, these are urchins you should avoid:

Slate Pencil Urchin

(Heterocentrotus mamillatus)

  • Not easy to care for
  • Not reef compatible for corals

Purple Short Spine Pincushion Urchin

(Pseudoboletia sp.)

  • Semi-aggressive
  • Must be added with caution with other reef fish

Long Spine Banded Urchin

(Echinothrix calamaris)

  • Not easy to care for
  • Venomous

To Finish

By now you should have a basic understanding of what sea urchins are, what ones are beginner-friendly, ones you should avoid, and how to care for them in your saltwater aquarium.

Remember:

  • Perform regular water changes.
  • Try not to disturb them & damage their spines when cleaning around them.
  • Some species are not compatible with all reef fish – do your research before buying!
  • They should be kept where there are lots of algae to graze on, otherwise, they will starve – but do not overfeed them.

Further Reading

If you found this article helpful, I highly recommend you check out these ones too:

What is a Closed-Loop Aqaurium?


I remember having this same question many, many years ago about what was closed-loop reef tank? And if you are here, you probably have a bunch of questions like what they are too? What is their purpose? Are they worth it? And are you missing out on something by not using a closed-loop system?

A closed-loop reef tank is a saltwater aquarium that has been fitted with a piped-in water circulation system. Closed-loops create high-flow water movement necessary for fish & coral health while keeping the aquarium free of obtrusive pumps & equipment. They are best suited to large aquariums.

If you want to learn more about closed-loop systems, continue reading below, where I go into more detail about everything you need to know.

What Is Considered a Closed Loop Reef Tank?

Closed-loop systems are piped circuits in which the aquarium water is circulated throughout the system without it being exposed to the outside environment. With closed-loop reef tanks, all inlets and outlets are constantly submerged and comprise one continuous loop.

Rossco’s Closed-Loop System on Reef2Reef.com Aquarium Forums

The aquarium water is pulled through one or several intakes by an externally mounted water circulation pump and then is pumped back into the tank through one or several nozzles.

Usually, a significantly greater water flow can be generated with a closed-loop system compared to using individual powerheads and wavemakers, especially on long or large aquariums.

In comparison, the most common reef aquarium setup using a sump is considered an open-loop system, because the water that is pumped through the system is exposed to the outside atmosphere when it reaches the sump.

Aquarium Sump Operation
An Typical Open-Loop Tank & Sump Setup

That being said, closed-loop systems and open-loop systems shouldn’t be viewed as systems that cannot coexist. In fact, many aquarists use them together—the closed-loop system provides water flow, and the open-loop system the filtration.

An Open & Closed-Loop Reef Tank Setup

Why Are Closed Loop Reef Tanks Used?

Closed loop systems are used mainly for creating water flow within the main display aquarium.

To a certain degree, closed-loop systems can be considered the old-school way of providing water flow in larger tanks because back then, we didn’t have the powerful wavemaker pumps we have today.

Closed-loop systems are mainly used on large and usually custom-built reef tanks because the holes have to be pre-drilled before the glass gets tempered. Because of this most closed-loop systems will be found on the larger 100 to +800 gallon reef tanks.

Closed-loop systems are usually either located underneath or behind the tank. Placing the closed-loop pipework and circulation pump under the tank is preferred because it is more aesthetically pleasing, allows the tank to hug the rear wall a little more tightly, and generates good water flow that will not allow the detritus to settle down.

Closed-loop reef tanks are not as common as they used to be used because they require a lot more work and cost to install but, in return, allow for clutter-free and smoother running display tanks. It all comes down to the personal preference and budget of the aquarium owner at the time they install the tank and filtration.

Advantages and Disadvantages of Closed Reef Tanks Systems

Clutter-Free Display Tanks

Most people don’t really enjoy the sight of powerheads, especially me!. Even though some powerheads can be hidden within artificial rocks, or behind the aquascape, they are still not very pretty to look at. If you can hide the pump, you usually then have the cables to look at!


To me, a reef aquarium should display the beauty of the living world within it with as few mechanical devices on show as possible!


Since you do not need to use powerheads and wavemakers with a closed-loop system, this allows you to keep the clutter in your display tank to an absolute minimum.

Maintenance and Care

The routine maintenance and care on closed-loop systems, if properly set up, is very easy to do. Ball valves must be placed before and after the circulation pump(s), allowing for easier mounting, dismounting, and servicing.

Ball valves should also be turned weekly to prevent seizure over time! One owner I knew did not do this, then when his closed-loop pump died he had a heck of a time unseizing that valve!

Leaks

Leaks are possible with any type of aquarium, but as long as the bulkheads and the piping are installed correctly, there shouldn’t be any leaks, this is the same no matter the type of system installed.

If you turn the power off on a closed-loop reef tank, the water level will not change—only the water flow will stop.

In comparison, in an open-loop reef tank, not only will the water flow stop, but the water level will also drop until it goes below the overflow. This means that a sump flood can happen if setup improperly because it is an open-loop system.

Water Flow

Depending on what corals and type of fish you have in your tank, you will need different amounts of water flow—which can easily be achieved with a closed-loop system. By using nozzles and valves you can direct and control the flow in many parts of the tank.

This means that you do need powerheads. If the closed-loop system is set up properly, you can generate more than enough water flow to keep an SPS and LPS reef vibrant and healthy, even in the largest aquariums!

However, alternating the flow can pose some difficulties compared to using powerheads, which you can place and direct in any direction you see fit. This is why owners often install flow diverters on closed-loop systems, like the ones from Oceans Motions and SCWD, to keep the water flow more natural and randomized.

How An Oceans Motion Works:

What The Water Flow Does:

You can find out more information and pricing on the Oceans Motions Flow Diverters Here at AquriumSpecialty.com

Noise Levels

Although most powerheads are fairly quiet, it is not uncommon for them to make strange noises, especially when they are ramping up and down in flow. Keeping that in mind, a closed-loop system should normally be quieter, with just a constant hum from the circulating pump.

If your aquarium is going in a noise sensitive area then you are best advised to join your local reefing club and visit tanks that run both closed loop systems and ones that just run powerheads to see for yourself.

There is no getting away from noise sometimes. Although the new wavemakers are incredibly quite, so to are the new circulation pumps.

Drilling

The number of holes drilled can vary between two to ten or more in some instances, with the most common being between four to six holes—two drains and two to four returns. The drains are typically 1.5 inches in diameter, and the returns 1 inch. Drilling holes with a larger diameter is often avoided for safety reasons.

Drilling the tank is one of the things that should be considered carefully. Once you drill the tank, you cannot go back; it’s not reversible, and mistakes can be costly.

Drilling a tank is easy, but drilling should be done only on untempered glass because drilling tempered glass will shatter it, with explosive power! This is why most closed-loop systems are designed before the tank is manufactured as almost all bottom panes in an aquarium are tempered for strength.

It is possible to make a closed-loop without drilling but that usually takes away all the aesthetical advantages and appeal closed-loops can offer. Usually, the pipework is going to be a little more complicated to set up, and it will have to go up and over the top of the tank, so it is not a pretty sight to look at, but it does work. With careful cabinet construction, you can hide a good portion of the pipework within the canopy, only seeing the nozzles under the waterline.

There are many great DIY examples out there, but there are also some horrible ones too!

A Single Point of Failure

The quality and type of pump you will be using is extremely important! This is not the place to cheap out on!

You want to use a high-quality pump that can run 24/7 for years without failing because if it fails, it will prevent the whole system from working. Losing your only source of flow can be fatal for your coral.

Because of this, many closed-loop owners will have a spare identical pump all plumbed and ready to be swapped out at a moment’s notice.

Costs

It is arguable whether or not a closed-loop will be more cost-effective in terms of providing water flow compared to using powerheads.

A less powerful powerhead is still viable on smaller aquariums, but on larger tanks where many powerheads may be necessary, installing a closed-loop can potentially be cheaper. It’s a matter of calculating the wattage used.

The more powerheads you run, the more watts are consumed. Compare that to the single wattage of the closed-loop’s circulating pump and you could be saving quite a lot of money running just the one pump.

The other cost to consider is the initial setup. Having the tank drilled, pipework installed, a circulating pump, spare pump, and maybe a flow diverter could run you around $1000-1500, however, just a single powerhead/wavemaker can run you $300-700 and depending on how many you will require may make a closed-loop cheaper.

Is a Closed Loop Reef Tank Worth It?

In my opinion, closed-loops still have their place. They are neither obsolete nor a relic of the past and they are arguably one of the best ways to keep a clutter-free tank while providing optimal levels of water flow, especially if the aquarium is long or large. If properly set up and designed, you will not see any pipes or power cables!

But powerheads have improved in quality and performance over the years to the point where they—although not visually appealing—can be considered a good alternative since they are super easy to install and can provide tremendous amount of flow, especially the Gyres!


For More Information & a Great Selection Gyres, See them Here at Amazon.com


The reality is not many owners will be comfortable with or willing to drill multiple holes in the rear panels (bottom panels are tempered remember) of their tanks to set up a closed-loop system. As a result, closed-loop systems have come a little out of favor and are not so commonly used today. This makes closed-loop systems more of a hassle to initially set up, but they are still worth considering, nonetheless, especially if you love to DIY!

To Finish

Closed-Loop Systems are a great way to provide tremendous and sometimes alternating flow to a reef aquarium. By using a pump, a few drilled holes, and some plumbing you can really create a stunning aquarium with zero equipment in sight.

Primarily used on larger aquariums where the installation of multiple powerheads would be required, a closed-loop system can make aesthetic and financial sense. But the cost and design of a custom aquarium can then make a very unattractive option to most reef tank owners.

For small aquariums, powerheads and wavemakers are the best route. For long and large aquariums, the Closed-Loop is a great alternative.

Further Reading

If you found this article helpful, please take a read of some of my others:

How Much Aquarium Salt Per Gallon/Litre? A Simple Guide!


For beginner aquarists to saltwater one of the most daunting tasks is correctly making the saltwater itself. The thought of getting it wrong and everything dying fills many beginners with dread, but it is actually a very straightforward process.

For a home saltwater aquarium, the salt content in the water needs to remain consistent at around 1.025 S.G. or 35ppt. Purposely engineered aquarium salt granules mix at a ratio of 1/2 cup for every US gallon or 36g per liter of fresh water. The use of a refractometer will be needed to test the ratio.

Once you have read this article you will have no fears about what you need and how to mix the salt and water to give you the perfect mix ready for addition to your new shiny aquarium. It is very straight forward and you will become a water change master in no time!

Before you begin mixing, you need to ensure you have the right kind of salt for the aquarium. Regular table salt will not do!

What Kind of Salt Mix Should You Use in an Aquarium?

Salt mixes for home aquariums are highly engineered to provide optimal water conditions for fish, coral, and invertebrates. It is not only the salinity that they provide but dozens of trace elements like Calcium, Magnesium, Carbonate, Strontium that the invertebrates use as building blocks for their skeletons.

There are many great brands that have decades of pedigree behind them so picking a salt is easy. The salt that I have personally been using for over a decade is Reef Crystals from Instant Ocean.

You can get it Here at Amazon.com

Each brand of salt can mix may be mixed to slightly different quantities so be sure to always read the manufacturer’s information when starting a new brand of salt. Some mixes are specially made for fish-only aquariums, whereas Reef Crystals is aimed at aquariums with large coral populations. No matter which salt mix you pick, they will all work, the ones with more trace elements for corals are just a little more expensive!

Reef Crystals Aquarium Salt

When selecting a salt mix stay away from freshwater aquarium salt which is used by freshwater aquarists to recreate brackish water conditions. Although these salt mixes will work to create the correct salinity they do not contain the trace elements like sodium, chloride, sulfate, and magnesium necessary for marine organisms to thrive.

TBR Recommends

Find a Great Selection of Aquarium Salt Mixes at Amazon.com

Salt Mixes At
Amazon.com

How Much Salt Mix Should You Use in an Aquarium?

For a home saltwater aquarium, the salt content in the water needs to remain consistent at around 1.025 S.G. or 35ppt. Purposely engineered aquarium salt granules mix at a ratio of 1/2 cup for every US gallon or 36g per liter of fresh water. The use of a refractometer will be needed to test the ratio.

Most saltwater aquariums run at a temperature of around 78°F (25.5°C) to 80°F (26.6°C) so the salt mixes will have to be measured and tweaked to ensure 1.025sg at your selected temperature – I run my aquarium at 78°F (25.5°C).

Some brands will give you a volume to measure, whereas other brands will give you a weight to measure out. Whichever brand you pick, just follow the instructions printed on the side of the packaging. Just measure out the recommended amount of salt granules and add it to the mixing container with fresh water. A pump is then used to mix it and a heater to warm it.

This then turns your bucket of water into saltwater!

Here are some of the best salt mixes for beginners and how each manufacturer recommends they are measured to achieve a salinity of 1.025 at 25°C/77°F:

Salt BrandMixing Recommendation
Instant Ocean1/2 Cup per 1 U.S. Gallon
Red Sea Salt136g per 1 U.S. Gallon
Tropic Marin Classic Salt1/2 Cup per 1 U.S. Gallon
Neomarine Salt Mix134g per 1 U.S. Gallon

Below is a list of common aquarium sizes and how much salt mix they require on initial fill using the most popular beginner salt mix, Instant Ocean at 1/2 Cup per U.S. Gallon, or 36g per Liter.

Aquarium SizeCups RequiredKg Required
15 Gal or 56 Liter7.5 Cups2.0 Kg
20 Gal or 75 Liter10 Cups2.7 Kg
55 Gal or 208 Liter22.5 Cups7.5 Kg
75 Gal or 284 Liter38.5 Cups10.2 Kg
90 Gal or 340 Liter45 Cups12.2 Kg
120 Gal or 454 Liter60 Cups16.3 Kg
150 Gal or 568 Liter75 Cups20.4 Kg
180 Gal or 681 Liter90 Cups24.5 Kg
240 Gal or 908 Liter120 Cups32.7 Kg
300 Gal or 1,135 Liter150 Cups40.9 Kg

If the aquarium contains a sump, refugium, and frag tank be sure to also account for the water volume in them too. Use this guide to get close then fine-tune the final ratio using a calibrated refractometer (See Below).


How To Correctly Mix Aquarium Salt

Mixing salt for an aquarium is best done in a food-grade bucket using a pump and heater set to 78°F/25.5°C. Make a note of how much water went into the bucket and add salt at 1/2 Cup/Gal or 36 g/liter and allow it to mix for 20-30 minutes. Test with a refractometer before adding to the aquarium.

If this is going to be the first time you have mixed saltwater for your new aquarium there is a fairly simple process that you can use, but you will need to gather the following items before you start:

(All Links to Amazon.com for Reference)

Before you begin be sure to place down towels. Salt granules or saltwater can stain carpets and flooring!

This is the exact method I have been using for decades and it works every time!

Step 1

If you have a brand new tank and this is going to be the initial fill you can do your mixing in the tank but do not add the live sand or live rock at this point. The freshwater will kill all living organisms and beneficial bacteria on them. They can be added later once the water is up to temperature and at the correct salinity.

Just be sure to only fill the aquarium around 2/3 full to account for displacement once the sand and rock go in. You can then mix the rest if required in a bucket and add it to the tank after.

Do not use any detergent when rinsing your new bucket/trashcan, just warm water and a cloth to wipe away manufacturing oils.

Food-grade containers are recommended because low-grade plastic can leach phosphate into the water over time.

If you wish to do your aquascape and insert the sand first, then mix your water in the trashcan/bucket.

Step 2

Fill the tank or container with water. If you can, get yourself an RO/DI water filter (See Further Reading section at the end) to help prevent water quality issues for the life of your aquarium! If not, use the Prime Decholrintor solution to treat the tap water as per its dosage instructions.

Step 3

Turn on the heater and pump to circulate and bring the water up to 78°F or 25.5°C. On a large aquarium, this could take several hours. More than one heater can be used to speed up the process.

Step 4

Once up to temperature, begin to add the salt following the manufacturer’s recommended dosage of around 1/2 cup per US gallon, or 36g per liter.

Step 5

Allow the water pump to mix the water and salt solution. Don’t worry if you see any sand-like residue or cloudy water, that is normal. Ensure all salt granules get dissolved.

Step 6

After around 30 minutes take a salinity reading. Add water if the salinity is too high, add more salt if the salinity is too low.

Step 7

Allow mixing for several hours to several days to get the salinity content dead on. Repeat Step 6 as needed.

Step 8

If you decided to add your rock and sand later, now is the time to do it. Slowly add your rock to create your aquascape, then add the sand! Adding rocks on top of sand can cause them to topple when burrowing critters get added to your tank. Rock on glass is fine, just be slow!

Step 9

Mix some more saltwater in your bucket/trashcan and add it to the aquarium to bring up the water level to the correct operating height once all the rock and sand are in. Be sure to fill enough for the sump/filters.

Step 10

Your tank will go cloudy for several days, allow the filters to run and pull out the suspended debris.

Your aquarium is now full and you can begin the fun of cycling the tank ready for it to become a full saltwater reef tank!


For lots more detailed articles on water changes and cycling your tank be sure to check out the Further Reading section at the end of this article.


How Do You Measure the Salinity of a Saltwater Mix?

Salinity can be measured in an aquarium using a Hydrometer, Refractometer, or an Electronic Sensor and Meter. The electronic meters and refractometer are the most accurate with the refractometer being the most popular amongst aquarists due to its low price, ease of use, and can be readily calibrated.

The unit of measure for salinity is known as specific gravity or sg. The ideal salinity for a home aquarium is 1.025sg or 35ppt, but the tolerable range is 1.021sg to 1.026sg depending on what livestock you have. 

Pure water has a specific gravity of 1sg. If your saltwater mix measures 1.025sg, it means that it is 1.025x denser than pure water.

Here are some typical salinity ratios for various types of saltwater aquariums:

SalinityFish-Only AquariumsMixed Reef AquariumsSPS Aquarium
SG1.021sg1.023sg1.025sg
PPT28ppt31ppt35ppt
SG = Specific Gravity
PPT = Parts Per Thousand

My recommendation is that if you wish to only keep fish, then mix your water to 1.021sg.
If you plan on keeping invertebrates and corals then begin your aquarium at 1.025sg.


To be able to measure the amount of salt content in your water there are three options available to the aquarist:

  1. A Hydrometer – Cheap, but hard to read
  2. A Refractometer – Most Used Option
  3. An Electronic Salinity Meter – Highly accurate but expensive

Let’s go into a brief introduction of each of these measuring instruments:

Hydrometers

Glass Hydrometer & Thermometer

Hydrometers measure specific gravity by using the concept of buoyancy. You float the hydrometer on the surface of the water and it will give you the sg reading based on where the water level touches its measuring stem. Reading the stem can be quite difficult.

Refractometers

Refractometer

Refractometers determine salinity by measuring the light refraction caused by the salt in the water and self-correct for temperature. You place a drop of water on the prism and view the result through the eyepiece. They are fast to use and can be easily calibrated with a simple solution.

A Refractometer is what I recommend you use. For around $35 it will last you forever (mine is 15 years old and still works perfectly!) and give you highly accurate results within 30 seconds of taking it out of the box!

You can find it Here at Amazon.com
Caibration Solution Here at Amazon.com

Electronic Salinity Meters

Pinpoint Salinity Meter

Salinity meters use a sensor to measure the salt content in the water. They are very simple to use and give an easy-to-read numerical value. They are easily calibrated using a test solution.

You can find the Pinpoint Salinity Meter Here at Amazon.com


For lots more detailed information about measuring salinity please see our article in the further reading section below.


To Finish

In order to create artificial saltwater, use as pure a water source as you can and a recognized aquarium salt mix.

Use the recommended dosage of around 1/2 cup per gallon or 36g per liter, but be sure to follow the specific instructions provided by the salt manufacturer to achieve a salinity reading of around 1.025sg/35ppt at 78°F(25.5°C) for your new aquarium. For partial water changes, salinity and temperature levels must match that of the existing tank water.

Further Reading

Before you get too far unto your aquarium journey I recommend the following articles to help you progress seamlessly:

Best Saltwater Shrimp for Beginners – My Top Picks!!


Shrimp are a beautiful and entertaining addition to your saltwater tank and by having just a couple of these characters in your tank will help to dramatically increase your viewing pleasure! Most of the shrimp are super easy to care for and this is why many hobbyists love to have them in their aquarium, I know I do!

Not only do shrimp add some nice visual diversity they also work as fantastic members to your clean-up-crew. Being mostly scavengers shrimp will set up home in their favorite spot in the tank and then wander looking for food.

By helping to keep uneaten food, fish waste, and dead animal matter under control the shrimp help to maintain higher water quality which is a win-win for everyone!

Some the Best Saltwater Shrimp for Beginners’ Aquariums Are:

  • Harlequin Shrimp 
  • Peppermint Shrimp 
  • Camel Shrimp 
  • Scarlet/Skunk Cleaner Shrimp 
  • Blood Red Fire Shrimp 
  • Sexy Anemone Shrimp
  • Banded Coral Shrimp
  • Saron Shrimp
  • Bumblebee Shrimp

Harlequin Shrimp

(Hymenocera elegans)

Prices Range From $50

This shrimp is from the Pacific and Indian Oceans and belongs to the Palaemonid family and is a very fine choice for your saltwater aquarium setup.

They have an incredibly bewitching appearance with their white or cream color bodies and purple, blue or red spots making them look like a work of art, hence it is also called painted shrimp.

This shrimp is a scavenger and can eat anything but they absolutely love eating starfish. Now, this shrimp is not a good option if you have or wish to keep a starfish, but it will devour any Asterina Starfish, which is a coral parasite, thus protecting your corals.

They are shy when coming into the new aquarium and will take their time adjusting to it, so don’t be afraid if you add it and then don’t see it for a while! Eventually, you can usually find them hiding in a rock cave for which they call home, and use it for shelter and protection.

Although they are friendly with other tank mates, they can be aggressive towards their own species, so it is not advisable to keep them in groups but better keep alone, or in a mated pair.

They can grow to 2 inches so can easily be kept in a 10-gallon tank.


Peppermint Shrimp

(Lysmata wurdemanni complex) 

Source: Aquarist.me

Around $10

This little beauty belongs to the family Hippolytidae is often called veined shrimp, Caribbean cleaner shrimp, Candy Cane Shrimp, or Sweeper shrimp.

They are very useful for keeping in the aquarium as they love to hunt the dreaded pest known as Aiptasia; the glass anemones. These anemones reproduce at high rates, overrun real-estate for coral and can sting fish in the tank.

This shrimp is mostly nocturnal, staying hidden in the rocks and cervices to only come out at feeding time, but over time will become used to your dayly aquarium life and start to swim freely searching for food. Their bodies are brightly colored, somewhat translucid with pink to red stripes.

It is a carnivore and will become a major part of your clean-up-crew. They will eat leftover organic matter, dead fish tissue, and detritus to help clean the tank.

This shrimp is usually civilized and pleasant with other tank members but be mindful because it can be hostile towards its own species so have one in a small tank or a few in the large tank.

They can grow up to 2 inches in size and again perfect for Nano Tanks.


Camel Shrimp

(Rhynchocinetes uritai)

Source: Seaotaro

Around $15

This shrimp is native to Australia, East Pacific, East Indian Ocean, Indonesia, and central/west Pacific and belongs to Rhynchocinetidae family.

They are named Camel shrimp because of their distinctive hump just like a camel. They are also called hinge beak shrimp because of containing a beak or rostrum which most of the time pointed skywards. Other names of this shrimp are candy shrimp and dancing shrimp. They have large eyes which helps them move around in a low-light environment as they are mainly a nocturnal member of the tank.

Their bodies contain very vibrant, bright cherry-red colored stripes so sometimes they can be mistaken for peppermint shrimp, but their hump easily differentiates between both of them.

This shrimp is a very good tank cleaner as it eats debris and other waste matter. This shrimp is very friendly and amicable with other fish, invertebrates, and their own species, so you can easily put them as a colony of 4 to 6 individuals in a large tank.

Due to its quiet and calm nature, it can be a target for predators so pay attention to any fish which can be known to prey on shrimp, especially Hawkfish.

In the aquarium, their diet is mostly omnivorous so you should feed them with diverse foods like vitamin-rich flakes, frozen plankton, crustacean larvae, clams, and mussels if your tank is fairly unmatured.

Due to all these mentioned factors, they can be slightly difficult to care for when your aquarium is new, but once matured and lots of algae and livestock have been in for a year they will do great.

They can grow a maximum of 2 inches and you can put one of them in a 10-gallon tank.


Scarlet Cleaner Shrimp

(Lysmata amboinensis)

Source: Chris Moody

From Around $35

This shrimp is from the Indo-pacific region and belongs to the Hippolytidae family. It is one of the most famous and graceful creatures you will find in many reef aquariums.

Its body color is yellow with striking red and white stripes with very long white antenna that you will usually see sticking out of a rock cave, long before you see the shrimp itself!

This shrimp gets its name by setting up a station on a piece of rock and gives grooming assistance to the fish by cleaning their bodies, fins, and even mouth. It eats dead tissue and any parasites it can find and in exchange for this service, fish do not try to prey upon the shrimp, which makes this relationship a symbiotic one.

My Yellow Tang is one of my Cleaner Shrimps favorite customers!

Any predatory saltwater fish is not compatible with this shrimp so avoid keeping both of them in the same aquarium. It is an omnivore and can eat any type of food, sometimes it can even munch on corals so keep an eye out for their behavior. They will swim and climb on you when your hands are in the tank and it’s interesting to feel them picking away at your nail cuticles!

They can grow to 2 inches and again, perfect for any size aquarium.


Blood Red Fire Shrimp

(Lysmata debelius)

Source: Eacesar

Starting Around $45

Originating from Indo-pacific regions blood-red fire shrimp is by far the most exquisite, elegant, and popular of all shrimp, but you can pay a hefty price for one!

It is also known as Fire Shrimp, Blood Shrimp, and Scarlet Shrimp because of its blood-red colors and long antennae. It is effortless to keep them because they don’t require any special requirements in your tank only that; it doesn’t like intense lighting so you will usually find them under a ledge or in a cave.

To help with this, if you set up a cave facing the front of the tank when you layout your aquascape, you can ensure this beauty is seen instead of hiding around the back!

They are usually calm and pleasant with other tank mates (providing they don’t encroach in its territory) but can get intolerant towards their own species. They are great to be kept in pairs in a tank of +55 gallons.

Be sure to house these without Marine Bettas, Hawkfish, and bigger fish that can eat them without a second thought.
This shrimp is part of the cleaning and scavenger crew and lurks at the bottom of the tank searching for meaty chunks and leftover food.

When fully accustom to your tank it will also establish a cleaning site where it gives special cleaning services clearing away parasites and dead tissues from fish fins and gills.

They can grow up to 3 inches with only one housed in a tank of 20g or more.


Sexy Anemone Shrimp

(Thor amboinensis)

Source: Brian Low

From Around $15

This shrimp owns the title of being among the cutest of all invertebrates having a very faraway enchanting look with their reddish-brown spots and exotic behavior. They are called sexy shrimp because of their walking and waving or their abdomens.

They originate from the indo-pacific region and belongs to the Hippolytidae family. It usually prefers living among anemone tentacles in the wild, but in the aquarium, you will see it sitting on rock outcroppings or rummaging through the sandbed in search of food.

This shrimp has a symbiotic relationship with anemone’s, especially Carpet Anemones because they provide it protection and in return, it assists them in cleaning.

This shrimp is an omnivore and will scavenge for any meaty morsel or can be seen picking away at bits of algae it finds. Besides being beautiful, it also shows friendly behavior with other tank mates so, to keep them happy and healthy you should put it in groups and feed them a diverse diet consisting of plankton, meat, and frozen bits.

Because of their micro size, they are best suited to nano and pico aquariums to not only keep it safe from hungry mouths but placing these in a large aquarium may be the last time you ever see it! One other thing to keep in mind is that this shrimp is very docile so be sure to place it in a peaceful aquarium for the greatest chances of success.

They can grow to 1-1/2 inches in size.


Banded Coral Shrimp

(Stenopus hispidus)

Source: Steve Childs

Starting Around $15

This beautiful red, white, and blue banded creature with its long antennae and pinchers belong to the family Stenopodidae which are predominantly scattered throughout the Indonesian ocean.

It can be also found under the names of a Banded Cleaner, Boxing or Coral Shrimp. It usually keeps its pinchers erect giving the impression that it is ready for a fight, hence the name Boxing shrimp and It has an active personality as it is seen scurrying around the tank searching for food.

My shrimp, along with most of the banded shrimp like to be found dangling upside down in their favorite cave or under a rock so make sure you have a lot of live rock with and hiding places in your tank for this beauty. Another reason to build in a hiding place you can see these shrimp in!

My Reef Aquarium
My Reef Aquarium with Forward Facing ‘Shrimp Caves’ On Each Island

It will live peacefully with other tank mates but make sure you don’t have any slow-moving invertebrates, be sure to keep an eye on your snail population as sometimes these shrimp are opportunist predators on them.

This one is also shown to be offensive towards its own species so it is advisable to keep only one or a mated pair in your tank to prevent any fighting.

This shrimp usually grow up to 3 inches in size and with antennae, it will reach up to 6 inches so a minimum 30-gallon tank size is advised. It is an omnivore and can eat a variety of foods and also helps in cleaning the aquarium from dead tissues, fungus, and parasites.


Saron Shrimp

(Saron marmoratus)

Starting Around $5

This one is perfect for beginner to advanced saltwater aquariums alike. It originates from Indonesia, Hawaii, Maldives and is also know as the Monkey shrimp, Buffalo shrimp, and Marble shrimp. It belongs to Hippolytidae family and is mainly a nocturnal creature.

It has a fantastic ability to change colors; green color in the day and red during the night which it uses to help stay hidden in the shadows when in the wild. Tufts of cirri are present in the males distinguishing them from females and either are suited for the aquarium.

It is easy to keep and care for but it will take a slow adjustment to your aquarium before it feels comfortable to begin roaming around during the day, so ensure your tank has lots of dark hiding places because in the start, it will only show up at night.

It can usually be found on the bottom of the tank scavenging and eating leftover dead organic matter but once happy it will also feed on the usual with frozen foods that you feed your fish.

It can grow a maximum of 2 inches in size and can be kept in a +20-gallon tank. 


Bumblebee Shrimp

(Gnathophyllum americanum)

Priced Around $15

This shrimp has a very striking appearance which gives it its name. It can also be called the Stripe Harlequin shrimp and is somewhat similar to Harlequin shrimp. It is present all over the Indo-Pacific region and belongs to Gnathophyllidae family.

It is very small, growing only to around 1 inch that is why it is well suited for nano aquariums! Its body is tan, white, orange, or yellow with black stripes giving it the resemblance to a bumblebee.

A minimum 10-gallon tank will be required for this shrimp and it is never aggressive and always friendly with the tank mates but the risk of getting eaten by the bigger fish is there due to its small size, so peaceful tank mates are a must. This shrimp will need lots of rockwork where it can easily hide when feeling vulnerable or in case of predatory attack from other fish.

To Finish

Keeping shrimp in a saltwater aquarium has great benefits, aside from visually diversifying your aquarium, they will also eat pests and detritus keeping the tank water clean.

Most of these shrimp are omnivores and scavengers so they will eat anything they can find and any supplemental feeding they get will come from the food your feed your fish anyway.

They also do not trouble other tank members and mostly keep to themselves. There are not any reports of shrimps being affected by any kind of parasite or any sickness but they do need oxygenated water for their great health.

As always, prior research is required before choosing a shrimp species for your aquarium to ensure it doesn’t become a meal the second you add them into your aquarium. They can be added soon after your tank has cycled, just be sure to provide them with food if your tank is still sterile and unmatured!

Further Reading

If you found this article useful, I highly recommend these other ones too: