Having to move an aquarium over a long distance is bar far one of the most labor-intensive moves you can do with an aquarium. Not only do you have the task of moving the house but you also have to move the aquarium, each of which is a mammoth task in itself!
Moving the aquarium can be done and is done often but the way you plan and execute it will mean the difference between success and stress!
Moving an aquarium long distance can be done in 3 ways: Sell all the livestock & move only the tank and equipment. Ship all the livestock to a holding facility and move only the tank & equipment. Breakdown, transport & reassemble the whole tank & livestock in one journey with the house belongings.
This article is part of an ‘Aquarium Moving’ series:
* If you are looking to move an aquarium temporarily or within your home – CLICK HERE
* If you are looking to move an aquarium across Town – CLICK HERE
Using my experience of moving many aquariums safely I wanted to create this series to help you make a plan for when you next need to move your pride and joy!
All links to products in this article take you to Amazon.com
Before we get too deep there are three common methods to think about that will help make the move easier:
Method #1:
Selling all your livestock and only transporting the aquarium and equipment
Method #2:
Shipping all your livestock to a holding facility until you have moved, installed, and matured the aquarium then have them shipped back to you
Method #3:
Driving all the tank, equipment, and livestock across the country
To give you the very best resource we are going to discuss each method so you can see which one may best fit your needs when it comes to moving time.
Method #1 – Selling the Livestock
To most aquarists this is by far the easiest and most convenient way as the stress of moving house, especially with a cross-country move is right up there towards the top of life’s most stressful times.
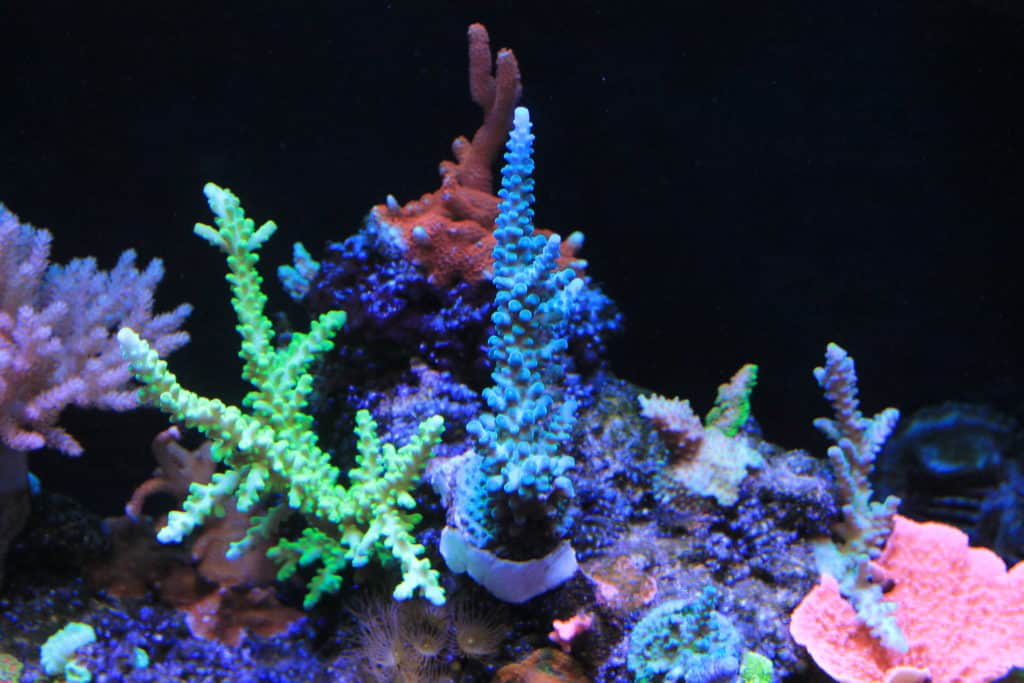
No matter if your aquarium is just a goldfish tank or a full coral reef, the easiest option is to break it down many weeks or months ahead of the move and save the money from the sales of your livestock to buy new.
This is especially so when we are talking about a mature coral reef aquarium! Selling frags or colonies of beautiful corals can soon turn that bank balance into a fat piggy bank if you have the market around you to sell them to.
If this method is the one you wish to pursue, get fragging your corals and selling them months before the move. DO NOT leave it until the last week before the move unless you really want to get stressed!
This method is by far my best recommendation!
Mainly because it allows you to start off with a clean slate when you get to your new home and it removes the risk of livestock fatalities during the move.
You may wish to try a different aquascape, a different type of coral, heck you could even get a new, bigger aquarium because we are always wanting to upgrade. This method will also prevent you from having to move a potentially large, heavy, and fragile aquarium!
If you just cannot part with your livestock then please read on…
Method #2 – Holding Facility
If you already have all of the livestock and/or corals you could ever want and you can’t bear to part with them, then shipping them ahead to a holding facility or leaving them at a holding facility where you currently live are great options!
Shipping your livestock to and from a holding facility can be done fairly easily, but it’s going to need to be planned months in advance and it could cost you quite a bit of money.
One Tip if this sounds like a viable option I highly recommend you do this a week or two before moving your house and then have them shipped to you a week or two after the house is moved. Trying to do this on the same day or even a few days before moving your whole house is just pure insanity!
Method #2:
Several Months Before Aquarium Moving Day
The first thing is you need to find someone to ship them to who you trust and who has the husbandry standards you are happy with. There are several ways to find a holding facility:
- Call some of the local (New Home), reputable fish stores in the area and talk to them about renting tank space. Even better is to go and visit them, inspect them, see what they can offer you, for how much and how long
- Reach out to the aquarium forums and see if any local aquarists may be able to help you. I have seen it many a time when fellow aquarists are able to help each other out
- If you have any aquatic friends where you currently live, see if they can hold your livestock for you, then ship it to you a few weeks after the move
Each scenario is going to be different so you will have to reach out and see what options are available to you. If you are unable to find a holding facility then you will have to look into Method #1 or Method #3.
If you are able to find a holding facility then be sure to call around to get some quotes for shipping your livestock. There are going to be many insulated boxes and potentially dozens, to hundreds of pounds of live rock, especially if you have a larger aquarium. A bill of $1000 in shipping could make Method #1 very tempting!
Method #2:
One Month Before Livestock Shipping Day
Once you have confirmed the location of the holding facility and agreed on a shipping date you are going to need to get enough packing supplies to move your livestock to the holding facility and provide them with enough supplies (and beer/wine/scotch) for them to ship them to you when required.
Here is a list of recommended packing & shipping supplies:
- Various-sized bags or containers for your fish, invertebrates and coral frags – Double or triple bagging is a must! – You can find fish bags HERE
- Rubber bands
- Insulated livestock shipping boxes – View a large selection of sizes HERE
- Clean cotton cloths for wrapping Live Rock
- Aquarium Air Pump – Filling livestock bags with air will increase the survival rate
- Newspaper for packing
- Labels – For livestock bags
- Sharpie Marker – For labels
- Shipping Labels from Shiping Carrier
- Packing Tape
- Heat or Cool Packs – Climate Dependant – Taped to the inside of the lid, do not allow the pack to touch any bags! – Just get the small ones, large ones create too much heat!
These are only needed if you are moving in the absolute extremes of summer or winter! - Get some big fish nets – Makes catching fish so much easier!

Method #2:
Two Weeks Before Livestock Shipping Day
If you are shipping your livestock to a holding facility close to your new home you need to look into the following steps to ensure your overnight livestock shipments don’t get left behind!

- Be sure of Shipping company store opening times or a pickup/dropoff time is arranged
- Estimated shipping cost so you can budget – Look at Same day or Next Day
- The latest drop-off time at the shipping company for that shipping schedule – Plan to arrive at least 1 hour before
- Timeline of how long it’s going to take to bag and pack every item to meet the shipping deadline. If the deadline is 10am and you have 5 hours of estimated bagging, packing and delivery it’s going to be a very early start!
- Possibly arrange to drive directly to the airport to save a journey in the UPS van – Time how long that journey and booking in time will take – Go and speak with the cargo agent at the airport
- Begin to reduce how much you feed your fish – Plan to completely stop feeding them 2-3 days before shipping
- Get a few helpers lined up – It will make catching and bagging far easier!
If you are leaving your livestock behind and a friend or store owner is going to ship them to you I recommend you do all these before you leave and have them accompany you or give them all the details to relieve their stress of shipping YOUR livestock!
Method #2:
Two Days Before Livestock Shipping Day
- Call the holding facility to confirm they are ready to accept your livestock
- Cease feeding all the fish
- Set up a long table next to the aquarium – This will help to set up a production line for bagging and boxing fish, invertebrates, and coral
- Place down towels on the table – It will get very wet during the bagging process
- Get all the packing supplies laid out in logical order:
- Bags, rubber bands, sharpie marker, insulated boxes, newspaper, heat packs, packing tape, another sharpie marker
- Get all the shipping labels filled out and ready – Keep away from the Wet Areas! ( Ensure you have spare labels!)
- Re-check your timeline to ensure you leave enough time to catch, bag, box, and deliver the livestock to meet the shipper’s deadline if you are shipping them across the country – Confirm no road construction or detours have popped up!
Method #2:
The Day Before Livestock Shipping Day
- Do a 25% water change to help remove any last traces of nitrates and ammonia
- Have a good dinner and get a good night’s sleep! Tomorrow could be a stressful and long day!
Method #2:
On Livestock Shipping Day
- Get up early and have a good breakfast!
- Begin to remove approx 50% of the water to give the fish less water to swim in
- Catch as many fish as you can and place similar species in the same bag. Large fish in one bag. 2 smaller fish in one bag, max!
- Double bag all fish and invertebrates and fill bag with air from the air pump.
- Secure bags with several rubber bands
- Place all bags into insulated boxes, fill voids with newspaper
- If required, tape heat/cool packs to the underside of the lid, tape the lid closed, and label the insulated box. Place the box to one side
- Begin by removing the aquascape rock or decorations
- If you have a coral and Live Rock:-
- Carefully cut with and Exacto-knife or Dremel (according to coral type) any coral growing between two rock pieces – DO NOT tear it!
- Place rock pieces in 4mil thick poly bags
- Carefully cover with cotton cloths dampened in aquarium water
- Place a few cupfuls of aquarium water in the bag
- Be careful not to squash any corals on the rock against bag sides/base
- Triple bag each piece of Live Rock
- Secure each individual bag with rubber bands
- Catch and bag all remaining fish and invertebrates
- Repeat until all Live Rock and livestock is sealed away in boxes
- Send someone to deliver or start delivering your livestock to the shipper or local holding facility
- If the facility is local, help them unpack, acclimate, tidy up and ensure they have lots of supplies ready to ship to you in a few weeks/month
- Ensure you leave the required amount of booze/steak/gift cards to thank them for this monumental undertaking!
- If the old aquarium is going in the house move, now is the time to give it all a really good clean while removing the old substrate and dismantling
- I find it easy if someone dismantles, passes the part to a helper and they clean and dry it
- Remove all remaining water and substrate and dispose
Once all the livestock have been shipped I highly recommend you break down all of the aquarium and equipment, give it a really good clean with vinegar and hot water.
- Once clean and dry and pack the tank using styrofoam sheets and blankets to prevent impact breakage to the glass during transport
- Label it well so anyone who is moving it knows exactly what it is and roughly how heavy and/or how many people are required to move it!
Packing up the house is a big enough task so having all the aquarium and associated equipment and parts already cleaned, ready to be unpacked, and installed at the new location will dramatically reduce your stress!
Method #2:
After House Moving Day
Once you have finally arrived at your new home it’s time to get the room ready for setting up the aquarium. There is not so much of a rush to do this but must be completed within the next week or two.
- Get any painting or renovations completed to the room housing the aquarium, even if you just paint the wall & trim the aquarium will go against!
- Unpack the aquarium and carefully inspect it and ALL of its equipment for damage. Replace if needed.
- Get the tank leak-checked (Outside!), installed, plumbed, and ready to go
- Fill the tank with (salt)water and turn on all the equipment
- Leak check all the plumbing
- Treat with the recommended dose of Dr. Tims One and Only Nitrifying Bacteria Culture
- Fill the aquarium with the NEW substrate but leave the glass clear where the Live Rock will sit.
You can find a huge substrate selection Here
To Calculate how much substrate you will need use Bulk Reef Supply’s Handy Calculator – Here
- Call your livestock holding facility and arrange a date for the Livestock to be shipped or picked up
- Call any shipping office to find out when the shipments arrive and find the times of opening
- The best option is to pick up directly from the cargo facility at the airport if being shipped
Method #2:
Week Before Livestock Arrival Day
- Have a thorough inspection of all the equipment, pipes, connections, and cables to ensure everything is working perfectly
- Check the water temperature, salinity, Ph, nitrite, nitrate, and ammonia – Ensure all are within tolerance:
- Temperature: 78 – 80°F or 25 – 27°C
- Specific Gravity (Salinity): 1.023 – 1.025
- Ph: 8.1 – 8.4
- Ammonia: 0ppm
- Nitrite: 0ppm
- Nitrate: <15ppm
- Alkalinity: 8 – 12 dkh
- Calcium: 350 – 450ppm
- Magnesium: 1250 – 1350ppm
- Phosphate: <0.03ppm for SPS Corals
- Phosphate: <0.05ppm for LPS, Zoas & Soft Corals
- Phosphate: <0.2ppm for Fish Only
- If the pickup is now local, gather enough Rubbermaid Totes with lids to transport Live Rock and corals to your new home
Method #2:
The Day Before Livestock Arrival Day
- Final test of all water parameters. Complete a water change if any are out of tolerance
- Confirm details with livestock holding facility – If they are shipping to you ensure they are ready, if it is now local, ensure they will be ready for you to help and pick up
- Set up a long table next to the aquarium – This will help to set up a production line for unbagging and boxing fish, invertebrates, and coral
- Place down towels on the table – It will get very wet during the unbagging process
Method #2:
Livestock Arrival Day
- Ensure to be at the shipper’s pickup point on time to receive the delivery, or
- If the holding facility is local, go there to help catch and bag your livestock
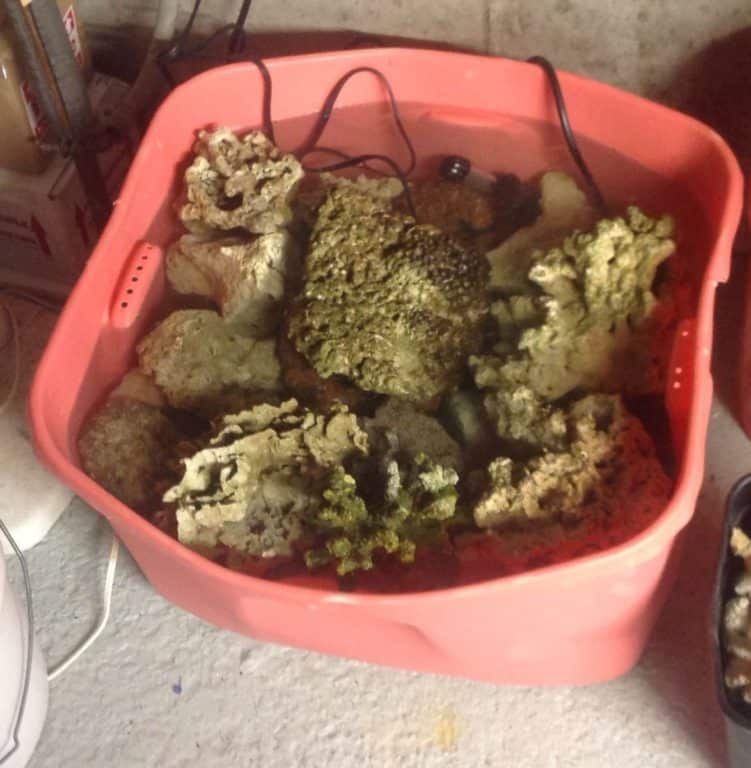
- Live Rock (if applicable) to be placed in Rubbermaid totes. Carefully cover with cloths dampened in aquarium water. Ensure each rock is stable in the tote to prevent coral damage. A sheet of Egg crate on the base can help stabilize
- Don’t fill the totes too much, they get heavy quickly! Protect your back!
Once Home:
- The aquarium should be full of water, turn off equipment and remove 50% of the water and store in a Rubbermaid trashcan/s
- Remove Live Rock from the totes/shipping boxes and carefully place on the glass bottom
- Complete the aquascape and move NEW substrate into position around the Live Rock
- Move the substrate slowly to prevent a dust storm
- Fill a spray bottle with old tank water and use to dampen rock and coral if they start to dry up
- Add the removed tank water to the aquarium
- Once water level is back to operating level turn on all the pumps and filtration
Because your livestock have been traveling for some time I highly suggest you acclimate them just like you did when you bought them home for the first time.
If you need any tips on fish acclimation check out this article. It works for freshwater too, just leave out the salt parts:
How To Acclimate Saltwater Fish
- Begin to slowly acclimate each fish over 30 minutes and add your livestock with the most aggressive and territorial fish going in last
- Reinstall the lights and canopy and leave the lights off for the rest of the day
- Do not feed the fish
- Have a thorough inspection of all the equipment, pipes, connections, and cables to ensure everything is working perfectly
Method #2:
The Day After Livestock Arrival Day
- Inspect all the equipment and ensure it is all running as it should with no leaks.
- Replace the mechanical filter media to help clean up the water if clogged
- Do a full panel of water tests, especially ammonia
One Tip is that your aquarium is going to go through a mini nitrogen cycle. Make sure you begin to test for ammonia, nitrite, and nitrate daily for the next few weeks or so to monitor any spikes.
- Keep the lights at 50% for today but allow them to ramp back up 5% each day until back at your full setpoints. If lights are not dimmable, adjust the length of ‘On Time’ each day by 10%
- Do a very small feed to the fish and check every fish for signs of distress and appetite
Method #2:
Two Days After Livestock Arrival Day
- Replace the mechanical filter media as the water should now be clear
- Begin to add some chemical media back into your media reactors if you have them installed. Up to 50% works fine.
- Keep testing your water and monitoring for signs of distress
Method #2:
One to Two Weeks After Livestock Arrival Day
- Slowly begin increasing feeding and light schedule back to their original amounts
- Remove any fish or coral that show signs of distress and place them into quarantine
- Begin your regular maintenance routine
- Monitor for signs of high Nitrite or Ammonia and do a water change if values begin to rise too high.
Method #3 – Driving Yourself
Well if you wanted a challenge, you certainly have one if you have to pick this method, but it can be done! I can tell you now that it is going to get stressful and packing up day, moving, and unpacking day are going to be some of the longest days in your life, but if your livestock just has to go with you, then Buckle up for some more readin’!
When moving the house and a mature aquarium at the same time it needs some careful planning and almost two teams of people:
- One team to pack up the house and
- One team to pack up the aquarium
It’s going to get busy!
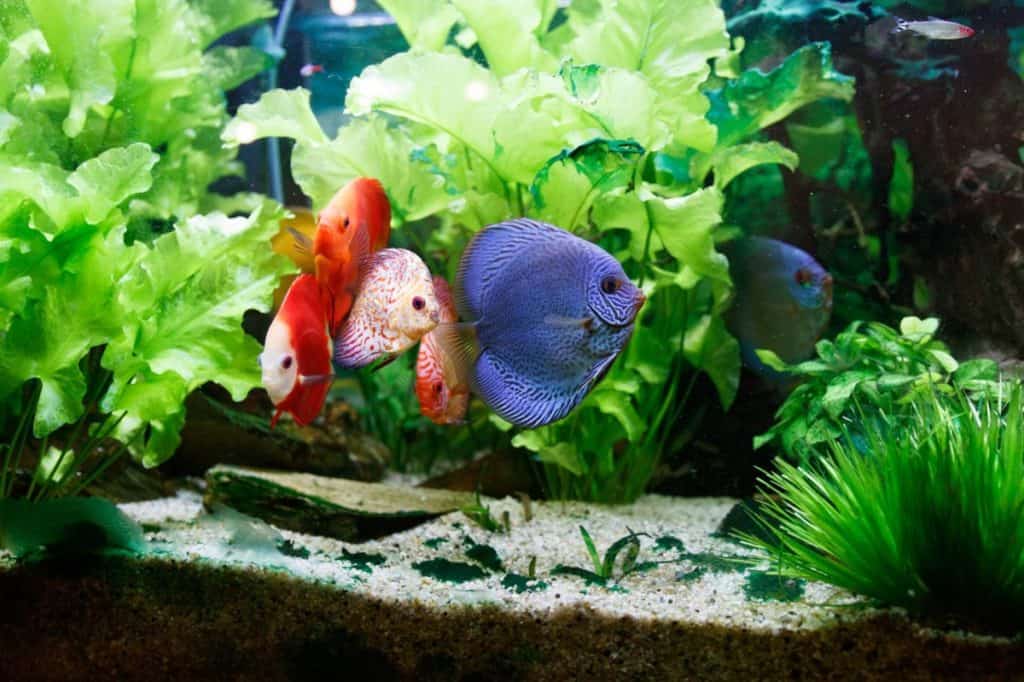
If you are moving a freshwater aquarium then the job is ALOT easier, but if you are moving a mature saltwater aquarium teeming with corals, Live Rock, invertebrates, and fish, then the job is going to be a lot more involved!
To ship your livestock this way, the only this can really work is if you drive the aquarium stuff yourself, while the house and the rest of the family go via a moving company and driving/flying etc.
Depending on the size of the aquarium, you may have to rent a Uhaul van or something similar as you could have a dozen or more bins and totes containing all the livestock plus all the aquarium and equipment.
Try to Avoid Doing This Move in the Middle of Summer or the Middle of Winter!
How To Transport Fresh and Saltwater Fish Long Distance
To transport fish, coral, and rock long distances they need to be bagged and packed into insulated shipping boxes, placed into totes, bins, and buckets with lids, heaters, and air pumps to maintain temperature during the journey. If traveling by road taking many days, small water changes can be made.
Another option is to create some simple, but very effective Livestock Transport Containers. To help you better understand please watch this video I created to show you how to easily make one:
The number of containers you may need will vary but each one will need to be heated and have air. You can run several containers of a single air pump using a manifold like this one at Amazon.com, just remember the more air outlets you run off a single pump, the bigger the air pump will need to be.
Also, for a selection of suitable heaters from Amazon.com here is what you will need based on water volume for each container:
| Water Volume | Heater Wattage | Recommended Heater |
|---|---|---|
| 5 Gal | 15 Watt | This One |
| 10 Gal | 50 Watt | This One |
| 20 Gal | 100 Watt | This One |
- If you are moving coral and Live Rock I suggest using Rubbermaid Totes (See Below) as they are easy to place the rock in with a little water. If you have coral frags then a tote with a heater and a small water pump will ensure plenty of flow for the times when the vehicle is not moving.
- If your vehicle or rental vehicle has a 110v outlet then take note of the maximum wattage you can run off it. My Minivan is 150 watt so make sure your containers are not going to max it out.
- 3x 5 gallon containers will use less wattage to run than 1x 10 gallon container. Be sure to check the wattage on the water and air pumps too!
- If your vehicle does not have a 110v outlet and/or you need more wattage than the outlet can supply, you can buy an inverter like This One at Amazon.com to convert 12v from the car battery to 110v.

Method #3:
One to Two Weeks Before Aquarium Moving Day
- Confirm the exact day for the move, ensure the moving company is booked for the same day! If you are renting a van, ensure that is booked too.
- Help will be required, get asking! – Family, friends, and local aquarists are all great.
One Tip is that even empty aquariums are heavy – Make sure you have enough bodies to carry the aquarium!
75G Glass Tank = 100lbs Rough Empty Weight
120G Glass Tank = 190lbs Rough Empty Weight
210G Glass Tank = 350lbs Rough Empty Weight
You can rent suction cups and dollies from most Tool Rental Stores
- Begin to assemble your livestock supplies:
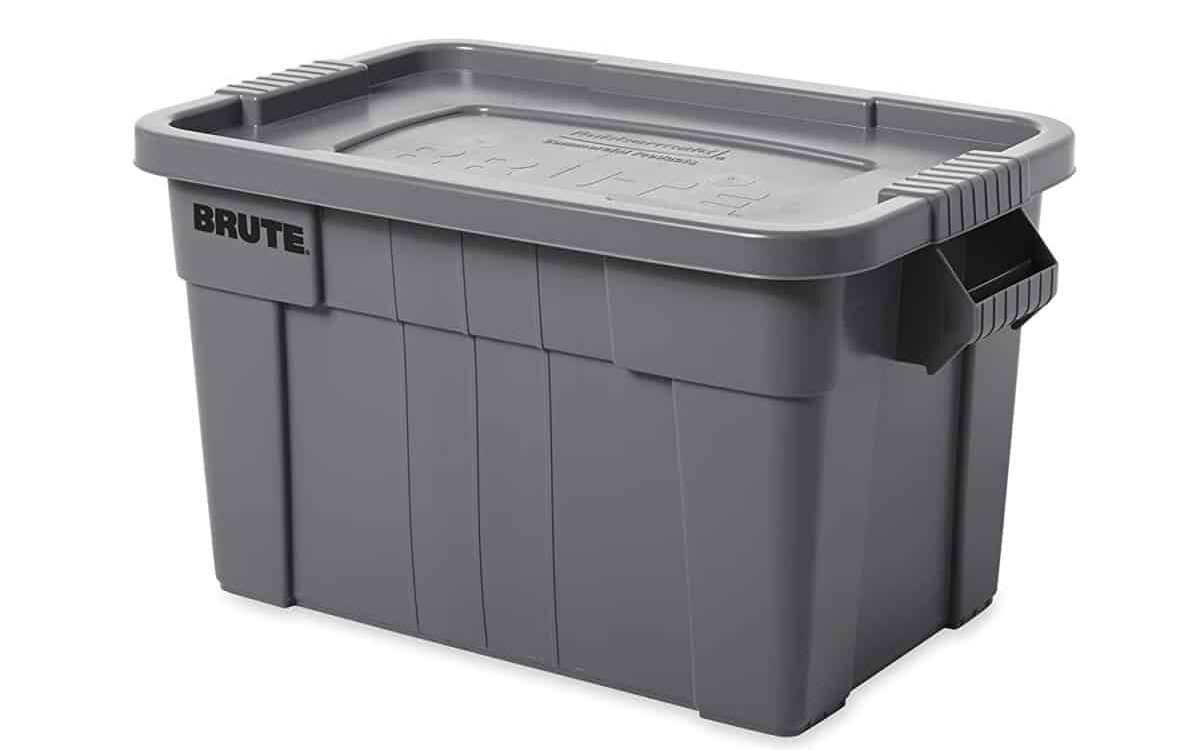
- Rubbermaid/Brute Totes & Bins are great for livestock storage
- Clean all storage totes and bins thoroughly using vinegar and rinse well with water!
- Obtain a heater, and Thermometer for each tote/bin:
- 50W Heater for 5-10Gal Containers – Find them Here
- 100W Heater for 10-20Gal Containers – Find the Here
- Powerheads – Find them Here
- Digital Thermometers (I like the ones with alarms to notify you) – Find them Here
- Obtain an Air pump with manifold, Airline & Stone Diffusers
- Obtain a small powerhead/pump for each coral container – Find them Here
- Dr. Tims One and Only Nitrifying Bacteria Culture (Fresh & Saltwater Versions) – Find them Here
- Ammonia, Nitrite, and Nitrate Test Kits – I recommend Salifert – Find them Here
Find them Here at Amazon.com
- Get some big fish nets – Makes catching fish so much easier!
- Collect old towels & Cardboard to walk on – You will use lots!
- Collect RO/DI water (san salt if required) ready for the move
- Get new sand or gravel for your aquarium – Trust me it’s worth it!
You can find a huge substrate selection Here at Amazon.com
To Calculate how much sand you will need to use Bulk Reef Supply’s Handy Calculator – Here
- Collect empty salt buckets or new 5 gallon pails from a hardware store – Clean thoroughly
- If you are planning any aquarium or equipment upgrades, ensure you have all the supplies and new gear before you leave, or confirm they are already at the new house
- If any specialist tools, adhesives, or sealants are required ensure you have them all with you
- Begin to reduce the amount you feed the aquarium. Plan to be completely stopped feeding 2-3 days before moving day
Method #3:
Three Days Before Aquarium Moving Day
- Confirm with the movers and van rental again (if Required)
- Confirm your help is still available!
- Stop feeding the livestock
- Assemble all your moving supplies into the locations they need to be at
- Test all the water pumps, air pumps, and heaters for the totes to ensure they work and hold the correct temperature
Method #3:
The Day Before Aquarium Moving Day
- Make up enough RO/DI water to fill several 5 gallon pails – This will be for partial water changes over the multi-day journey. Ensure you have a small heater and mixing pump if your aquarium is saltwater
- Begin to pack as much of the equipment that is not required as you can:
- Food
- Medications
- Maintenance tools – Keep these handy
- Get all the tools required for aquarium disassembly close by – Ensure tool batteries are charged
- Pick up the rental van if possible
- Have a good dinner and get a good night’s sleep! Tomorrow could be a long day!

Method #3:
On Aquarium Moving Day
- Get up early and have a good breakfast!
- Park your rental van for the aquarium close by, but not in the way of the house movers!
- Get the power cords and inverter (if required) installed in the vehicle – Ensure They Work!
- Ensure your house moving party is good and give your partner a kiss! It could be a stressful day!
Don’t Rush, Take Your Time, Be Methodical, Be Efficient!
- Begin to remove approx 50% of the water into a storage bin/tote that is out of the way. This is for your livestock containers! A Python Vacuum is great for this as it has a long hose
You can find one Here at Amazon
One Tip is to ensure there is a person on each end of the hose! Hoses pop out of containers very easily!
Here is how I recommend splitting up your livestock ready for transport with some of the old aquarium water:
- Fish into buckets, containers, totes – They are going to need water, heaters, an air pump supply, and lids
- Invertebrates into buckets, containers, totes – They are going to need water, heaters, an air pump supply, and lids
- Ensure the livestock that is in the containers can tolerate each other – Use the chart below if it is a saltwater aquarium:

If you have a coral and Live Rock:
- Carefully cut with an Exacto-knife or Dremel (depending on coral flesh type) any coral growing between two rock pieces
- Live Rock go into one or several containers – Each container will need water, heater, small pump, and lid – Remember it’s heavy! Make each container manageable
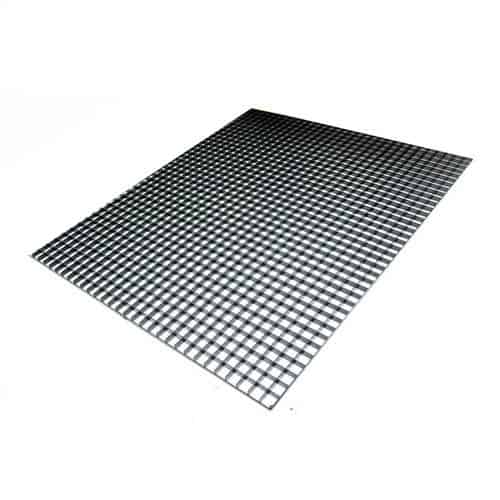
- Loose corals into buckets or totes – They are going to need water, heaters, small pump, and lids. The small water pump will aid in water movement when the vehicle stops. Egg crate will help them stay in place and can be made into compartments to help support each piece while allowing water movement. Zip-Ty’s work great for securing and creating sections – No Metal on Zip-Ty’s!
- Don’t cram in too much rock and be sure not to crush any coral
- Remove all remaining water from the aquarium – NEVER move an aquarium with water in it. The dynamic loads could crack the tank or impose loads on that could allow it to burst in the future!
- Take a few 5 gal pails of old aquarium water with you to help seed the new installation
- Remove the sand or gravel and dispose of it. The amount of bacterial dieoff from disturbing the sand/gravel could cause a tank crash when re-installing! I have seen it a few times with owners that would not listen!
- Remove any the biological filtration media and place in a storage container with old tank water or a Live Rock container
- Install heater, pump, thermometer
- This ensures that all the beneficial nitrifying bacteria living in the filters will survive the move ready for when we need them at re-installation!
- Ensure the areas and walkways are clear of tools and equipment
- Move the aquarium, stand, and all additional equipment into the moving vehicle first. You will need access to the livestock throughout the journey
- Get all the livestock totes into the vehicle and get them hooked up to power
- Ensure they are secure, working, and cannot tip over
- Last into the vehicle you will need the following:
- Some 5 gal pails of clean RO/DI water for water changes and salt and measuring cup if required
- Heater and mixing pump if saltwater
- Jug for removing water for journey water changes
- I highly recommend you get a few spares of the following life support items:
- Airpump
- Battery-Powered Air Pumps | Charge in cab while driving
- Water pump
- 12V Inverter
- Heater of each size
Method #3:
During Aquarium Transport
Moving across a country the size of the US can take days, especially in a rattly, diesel rental moving van but providing your life support systems are working then you should have no problems.
Here are a few great tips to think about when driving long distances with an aquarium:
- The movement of the vehicle will help keep the water moving in the containers. The only time you need a very small water pump is for corals when the vehicle is parked overnight
- When parked overnight, run a power cord to the vehicle to power all the life support equipment
- Ensure you have good fitting lids but with a hole in the middle to allow for gas exchange
- Place down cardboard and blankets on the floor of the vehicle if it is carpeted and transporting saltwater. Dried salt is a nightmare to clean up!
- Every night or 24 hours completely remove the lids for a minute or two to really help exchange gas while checking on livestock health
- Any dead coral or animals, remove them instantly and dispose
- Test ammonia levels daily in each container
- Do small water changes with the water (and salt if required) supplies you have. Just 10-15% is sufficient in each container. Ensure water parameters match, especially temperature!
- If possible, try not to move in winter or the dead of summer. It makes the stress level go way up!
- If moving in winter or the middle of summer relocate all the livestock bins into the hotel/motel room and make sure it has air conditioning/heating – aquarium heaters will not cope with -30°F in a moving van parked overnight
- Try and drive the trip in one go using multiple drivers – Just be sure to check livestock while gassing up.
- Install a digital thermometer into the cargo area of the moving van to monitor the ambient temperature in there – Too warm and you will cook the livestock – These are Perfect to allow you to get alerts if the temp goes out of range
- If containers are beginning to get too warm using a cool patch like These From Amazon.com can help
- Place one in a ZipLock bag and securely tape to the underside of each lid to help combat the temperature rise
- Be sure to monitor using the digital thermometer installed in each container

Method #3
Destination Arrival
- Get cardboard and towels down to protect your new flooring and ensure the routing is all clear
- Get all the livestock bins moved into the aquarium room but placed out of the way
- Ensure lots of room for installing the aquarium
- Plug in all the life support systems to the house power
- Do an ammonia test on every container and inspect livestock
- Do a 10-15% water change on any containers with ammonia reading anything above Zero ppm
- Remove any dead animals
- Bring in the containers of old and new water – Get them up to temperature
- Begin to make enough new water to completely fill the aquarium when needed – Get it up to temperature and salinity if required
The key here is to ensure the livestock is healthy before moving onto aquarium installation
Method 3#:
Aquarium Re-Installation
- Get the aquarium and stand installed and ensure it is perfectly level
- Get all plumbing connected and electrical extension cords etc neatly secured
- Begin to reinstall your aquascape with your Live Rock while placing in the NEW substrate – Always place your rocks on the glass and not on the substrate
- Once all your water is ready begin to fill the aquarium with the water you first removed from the aquarium and stored in the 5 gal pails
- Get heaters in the water to help keep it at temperature during the fill
- As your aquarium begins to fill and covers all the equipment you can start to fire up the filtration and leak check
- Fill the aquarium with all the old water you have and have the rest of the new water ready to around 75% full
One Tip is to pour your old tank water through a filter sock as it goes back into the aquarium. This will help remove any sediment from when it was first removed.
- Run all the pumps, filters, and wavemakers to ensure everything is running as it should
- Add in a recommended dose of Dr. Tims One and Only – This will help kickstart the growth of the nitrifying bacteria
- If you have chemical media reactors installed leave them empty for today to allow the mechanical filter to remove the suspended sediment
- Check all the water parameters before adding your livestock
Because your livestock have been traveling for some time I highly suggest you acclimate them just like you did when you bought them home for the first time.
If you need any tips on fish acclimation check out this article. It works for freshwater too, just leave out the salt parts:
How To Acclimate Saltwater Fish
- Begin to slowly acclimate each fish over 30 minutes and add your livestock with the most aggressive and territorial fish going in last
- Reinstall the lights and canopy and leave the lights off for the rest of the day
- Do not feed the fish
- Have a thorough inspection of all the equipment, pipes, connections, and cables to ensure everything is working perfectly
Method #3:
The Day After Aquarium Installation Day
- Inspect all the equipment and ensure it is all running as it should with no leaks
- Replace the mechanical filter media to help clean up the water
- Do a full panel of water tests, especially ammonia
One Tip is that your aquarium is going to go through a mini nitrogen cycle. Make sure you begin to test for ammonia, nitrite, and nitrate daily for the next few weeks or so to monitor any spikes.
- Keep the lights at 50% for today but allow them to ramp back up 5% each day until back at your full setpoints. If lights are not dimmable, adjust the length of ‘On Time’ each day by 10%
- Do a very small feed to the fish and check every fish for signs of distress and appetite
Method #3:
Two Days After Moving Day
- Replace the mechanical filter media as the water should now be clear
- Begin to add some media back into your media reactors if you have them installed. Up to 50% works fine.
- Keep testing your water and monitoring for signs of distress
Method #3:
One to Two Weeks After Moving Day
- Slowly begin increasing feeding and light schedule back to their original amounts
- Remove any fish or coral that show signs of distress and place them into quarantine
- Begin your regular maintenance routine
- Monitor for signs of high Nitrite or Ammonia and do a water change if values begin to rise too high.
Hopefully, your aquarium move will have gone smoothly without too much stress and loss of livestock! Moving a mature and healthy aquarium across the country is no easy feat and you must expect a few fatalities.
With you thinking about moving an aquarium you may find these articles helpful too:
- Where To Put An Aquarium – Tips No One Tells You!
- Is Tap Water Safe For An Aquarium? Maybe. Find Out Here!
- Reef Tank Aquascapes: 15 Stunning Design Tips
- Reef Tank Mistakes: 18 Problems That Are Easily Prevented!