I ran my aquarium without a chiller for many many years, then like most people, I installed one last minute because we were having a heatwave and the summer temps were starting to rapidly climb.
I was lucky, I got it installed and running just in time, but many people install them after they have suffered losses. I now recommend to anyone who has a lot of money invested in their aquarium to plan for a chiller!
Installing an aquarium chiller all comes down to one question:
“How much livestock are you prepared to lose to excessive heat before you decide a chiller is needed?”
If you have $200 worth of fish and coral in a nano reef, then a $200 chiller might appeal to you, but if you are going to be spending $20K on your reef then it’s a no-brainer! Prevention is always better than losing!
Temperature stability is one of the biggest factors for preventing illness and being successful with corals, especially SPS. You have a temperature-controlled heater to keep the tank from getting too cold, but what about preventing the tank from getting too hot!
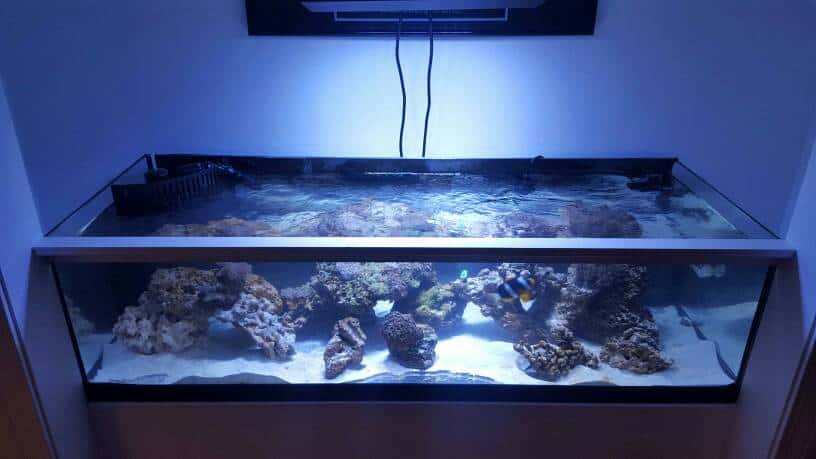
Since installing my chiller my entire system temperature does not fluctuate more than 0.2°F. I will never own an aquarium without one. I can highly recommend the Aqua Euro USA line of Aquarium Chillers. I use the 1/10HP version on my 90 gallon system.
You can find their range Here at AquariumSpecialty.com
or

Fish cannot regulate their own body temperature & rely on the water they are in. Fresh & saltwater aquariums should be kept under 82°F. Ambient room temperature, system water volume, temperature drop required & heat given off by lights & pumps need to be considered when sizing an aquarium chiller.
Aquarium Chiller Size Examples:
| Aquarium Size | Chiller Size | BTU/hr |
|---|---|---|
| Up to 30 Gallons | Nano Chiller | 200 |
| Up to 40 Gallons | 1/15 HP | 800 |
| Up to 50 Gallons | 1/13 HP | 1,000 |
| Up to 130 Gallons | 1/10 HP | 1,200 |
| Up to 180 Gallons | 1/5 HP | 2,400 |
| Up to 260 Gallons | 1/4 HP | 3,000 |
| Up to 340 Gallons | 1/3 HP | 4,500 |
| Up to 500 Gallons | 1/2 HP | 6,000 |
| Up to 800 Gallons | 3/4 HP | 9,000 |
| Up to 1200 Gallons | 1 HP | 12,000 |
Each manufacturer recommends different water volumes and flow rates for their chillers. It is important to match the volume and flow rate of that particular chiller to your needs.
Now that you know you need a chiller, the next question is…
What Types of Aquarium Chiller Are Available?
There are 4 types of aquarium chiller on the market. Nano Thermo-Electric Chillers & Nano Ice probes for small aquariums. Inline chillers are the most common in the hobby and then Submersible coil chillers for large aquariums. Chillers can be easily installed and ran only during the hotter months.
Each type has its pros and cons and its all about finding the unit that will suit your particular aquarium system.
Here are the various types commonly available:
Nano Thermo-Electric Inline Chiller
A small chiller that uses Peltier Technology (Wiki Link) to cool a heatsink. Peltier conductors work by passing an electric current through a special laminate sandwich. One side heats up, the other side cools down.
The side that cools down is attached to a heatsink which the water pipe runs through, the hot side of the Peltier plate is attached to another heatsink with a fan on top to draw the heat out and disperse it into the air.
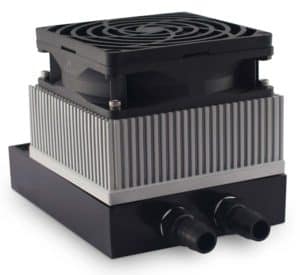
These are great little chillers for nano aquariums, especially ones that cannot fit an additional pump inside the tank or filter housing. Just remove the hose from the aquarium return pump, attach it to the chiller then connect the chillers’ outlet to the return nozzle of the aquarium.
The return pump MAY need to be upsized because of the extra flow loss caused by the additional piping and chiller.
| PROS: |
| Small |
| Quiet |
| Versatile |
| Inexpensive |
| Simple Installation |
| Digital Temp Control |
| Easily Hidden |
| Installation Kit Available |
| Great Reviews |
| Made In The USA |
| CONS: |
| Limited Cooling Power |
| Needs Additional Pump |
| Pedigree Yet Untested |
Nano Ice Probes
This type of chiller uses the same technology as the Thermo-Electric Inline Chillers, however, rather than water passing through it, these use a large probe that needs to be inserted into the water.
This probe is then chilled which then conducts heat from the passing water flow. The installation of these needs a little more planning but the ability to cool nano aquariums have been proven.
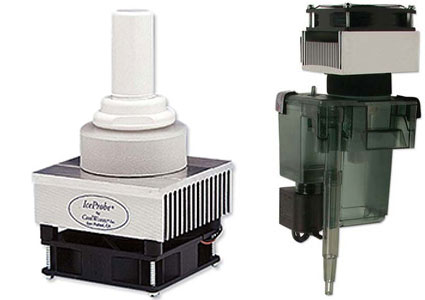
A 1.5” hole is required to mount these so a bracket needs to be fabricated or 3D printed, a hole drilled in the sump or aquarium or you can buy the chiller pre-installed in an AquaClear Hang-On-Back filter.
The manufacturer states they are able to cool 10 gallons by 6-8°F below ambient air temperature.
| PROS: |
| Small |
| Quiet |
| Inexpensive |
| 50 Watts Of Power |
| Multiple Can Be Used |
| No Pump Required |
| Great Reviews |
| CONS: |
| Drilling/Mounting Required |
| Temp Controller Needed |
| Looks Unsightly in HOB |
You can find the Ice probe Here at Amazon.com
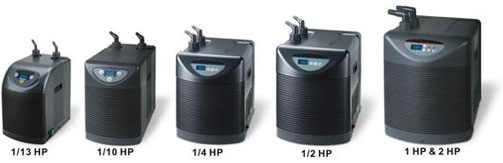
Inline Chillers
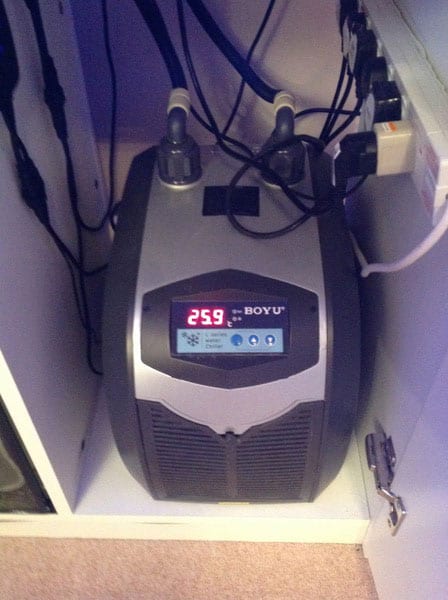
The most popular type of chiller available on the market and the type that the majority of aquarists own. An inline chiller is a unit roughly the size of a small carry-on suitcase that sits fairly close to the aquarium or sump.
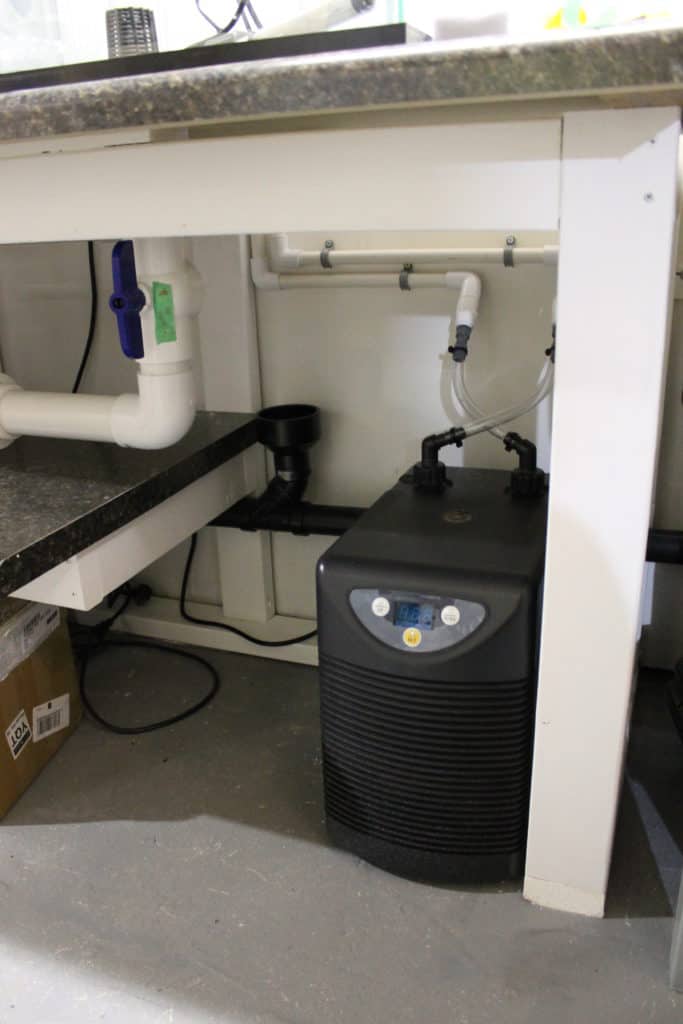
Water is pumped through the unit which will monitor the water temperature and switch on and off as required to cool the water.
This type of chiller works in a similar fashion to your home refrigerator. Water from the aquarium is constantly flowing through the heat exchanger and when the unit senses it is time to cool, it starts up a compressor that circulates a cooling agent around the coil of the heat exchanger.
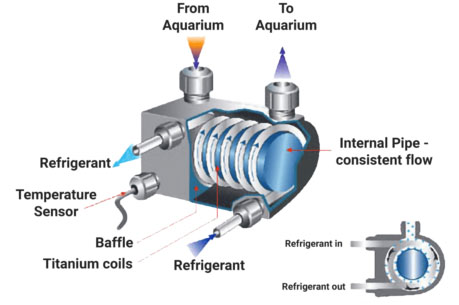
This cooling agent pulls the heat from the water and the cooling agent now circulates to the radiator where the air is forced through it by a fan to remove the heat from the cooling agent and disperse it into the surrounding air.
| PROS: |
| Lots of Sizes Available |
| Brands are Well Tested |
| Accurate Temperature Control |
| Fully Automated |
| Easily Calibrated |
| Great Reviews |
| Work Really Well |
| CONS: |
| Expensive |
| Can Be Physically Large Units |
| Looks Unsightly |
| Large Units Are Heavy |
| Cooling Fans Make Them Noisy |
| Requires Separate Feed Pump |
| Needs Good Ventilation |
Drop-In (Submersible Coil) Chillers
These units work in a similar fashion to the inline chillers except the heat exchanger for the water is placed directly in the aquarium or sump. A titanium coil has a cooling agent circulating to it when the chiller senses the need to cool.
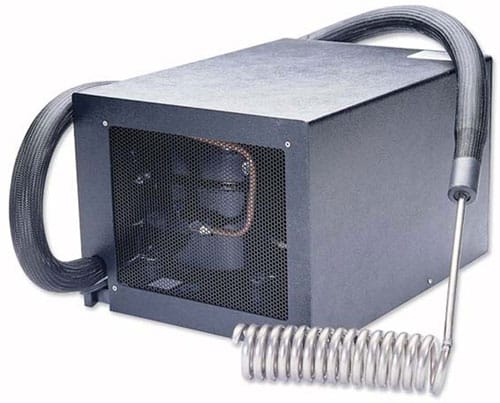
They are not as popular as the inline chiller as they are quite a bit more expensive, but because they do not need a dedicated pump and you only need to place the coil, they could be a better option for aquarists who are unable to plumb in an Inline Chiller.
These units are generally designed for the larger aquariums with 1/4HP being the smallest size available.
| PROS: |
| Variety Of Sizes Available |
| Coil 25% More Efficient |
| Quiet Operation |
| No Plumbing Required |
| Ozone Friendly Refrigerant |
| Compact Unit |
| CONS: |
| Expensive |
| Coil Hose Only 5ft |
| Temp Controller Required |
| Only For Larger Aquariums |
| Cooling Fans Make Them Noisy |
| Larger Units Made-To-Order |
Once you have decided on the type of chiller best suited to your aquarium setup you now need to work out what size chiller to get.
Are There Any Considerations Before Sizing An Aquarium Chiller?
As we are now working down the shortlist to the chiller that will best suit your system, here are a few things to keep in mind when shopping for a chiller:
Suitability
You may find cheaper chillers online but hoes not made for the aquarium hobby will almost certainly contain materials that will kill your fish. Aquarium chillers are more expensive because all the components that come into contact with the aquarium water are made from stainless steel or titanium.
Cheaper units made for other applications may contain copper or brass fittings. these will release toxins into the water, especially copper which will kill your fish. For saltwater aquariums, copper is highly toxic to coral.
Hooking up a chiller that is $100-$300 cheaper than a purpose-made aquarium chiller is a surefire way to decimate a tank full of corals!
Price
This is always at the forefront of most aquarists’ minds! Chillers are not cheap, but they play a vital role and sizing the correct unit is prime for it to be able to work efficiently and do the job.
There is nothing worse than having to return an underpowered unit to get the bigger chiller in a month’s time after you have lost livestock because you wanted to save a few bucks.
Energy Consumption
Most aquarium chillers are designed to run for a maximum of 10-20 minutes at a time. Having the correctly sized chiller will keep it running efficiently.
Chillers can be energy thirsty and finding one that is energy efficient and sized properly will prevent the chiller from running for long periods. The extra electricity costs over a 5 year period for an undersized chiller can be significantly greater than the extra few dollars of upsizing to the bigger model!
Noise Level
Is your aquarium sitting in your office, bedroom or living room? Does the chiller need to be quiet? Most chillers will produce some noise because of the fan moving the air across the cooling elements. Some of the bigger units are not that quiet and remote installation may be required.
Ease of maintenance
Regular cleaning of the air filters and fan are essential for efficient operation. Make sure the chiller you pick allows for it to be done easily or we all procrastinate!
Ozone-Friendly Cooling Agent
We all need to do our part for the planet and buying a chiller that uses a cooling agent that is non-toxic to the environment is a must. Most of the reputable chiller manufacturers use the environmentally friendly R-134a Refrigerant (Wiki Link) cooling agent, but it is something to check when researching your purchase.
Ambient Room Temperature
The warmer the room the aquarium is located in, the more the chiller has to work. Most chillers work on being able to cool the water by up to approximately 10°F for its recommended volume.
If the room in which your aquarium sits gets into the 90’s or above you will have to start looking at a bigger chiller to handle that much of a drop.
If your house already has AC make sure that unit is serviced regularly before the hot season and remember to NOT SHUT OFF or TURN DOWN the AC when you go on vacation!
If your chiller is sized on your home AC keeping the house at 75°F then keep the house around that temp! Too many people have come home to dead aquariums because they turned down the house AC while they were away!
Location Of The Chiller
Chillers don’t ‘Chill’ the water they remove heat from it and disperse that heat usually out the back of the unit. If the chiller is located in the stand with no ventilation, the chiller will just heat the underside of the aquarium.
If there is no airflow at the back of the chiller it will heat the back of the aquarium. If the aquarium is in a small room with the chiller and the doors and windows are kept closed, the chiller will just heat up the room air temperature which in turn heats up the aquarium.
You can see that there is a vicious cycle starting to form here!
More details on Location is discussed further on…
How Do You Size An Aquarium Chiller?
Aquarium chillers are based on BTU/hour. 1 gallon of water requires 8.3BTU to drop the temperature 1°F. To drop a 75 gallon aquarium from 84°F to 78°F requires (8.375)(84-78)= 3,735 BTU/hour. A chiller of at least this size is required. A 1/3HP chiller that has a 4,000BTU/hr capacity would be perfect.
There is complex thermodynamics that can be taken into account for every aquarium owner, but to be honest they are way above the scope of most of us and this article. I’ll try and keep things as ‘Layman’s as I can to make sizing the chiller an easy process.
Sizing a chiller can seem quite daunting to some people. There are lots of calculators out there and some of them are quite complex but you need to size your chiller correctly for it to work efficiently and earn its keep in your home.
When you look at most aquarium chillers, they are based on system water volume. If you run a 75 gallon display tank and a 25 gallon sump, taking into account displacement for rock, sand and your sump not being 100% full, you are looking at a rough total water volume of around 83 gallons.
It is always a good recommendation to do an accurate volume count on your initial fill of the system. This not only helps for sizing equipment like heaters, chillers, and pumps, etc. but it is also really handy for dosing medications and supplements as your corals begin to grow.
What Heats Up Your Aquarium?
There are several ways your aquarium heats up after your heater has turned off:
First, is by absorbing the ambient heat of the room through the glass and water surface.
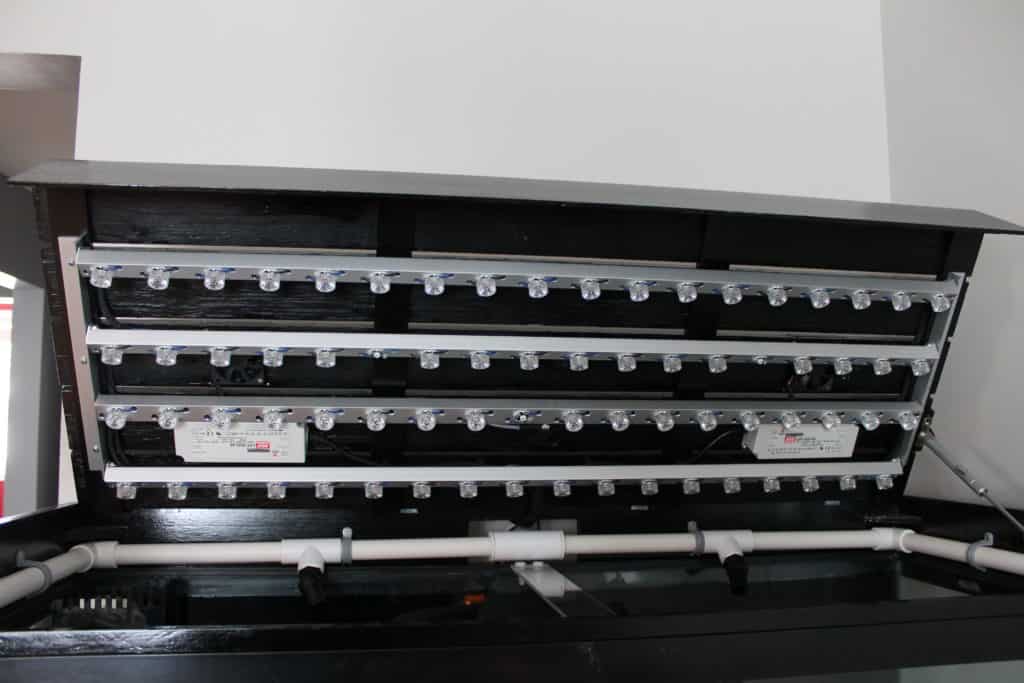
Second, is the lighting system you have. Metal Halides especially, give off tremendous amounts of heat!
Third, is the pumps and powerheads also add heat to your water
Now we have to try and figure out how much all of these add to the temperature increase.
Ambient Heat
This can be the one that fluctuates the most for many aquarists. If you have house air conditioning it is easy to set the ambient temperature and then it remains fairly constant.
If you do not have house AC, then getting the right chiller can be a little more tricky due to the seasonal temperatures where you live.
If you have lived in your home for a few summers you should have an idea of what temperatures the room where your aquarium is/going to be will heat up to.
If you have no idea, over a week take recordings of the temperature of the room and see what the maximum temperature the room gets to. The hotter the room, the bigger the chiller will have to be.
Light Heat
Lights are fairly easy to calculate because they are only on for a set period each day.
The best way to see how much they add is to check the water temperature each day for a week, just before the lights come on. Record that value.
Next record the temperature of the aquarium at several times in the afternoon (hottest part of the day) and just before they turn off each day for a week.
Once you see the average temperature increase, you will know how much the lights heat the water. This is not an exact science but it gives close enough values for most aquarists.
Generally, Metal Halides and T5’s will give off the most heat with LEDs being the coolest.
Pump Heat
Pumps and wavemakers are generally running 24/7 so the heat they transfer into the water is fairly consistent. If your tank stays at 80 during the cooler months with no problem then you can disregard pumps a little.
Chiller Sizes
Aquarium chillers are usually rated based by Horsepower or BTU (British Thermal Units).
BTU’s are the measurement units used to describe the amount of energy required to cool one pound of water by one degree Fahrenheit.
General Rules of Thumb:
| 1 HP (Horse Power) = 12,000 BTU (British Thermal Units) |
| 1 BTU = 1lb = 0.1 gallons |
| 1 gallon = 10lbs = 10 BTU for 1°F |
| Each gallon requires 10 BTU for each degree drop |
| therefore: |
| 10 gallons Requires 100 BTU per degree |
| 50 gallons Requires 500 BTU per degree |
| 100 gallons Requires 1,000 BTU per degree |
| 200 gallons Requires 2,000 BTU per degree |
If you want more accurate math here is the formula you use:
- One gallon of water requires 8.3 BTU/hour to cool by 1°F
- Multiply your TOTAL system water volume by 8.3
- Next, multiply this answer by how many degrees you need it to drop
- This gives your total BTUs per hour required to drop to and maintain your ideal tank temp
For Example:
Example #1:
55 Gallon aquarium with 15 Gallon sump = 70 Gal volume
70 x 8.3 = 581 BTU per Degree per Hour
Drop from 83°F to 80°F = 3°F
3°F x 581 BTU = 1,743 BTU/hr required
A 1/5HP chiller rated at 2,400 BTU/hr would be a perfect choice.
Example #2:
150 Gallon aquarium with 55 Gallon sump = 205 Gal volume
205 x 8.3 = 1,701.5 BTU per Degree per Hour
Drop from 83°F to 80°F = 3°F
3°F x 1,701.5 BTU = 5,104.5 BTU/hr required
A 1/1HP chiller rated at 6,000 BTU/hr would be a perfect choice.
Most chiller manufacturers use titanium heat exchange coils to remove the heat from the water, but titanium is not very good at transferring heat.
Titanium is very good at not being corroded by saltwater hence why they use it rather than copper or stainless steel, and the fact those metals can be toxic to the inhabitants.
The Chiller Sizing Calculator on the JBJ website does a great job at sizing a chiller based on your requirements.
You can find the JBJ Chiller Calculator HERE
Several things need to be considered after looking at the results from the calculator:
- The hotter the ambient room temperature, the bigger the chiller you will need to get!!! – Play with the temps on the JBJ Calculator!
- How much do you need to drop the temp by? The more the drop, the more you may need to go up a size
- Is the room temperature stable or does it fluctuate a lot? Will the chiller need to run all day or just for an hour or two?
- Adding ventilation to the room will dramatically help the chiller do its job.
- If the recommended chiller is on the borderline, go up a size
- If you are planning to add more lights, powerheads or a frag tank in the future, go up a size
- Chillers are designed to run for 10-20 minutes at a time. Undersizing a chiller will make the chiller run more, cost more in electricity and wear faster
- Chillers sized far too big will short-cycle which means they run and then shut off too quickly. This will wear out the compressor and cost more in electricity. Current draw is highest when a motor first starts. The more it starts, the more it costs to run, the sooner it wears out.
After looking at all the factors and you have slightly oversized the chiller if required, there are two more steps to ensuring it works efficiently.
Do Aquarium Chillers Need A Set Flow Rate?
Every chiller has a recommended flow rate. If the flow rate is too fast, not enough heat will be removed with each pass of the water so the chiller will underperform. If the flow rate is too slow, the water is cooled but even more water could be cooled too so the chiller will underperform.
Matching the flow rate to the chiller is a simple process and can be done in several ways:
With Drop-In Chillers:
These just require the cooling coil to be placed in a high flow area of your sump. The best place I find is right next to the intake for the return pump. This way the cooled water is drawn straight into the pump and sent to the display tank.
Your return pump’s flow rate should already match the flow rate required for the protein skimmer, so try and select a chiller that has a manufacturer recommended flow rate similar to the protein skimmer and you can then just drop the coil in with no issues.
If the flow rates are drastically different between the protein skimmer and the chiller, maybe an inline chiller with a dedicated feed pump will work more efficiently for your needs.
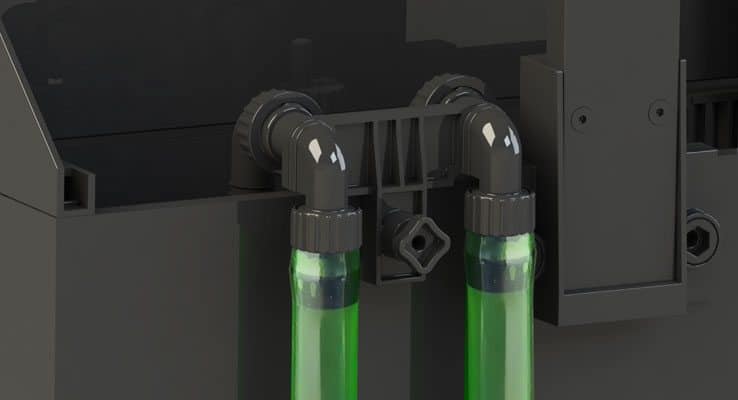
With Inline Chillers:
Connecting The Chiller To A Dedicated Pump:
If you have a sump you can place a submersible pump at the outlet pipe of the protein skimmer. This then removes most of the cleaned water from the skimmer and sends it to the chiller.
Match the pump to the desired flow rate, then have the chiller output the cooled water into the return section or directly into the aquarium.
Here is a great selection of commonly used Submersible Pumps at Amazon.com
or
You can use a DC Variable Flow pump to get the exact flow – Also available at Amazon.com
If you are discharging straight into the aquarium be sure to take into account the head loss of the pump. A pump rated at 250 gallons per hour might be at zero pumping height.
If that pump then needs to pump up 4ft to the top of the aquarium the flow rate may then only be 150 gallons per hour. Be sure to check the flow rate for the height intended and also take into account the friction going through the chiller.
It is better to buy an oversized pump that you can then install a valve on to allow you to fine-tune the flow rate perfectly for the chiller or buy a DC-controlled pump that allows you to adjust the flow.
To measure flow rate:
Take a bucket and catch the water coming out of the pipe for 15 seconds. Measure that amount of water then multiply that value by 4. This gives you Gallons Per Minute. Multiply that number by 60 and you get Gallons Per Hour.
Example:
Your chiller requires a minimum of 250 gallons per hour (GPH)
Feed Pump is rated to 300 Gallons per hour at 6ft head height
15 seconds delivers 1.2 gallons into the bucket
Multiply 1.2 gallons x 4 = 4.8 gallons per minute ( 4 x 15 Secs = 1 Minute)
Multiply 4.8 x 60 minutes = 290 gallons per hour
Close the valve slightly and repeat
15 seconds delivers 1.05 gallons.
Multiply 1.05 x 4 = 4.2 gallons per minute
Multiply 4.2 x 60 = 252 gallons per hour – Perfect flow rate!
Just remember to catch the water at the same height the chiller pipe would output to in the sump/aquarium!
Inline With Return Pump:
Many people connect their chiller in between the return pump and the return nozzle on the aquarium. This is an easy process and is the most efficient for the chiller. However, the chiller will add some friction to that flow and again it is important to match the flow rate.
The other important point to consider here is that your return pump should also match the flow required by your protein skimmer! By looking at the flow rate required for your chiller, the protein skimmer and the head height for the pump you should be able to valve the return line to accommodate the flow rates for the chiller and skimmer.
For more information on how to select and size a Return Pump you can read my article HERE
Chiller Fed Off A Manifold:
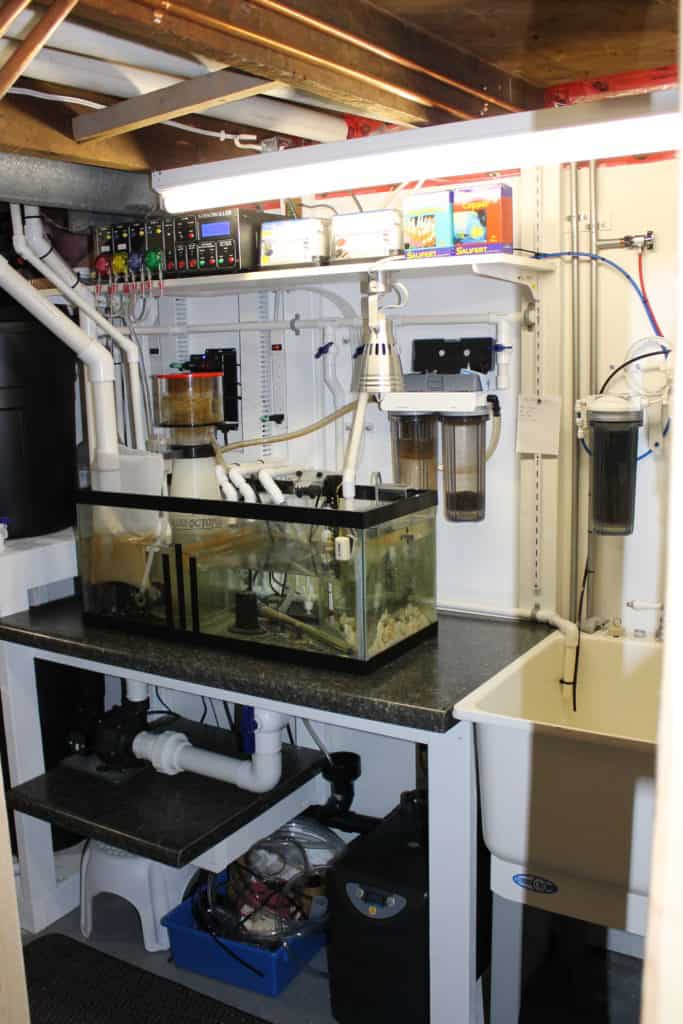
This is how mine is fed. I have an oversized return pump that feeds up to my display tank and to my manifold. I have a valve that controls the flow to the display tank to match my protein skimmer, then each leg off the manifold has its own valve for flow rate control of the attached equipment.
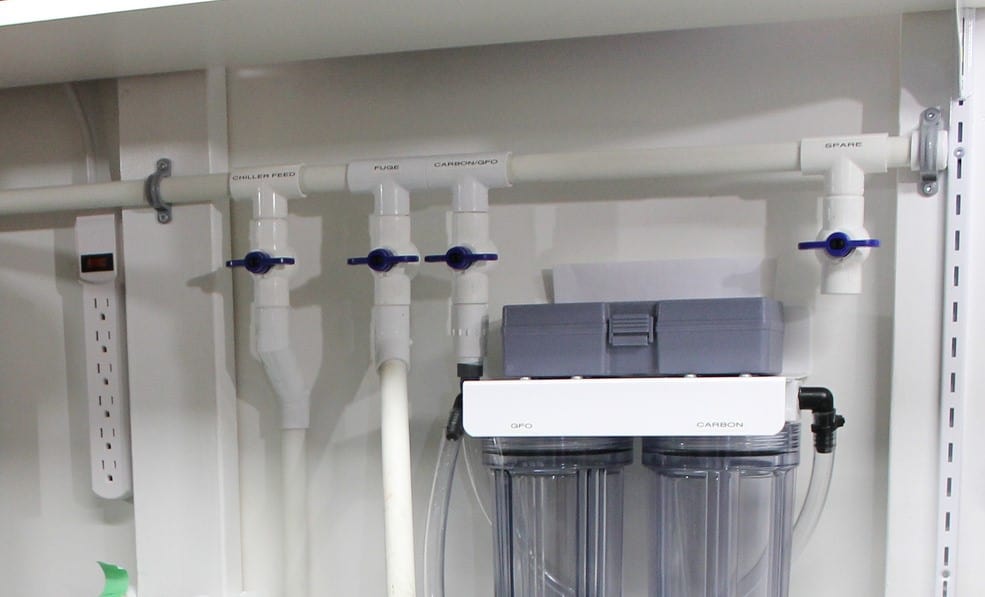
The leg connecting my chiller has the valve set to deliver around 100gph to my Aqua Euro 1/10 HP chiller. The flow rate recommended by the manufacturer is between 65gph – 315gph.
I went with a slightly slower flow rate to give the water as much contact time with the heat exchange coil.
The output from the chiller then dumps into the return section of my sump.
It is not the most efficient way to connect the chiller as some of the water will circulate back into the manifold and back through the chiller, but the majority of the cooled water goes into my display tank.
It works well and my temperature is rock steady year-round.
Chiller Connected To An All-In-One (AIO) Aquarium:
Some of the AIO aquariums come with the provision to install a chiller to them. They allow for a pump to be installed in the filter compartment and pump water out of the tank, down to the chiller and back to the return chamber of the filter.
Just be sure to buy a pump that can pump down, through and back up to the aquarium with the desired flow rate. Again, a slightly bigger pump with a valve will be the best option.
Having a bigger pump also allows you to situate the chiller away from your aquarium to aid in cooling, however, the size of most AIO aquariums don’t require much cooling and the chiller being located in the stand with good airflow out the back is usually more than sufficient.
If however, you do not have the stand but the aquarium is on a counter, for example, a remote chiller is easy to hide so long as the pump delivers the required flow back to the aquarium.
JBJ makes a great little AIO Chiller Installation Kit (Link to Amazon.com) which can be installed on most aquariums. The kit includes many of the parts you will need. Just be sure to check your AIO aquarium has room to fit a small Maxi-Jet or equivalent pump.
Where Do You Locate An Aquarium Chiller?
Aquarium chillers need to be located in a clear area to allow sufficient airflow around the chiller. Chillers work by using a fan to move air over a cooling unit and expelling this warm air away from the chiller. Enclosing the chiller in a stand can dramatically reduce its cooling efficiency.
Air Flow
The sole purpose of an aquarium chiller is to remove the heat from the water, then expel that hot air away from the aquarium. If you can locate the chiller on the other side of a wall, below an open window, close to the AC return vent or even pipe the back of the chiller outside like a bathroom fan, then your chiller will work much better at cooling the aquarium.
To get the best out of the chiller you should try and have the hot air that is produced be moved to another area so that the ambient air in the aquarium room is not being heated by the chiller.
Aquariums are great at sucking up heat from the surrounding air, especially if it is a modern open-topped design. If the chiller is heating that room, it is heating the same aquarium it is trying to cool. This is going to cost you more in electricity so the more you can do to vent that hot air the better.
As well designed as chillers are, they are not really aesthetically pleasing in most living rooms. If you are unable to fit the chiller in the stand then an option is to place it next to the stand in a cabinet modified for airflow or even under a coffee table with a loose cloth over it.
There are some clever ways people have come up with to hide their chiller, yet allow it plenty of airflow for it to work efficiently.
Electrical Supply
Some of the larger chillers can pull a lot of electricity, especially each time they fire up, so some thought will be required for its placement.
I advise against plugging it into the same circuit that the rest of your aquarium is fed off if you can. Chillers can pop circuit breakers and if your aquarium lights, pumps or heater are fed off the same breaker you could lose your tank! – Especially when you are away on vacation and unable to spot it!
Some aquarists have split receptacles installed or multiple circuits fed to the aquarium location to help keep equipment electrically separated from one another.
If you have to plug the chiller into the same circuit as your aquarium be sure to purchase a good heavy-duty power bar to prevent any overloads or melting. If you have the chiller located some distance from the electrical socket, have a good quality heavy duty power cord feeding it too.
These power bars are what I install and recommend to anyone installing a remote chiller – View Them HERE at Amazon.com
These are the power cords I also recommend when plugging in a chiller with other equipment – View Them HERE at Amazon.com
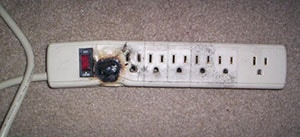
Many aquarium fires have been caused by faulty equipment and overloaded electrical circuits. Be cautious and stay safe!
Aquarium Chiller Recommendations
There are many chillers on the market today and some of them are fantastic products and I’m glad I can recommend them to you. Chillers are not cheap and getting a good chiller is why I’ve written this article to help you.
Here are my top recommendations for each type of chiller…
For Nano & Small Aquariums:
Chill Solutions CSXC-1 Thermoelectric Aquarium Chiller
I love this little chiller. It does so many things very well that if I was setting up a Nano Reef, then this would be a part of the setup.
The simple, yet effective design, coupled with its quiet operation make it perfect for those small bedroom tanks.
The two hose connectors allow you to mount the chiller behind or out of sight thus keeping the aquarium being the center of attention.
Digitally controlled, Set & Forget and a reasonable price make this my top pick for Nano Aquariums!
Around $250.00 from ChillSolutions.com
Click Here to check its reviews and more information
Inline Chillers:
Aqua Euro Systems Series Aquarium Chillers
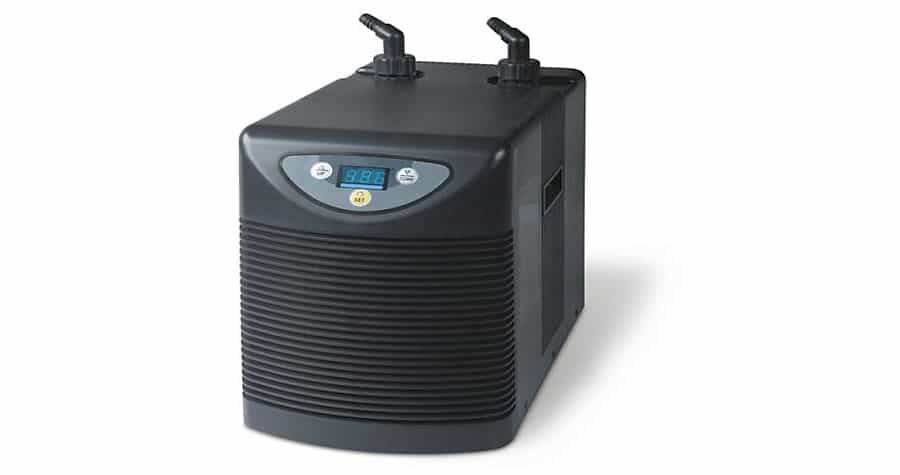
Aqua Euro have been leading the way with home aquarium chiller technology for a very long time.
Their Max range is their best-selling chiller built on years and years of chiller development, feedback, and pedigree.
They come in a range of sizes to cover aquariums from 40 gallons up to 500 gallons with 5 sizes.
A well-designed titanium heat exchanger allows these chillers to give high capacity cooling with less energy required.
The pedigree, reviews, and efficiency of the Aqua Euro range of chillers are why I made it my pick for my own aquarium!
You can find them here at Amazon.com
I also recommend the JBJ Artica Range which you can find Here at Amazon.com
Drop-In Chillers:
TradeWind Aquarium Chillers

Drop-In chillers provide the perfect solution to those aquarists who are unable to plumb in a chiller but have the space to locate it.
Just drop in the coil and allow the fully automated chiller to keep your tank temperature rock-solid in those hot summer months.
They come in a range of sizes to cover aquariums from 120 gallons up to 450 gallons with 5 sizes.
A titanium heat exchange coil allows these chillers to be situated to the side of the aquarium/sump with only minimal space required for the cooling element.
Click Here to check their price, and more information at AquariumSpecialty.com
How Do You Maintain An Aquarium Chiller?
Here are some simple things you can do to keep your chiller working at its maximum efficiency:
- Keep the intake and exhaust filters clean
- Every month ensure chiller is calibrated to aquarium temperature
- Regularly check the electrical plug to ensure no excessive heat/burning
- If you can access them, clean the fan blades every month or so to keep the fuzz off
- Every 6 few months check to ensure the correct flow rate is being passed
- Every 6 months pass a bleach/water solution through chiller for 30 mins the opposite way – Pump in a bucket with the return to bucket – rinse thoroughly, leave to dry
- Clean the feed pump every few months
- Inspect all plumbing, hose tails and flexible pipes for wear
- Operate any valves weekly to prevent them from sticking.
This live chat is a great resource to really help you answer any questions:
JBJ Chillers Live Chat Customer Service
Further Reading:
- 16 Tips For Safely Cooling Your Aquarium
- Everything You Need To Know About Aquarium Sumps
- Selecting The Right Aquarium Return Pump
- Aquarium Battery Backups -This Guide Could Save You $$$!
- Aquarium ATO Automatic Top-Off System – What Is It?