Moving house is said to be one of the ‘Top 5 Most Stressful Times’ in our life! Now if you have an aquarium, especially an established saltwater aquarium this now sends that stress toward the very top of the list.
Moving an aquarium across town is a fairly straightforward process but it needs a little planning, just like moving the home contents themselves.
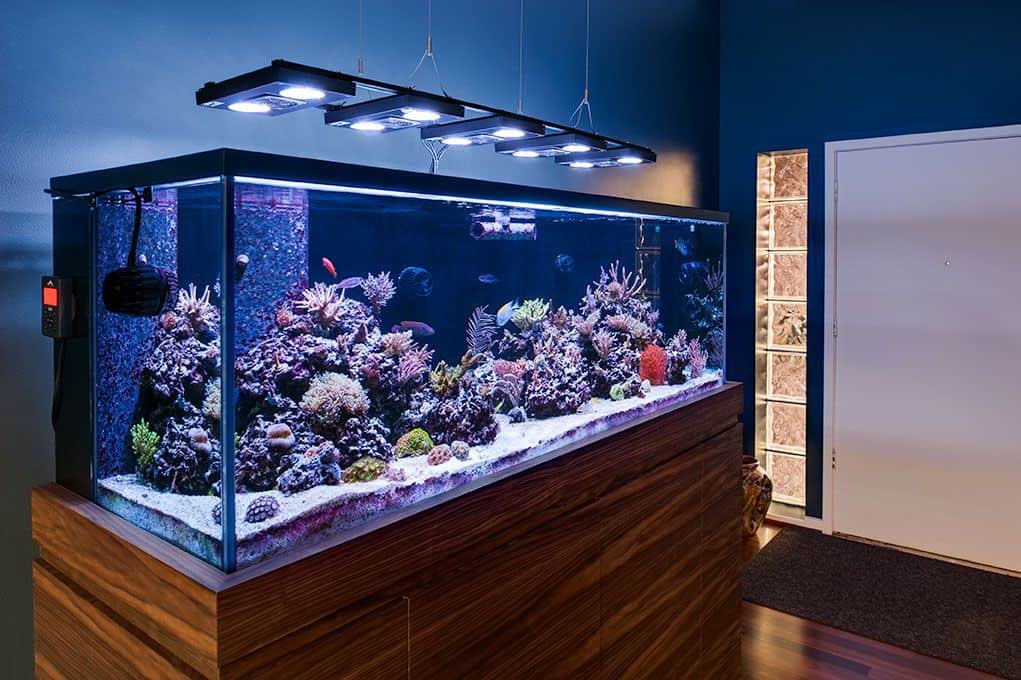
This is by far the most common type of move an aquarium will do. The tank is not moving too far away and the owners usually want to keep all of their livestock but I can tell you from experience
Many people chose this time to do an aquarium upgrade and having a new aquarium to install at the new location before the move is a great benefit! It also allows you to plan and create the setup of your dreams!
This article is part of an ‘Aquarium Moving’ series:
* If you are looking to move an aquarium temporarily or within your home – CLICK HERE
* If you are looking to move an aquarium across the state or country – CLICK HERE
Using my experience of moving many aquariums safely I wanted to create this series to help you make a plan for when you next need to move your pride and joy!
All links to products in this article take you to Amazon.com
BIG TIP: I can tell you from experience to NOT move your aquarium the same day as you are moving your house! The stress and hassle it causes are immense. I have seen arguments, dropped possessions, and rushed installations that are regretted later! Always try and move the Aquarium on a separate day to house moving day!
If you have to move on the same day then you will need a team to move your house possessions and a team just to move your aquarium – Unless it’s a small tank, then just yourself. A reputable aquarium maintenance company within your town will be able to complete this task. However…If you wish to move the aquarium yourself here is my advice from being part of the professional aquarium maintenance company doing many aquarium moves across town.
Planning an Aquarium Move
Planning an aquarium move needs to begin weeks beforehand. Things to consider are temporary storage containers, water transport, the same or new sand, having all the consumables & tools ready, arranging helpers or movers, and forming a list of things to be done before, during & after the move.
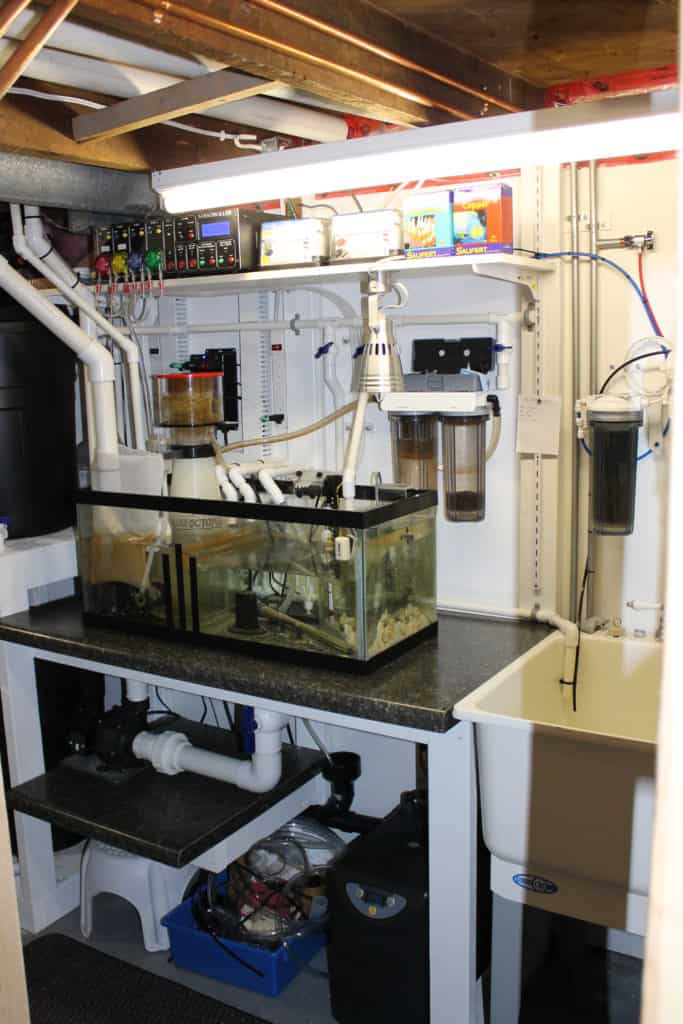
This is the part that can make a tank move easy and stress-free or the worst day of your life! Depending on what is happening to your aquarium, will depend on when you need to start thinking of your plan. How big is the aquarium? How much livestock and coral does it contain? Does the filtration system require a large plumbing installation?
You need to sit down and start writing down every idea that you can think of about your tank move. Just brainstorm, no idea is useless at this point.
Spend a few days making this list. New ideas may pop into your head and you need to just make a note and add them to the brainstorm.
Ask friends and family to think of ideas. They may have a different view to you and suggest some really good things you may not have realized.

Once you have your brainstorm, start to try and lay out the ideas in a logical order following this timeline:
- One month before the move
- Two weeks before the move
- One week before the move
- The day before the move
- The day of the move
- The day after the move
- The week after the move
- Two weeks after the move
This will start to give you an idea of what needs to be done and when so you don’t forget anything. This will also allow you to allocate the correct amount of time to each task. Don’t forget to add buffer time!
The best way to plan this is to work backward from each day and formulate the plan backward. this will allow you to get the steps in the correct order.
Below is how we have done many successful aquarium moves so use it as a template and adjust to your own aquarium:
Two to Three Weeks Before Aquarium Moving Day:
The main thing you need to acquire here are the moving supplies for the livestock. You have two choices:
- Pack everything into bags like they do at the fish store, or
- Build some transport containers to ship bigger quantities in one container
For this type of move and to prevent repetition we will focus on packing livestock into bags like the fish store does, but if you wish to see how to build some fish transport containers, have a read over the third article in this series ‘How to Move an Aquarium Across the State or Country’.
For packaging your livestock you are going to need to acquire the following:
- Various-sized bags or containers for your fish, invertebrates and coral frags – Double or triple bagging is a must! – You can find fish bags HERE
- Rubber bands
- Insulated livestock shipping boxes – View a large selection of sizes HERE
- Aquarium Air Pump – Filling livestock bags with air will increase the survival rate
- Newspaper for packing
- Labels – For livestock bags
- Sharpie Marker – For labels
- Packing Tape
- Heat or Cool Packs – Climate Dependant – Taped to the inside of the lid, do not allow the pack to touch any bags! – Just get the small ones, large ones create too much heat!
These are only needed if you are moving in the absolute extremes of summer or winter!


- If you are installing a new aquarium or doing a major installation revamp, begin to acquire all the plumbing, electrical, and carpentry supplies and tools
- Formulate a design of where the new/existing aquarium will go – Try and view the new house to look at the electrical outlets and possible water/drain locations if required
- Take photos and measurements so you can design a layout if required. Sumps in aquarium stands are much simpler to move!
- Do the flooring, walls, and trim need to be changed/painted before the aquarium gets installed? – Make a plan for that and get it done way before moving day if possible!
- Does the new location need floor support?
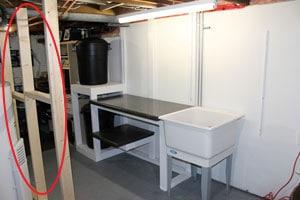
One Tip is that if the existing/new aquarium is large, get into the basement of the new house and inspect the underside of the floor and see if the structure can take the load.
My house is 100 years old so I reinforced the floor joints with a simple 2×4 frame.
Full aquariums can be ridiculously heavy:
55 Gallon Aquarium = 471lbs / 212 kg when filled
120 Gallon Aquarium = 1,027 lbs / 462 kg when filled
300 Gallon Aquarium = 2,568 lbs / 1156 kg when filled
Even empty aquariums are heavy – Make sure you have enough bodies to carry the aquarium.
75 Gallon Glass Tank = 100lbs Rough Empty Weight
120 Gallon Glass Tank = 190lbs Rough Empty Weight
300 Gallon Glass Tank = 446lbs Rough Empty Weight
You can rent suction cups and dollies from most Tool Rental Stores.
For more helpful information on the weight of aquariums and things to consider please check out:
How Much Does An Aquarium Weigh?
- If additional help is required, get asking – family, friends and local aquarists are all great
- Triple check your plan to ensure nothing has been left out!
One Week Before Aquarium Moving Day:
- All the packing supplies above should have arrived by now
- Begin to assemble your moving supplies:
- Rubbermaid Totes & Bins are great for livestock storage
- Clean all storage totes and bins thoroughly using vinegar and rinse well with water!
- Obtain a heater, Powerhead and Thermometer for each tote/bin:
- 50W Heater for 5-10Gal Containers – Find them Here
- 100W Heater for 10-20Gal Containers – Find the Here
- Powerheads – Find them Here
- Digital Thermometers (I like the ones with alarms to notify you) – Find them Here
- Dr. Tims One and Only Nitrifying Bacteria Culture (Fresh & Saltwater Versions) – Find them Here
- Ammonia, Nitrite, and Nitrate Test Kits – I recommend Salifert – Find them Here
- Get some big fish nets – Makes catching fish so much easier!
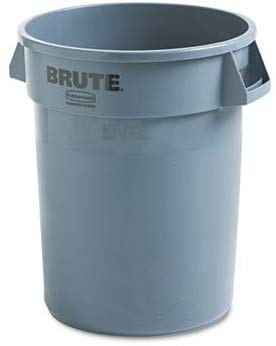
- Get some clean, old salt buckets or 5 Gal pails from a hardware store
- Collect old towels & cardboard to walk on – You will use lots!
- Collect salt and/or new RO/DI water filters for the initial fill
- Get new sand or gravel for your aquarium – Trust me its worth it!
You can find a huge substrate selection Here
To Calculate how much sand you will need to use Bulk Reef Supply’s Handy Calculator – Here
- Ensure you have all the necessary tools, materials, and construction supplies you will need for the installation
- Slowly start to reduce the feeding amount to help control Ammonia during shipping. Fish especially can go weeks without food so reducing the amount they eat is not going to hurt them
Two Days Before Aquarium Moving Day:
This is where there can be several plans of attack depending on the new house situation. If you have access to the new house this is what I recommend:
At the New House:
- Get any painting or renovations completed to the room housing the aquarium, even if you just paint the wall & trim the aquarium will go against!
- If you are installing a new aquarium:
- Get it leak-checked (Outside!), installed, plumbed, and ready to go at the new house
- Fill the aquarium with the new substrate, fill it with (salt)water and turn on all the equipment
- Leak check all the plumbing
- Treat with the recommended dose of Dr. Tims One and Only Nitrifying Bacteria Culture
- If there is no new aquarium:
- Just prepare the new water for your old aquarium. In clean, Rubbermaid trash cans get some water made up and get the heaters and pumps working to get it mixed and up to temperature. Place lids on the bins so your water will be ready & make sure there is enough water for the entire aquarium system
- Make sure to keep it/them out of the way, but close-by to allow for easy aquarium installation
At the Old House:
- Cease feeding all the fish
- Set up a long table next to the aquarium – This will help to set up a production line for bagging and boxing fish, invertebrates, and coral
- Place down towels on the table – It will get very wet during the bagging process!
- Get all the packing supplies laid out in logical order:
- Bags, rubber bands, sharpie marker, insulated boxes, newspaper, heat/cool packs, packing tape, another sharpie marker
- Have several Rubbermaid Totes ready under the table to place the Live Rock & corals in
- Have clean cloths ready to dampen with aquarium water and cover the Live Rock & corals
- Pack up all the aquarium supplies, food, tools, and medications that will not be needed – Label the box
The Day Before Aquarium Moving Day:
- Confirm the moving truck for the aquarium and helpers are still available
- Get all the cardboard and towels down and ensure the exit routing is all clear
- Do a 25% water change to help remove any last traces of nitrate and ammonia
- Do a full panel of water parameter tests
- Make a note of the current water parameters to ensure new water matches upon re-installation
- Check the new house to ensure the new aquarium and/or water is ready – Temperature and salinity (if required)
- If house moving day has already happened, ensure all the doors and routing is clear of obstructions and trip hazards to the new aquarium location

- Place cardboard and towels down on the route inside the new house to protect from drips and shoes
- Have a good dinner and get a good night’s sleep! Tomorrow could be a long day!
On Aquarium Moving Day:
- Get up early and have a good breakfast!
- Begin to remove approx 50% of the water into several 5 gal pails/buckets with lids – This water will go into the aquarium at the new house
- Begin by removing the aquascape rock or decorations
- Live Rock (if applicable) to be placed in totes under the table. Carefully cover with cloths dampened in aquarium water. Ensure each rock is stable in the tote to prevent coral damage. A sheet of Egg crate on the base can help stabilize
- If required, insert heat/cool packs into ZipLock bags and tape to the underside of the lid, place lid on tote
- Don’t fill the totes too much, they get heavy quickly! Protect your back!
- Catch fish and place similar species in the same bag. Large fish in one bag. 2 smaller fish in one bag, max!
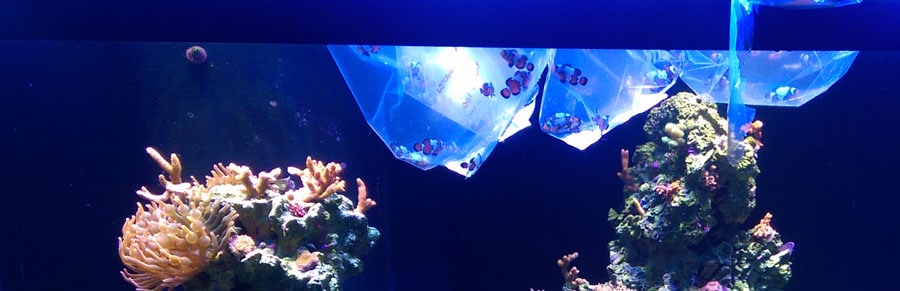
- Double bag and fill bag with air from the air pump. Secure bags with rubber bands
- Place bags into insulated boxes, fill voids with newspaper
- If required, insert heat/cool packs into ZipLock bags and tape to the underside of the lid, place lid on the insulated box, and label the box then place the box to one side
- Repeat until all livestock is sealed away in boxes
- If a new aquarium awaits at the new house, get going with fish and leave friends to dismantle the old aquarium, substrate, water, and dispose of – Don’t forget to take the 5gal pails of old tank water to the new house!
- If the old aquarium is moving to the new house, now is the time to give it all a really good clean while removing the old substrate and dismantling
- I find it easy if someone dismantles, passes the part to a helper and they clean and dry it.
- Remove all remaining water and substrate and dispose
- Break down the aquarium and pack into the moving vehicle
Take time to have a break, eat, sit down, and relax before driving to the new house! There is still a long day still left to go!
- Upon arrival at the new house, if the aquarium is all ready then great, if you brought the old aquarium, get it installed, leveled, plumbed, wired and ready for livestock.
- Check water parameters of new aquarium water or water in the Rubbermaid bin/s you prepared a few days before.
- Ensure the parameters match your old aquarium water EXACTLY!
- If the new aquarium is full of water, turn off equipment and remove 50% of the water and store in a Rubbermaid trashcan
- Remove Live Rock from the totes and carefully place on the glass bottom
- Complete the aquascape and move NEW substrate into position around the Live Rock
- If doing this in the new tank, the water will become cloudy!
- If it is the old tank, remove each cloth slowly as you build the aquascape
- Fill a spray bottle with old tank water and use to dampen rock and coral if they start to dry up
- Add the pails of old tank water to the aquarium
- This old water will help minimize the mini nitrogen cycle that your aquarium will go through over the next week or so.
Because your livestock are going into a new environment I highly suggest you acclimate them just like you did when you bought them home for the first time.
If you need any tips on fish acclimation check out this article. It works for freshwater too, just leave out the salt parts:
How To Acclimate Saltwater Fish
- Begin to slowly acclimate each fish over 30 minutes and add your livestock with the most aggressive and territorial fish going in last
- Top up the aquarium to its normal running level with the new water removed or prepared earlier
- Turn on all remaining equipment now water level is full
- Reinstall the lights and canopy and leave the lights off for the rest of the day
- Do not feed the fish
- Add in a recommended dose of Dr. Tims One and Only – This will help kickstart the growth of the nitrifying bacteria
- Have a thorough inspection of all the equipment, pipes, connections, and cables to ensure everything is working perfectly
- Check water temperature and salinity
Fire up the grill and give all your helpers a well-earned steak and a few cold ones!

The Day After Aquarium Moving Day:
- Inspect all the equipment and ensure it is all running as it should with no leaks
- Replace the mechanical filter media to help clean up the water
- Do a full panel of water tests, especially ammonia
One Tip is that your aquarium will probably go through a mini nitrogen cycle. Make sure you begin to test for ammonia, nitrite, and nitrate daily for the next week or so to monitor any spikes.
- Keep the lights at 50% for today but allow them to ramp back up 10% each day until back at your full setpoints. If lights are not dimmable, adjust the length of ‘On Time’ each day by 10%
- Do a very small feed to the fish and check every fish for signs of distress and appetite
Two Days After Aquarium Moving Day:
- Do a 10-20% water change
- Replace the mechanical filter media as the water should now be clear
- Begin to add some chemical media back into your media reactors if you have them installed. Up to 50% works fine.
- Keep testing your water and monitoring for signs of distress
One to Two Weeks After Aquarium Moving Day:
- Slowly begin increasing feeding and light schedules back to their original amounts
- Remove any fish that show signs of distress and place them into quarantine
- Begin your regular maintenance routine
- Monitor for signs of high nitrite, nitrate, or ammonia and do a water change if values begin to rise too high
If you are painting throughout the rest of the house try and keep the room sealed off to the aquarium. Also, be sure to run Activated Carbon until several weeks after and painting and renovations are complete. This will help remove any pollutants from the air that found their way into the water.
I hope you found this helpful and gave you some ideas on how to plan your move!
With you thinking about moving an aquarium you may find these articles helpful too:
- Where To Put An Aquarium – Tips No One Tells You!
- Is Tap Water Safe For An Aquarium? Maybe. Find Out Here!
- Reef Tank Aquascapes: 15 Stunning Design Tips
- Reef Tank Mistakes: 18 Problems That Are Easily Prevented!