RECENT ARTICLES

Aquariums Are Heavy, But How Much Do They Weigh?


When I was in my teens and early into my aquarium journey I realized how much aquariums weigh through a near catastrophe!
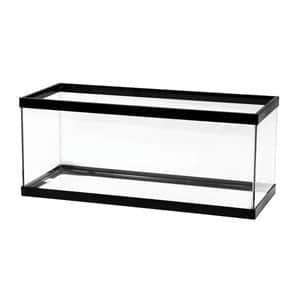
I had purchased a small 25 gallon aquarium as an upgrade for my Tropical Fish and sat it on top of my drawer unit, just like the smaller aquarium before it. No problems, right!?

Saltwater aquariums weigh 8.56 lbs or 3.88kg per gallon and 2.26 lbs or 1.03kg per liter.
Freshwater aquariums weigh 8.34lbs or 3.78kg per gallon and 2.20 lbs or 1.00kg per liter.
The empty weight of the tank, stand, canopy, substrate, and rock is in addition to the weight of the water.

My little 25 gallon freshwater aquarium weighed in at close to 200lb. and my cheap set of drawers were not happy! From that point on, every aquarium I owned had the manufacturer’s recommended stand!

Aquarium Water Weights

Saltwater Weighs:
8.56 lb. / 3.88 kg Per US Gallon
2.26 lb. / 1.03 kg Per Liter

Freshwater Weighs:
8.34 lb. / 3.78 kg Per US Gallon
2.20 lb. / 1.00 kg Per Liter

Below is a guide to glass saltwater and freshwater aquarium weights by volume:

AQUARIUM
VOLUME
SALTWATER
WEIGHT
FRESHWATER
WEIGHT
EMPTY
WEIGHT
5 Gal / 19 liters43 lbs / 16 kg42 lbs / 19 kg7 lbs / 3 kg
10 Gal / 38 liters87 lbs / 40 kg84 lbs / 38 kg11 lbs / 5 kg
15 Gal / 57 liters128 lbs / 58 kg125lbs / 56 kg19 lbs / 9 kg
20 Gal / 76 liters172 lbs / 77 kg167 lbs / 75kg25 lbs / 11 kg
25 Gal / 95 liters214 lbs / 96 kg209 lbs / 94 kg32 lbs / 15 kg
30 Gal / 114 liters257 lbs / 116 kg250 lbs / 113 kg42 lbs / 19 kg
35 Gal / 133 liters300 lbs / 150 kg292 lbs / 131 kg46 lbs / 21 kg
40 Gal / 152 liters342 lbs / 154 kg334 lbs / 150 kg56 lbs / 25 kg
45 Gal / 170 liters385 lbs / 173 kg375 lbs / 169 kg68 lbs / 31 kg
50 Gal / 190 liters428 lbs / 193 kg417 lbs / 188 kg70 lbs / 32 kg
55 Gal / 208 liters 471lbs / 212 kg459 lbs / 206 kg78 lbs / 35 kg
65 Gal / 246 liters 556 lbs / 250 kg542 lbs / 244 kg90 lbs / 41 kg
75 Gal / 284 liters642 lbs / 289 kg626 lbs / 281 kg98 lbs / 44 kg
90 Gal / 341 liters770 lbs / 346 kg 751 lbs / 338 kg135 lbs / 61 kg
120 Gal / 455 liters1,027 lbs / 462 kg1,001 lbs / 450 kg191 lbs / 87 kg
150 Gal / 569 liters1,284 lbs / 578 kg1,251 lbs / 563 kg281 lbs / 127 kg
180 Gal / 682 liters 1,541 lbs / 693 kg1,501 lbs / 676 kg282 lbs / 128 kg
210Gal / 796 liters1,798 lbs / 809 kg1,751 lbs / 788 kg343 lbs / 156 kg
240 Gal / 910 liters2,054 lbs / 924 kg2,002 lbs / 901 kg365 lbs / 166 kg
280 Gal / 1,061 liters2,397 lbs / 1079 kg2,335 lbs / 1051 kg402 lbs / 182 kg
300 Gal / 1,137 liters2,568 lbs / 1156 kg2,502 lbs / 1126 kg446 lbs / 202 kg

Once you have the weight of the water you will also need to add the empty weight of the aquarium, the stand, the sand and the Live Rock/Dry Rock you add to the system.

How to Accurately Calculate Aquarium Weight & Volume

Calculating the weight and volume of your new aquarium is really simple and is essential for you to know. Knowing the weight is one part, but when it comes to dosing and treating your aquarium with medication, you need to know the volume in your system.

Knowing how to calculate volume will also help if you add on a future sump or frag tank to your system.

Multiply Length x Width x Height

Aquarium Dimension Guide

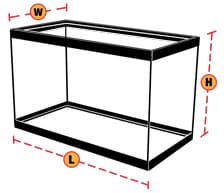
Calculating Aquarium Volume:

Gallons:

48″ x 18″ x 21″ = 18,144 Cubic Inches
18,144 x 0.004 = 73 Gallons

Litres:

122cm x 46cm x 53cm = 297,436 Cubic Centimeters
297,436 / 1000 = 297 Liters

Calculating Aquarium Weight:

Pounds:

Volume ( Gallons ) x 8.56 for Saltwater
Volume ( Gallons ) x 8.34 for Freshwater

73 Gallons x 8.56 = 625 lb. Saltwater
73 Gallons x 8.34 = 609 lb. Freshwater

Kilogrammes:

Volume ( Litres ) x 1.024 for Saltwater
Volume ( Litres ) x 1.000 for Freshwater

297 Litres x 1.024 = 304 kg for Saltwater
297 Litres x 1.000 = 297 kg for Freshwater

Calculating Custom Shaped Aquariums

It’s back to Math Class Ladies & Gentlemen! Who can remember areas and volumes of shapes? It’s just the same here!

  1. Calculate the area
  2. Calculate the volume
  3. Calculate the weight

Don’t worry I’m not going to be cruel and make you get out the pen, paper and calculator! There is an awesome calculator that does it all for you!

Click Here to visit the Volume Calculator

Once you have your volume, you can use the equations above to help you find out the weight. Don’t forget to add in the weight of your sump if that’s in the stand too!

Floor Strength Required For An Aquarium

When I was in the planning stages of my aquarium I knew it was going to be heavy. It’s only a 75 gallon aquarium, but I knew it was going to weigh around 650 lb., add the weight of the stand, sand, and rock, it would be close to 750-800 lb.

The other consideration I had was that people like to look at your aquarium when you have guests, so now you have 4- 6 adults standing in the same area and you have now added another 800-1200 lb. in weight.

A total weight of up to 2000 lb. within an 8ft square area of my floor. I’m no structural engineer but I wanted to know the floor in my 100-year-old house would take the load.

North American Building Code

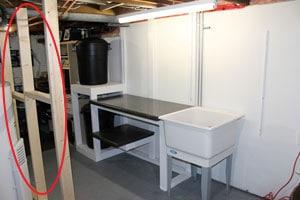
Below my aquarium, I had a basement with my floor joists being 12″ apart. I researched and found that by placing the aquarium as close to the outside wall this would be the strongest point of the joists.
Spanning as many joists as you can helps to distribute the load too.

A check of your local building codes will help you ascertain exactly what your floor should be able to support, but in general 12″ spans should support around 40 pounds per square foot. This is a theoretical load averaged over the entire floor within your room.

Your aquarium only takes up a small portion of the floor space and depending on where that floor space is, you may need to support the joists from below or have additional structure added to your joists.

If you looking to install a large aquarium I would suggest you contact a structural engineer to come and survey the location just to be sure.

How To Support Floor Joists For An Aquarium

Most aquariums up to the 120 Gallon size should be fine in most homes. Once you start going up from that size there are things you can do to help support the floor under your aquarium, provided you can access the area of course!

  • Place the aquarium close to an outside wall
  • Place your aquarium across as many joists as you can
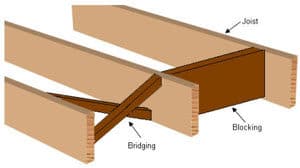
  • Install blocking or bridging between your joists to prevent twisting
Joist Blocking and Bridging

Joist Sistering
Joist Sistering

  • Install Sister boards to increase individual joist strength
  • Install support beams and posts under joists
Floor Joist Support
Floor Joist Support

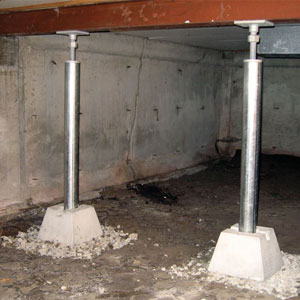
For my setup, I built an additional 2×4 frame and placed it under my joists to help support the load, just in case!

Aquarium Joist Bracing

Aquariums In Condo’s and Apartments

There are many aquarium owners who live in tower blocks who regularly ask this question. Is my aquarium too heavy for the concrete floor?
As we all know concrete is incredibly strong and the floors of a residential and commercial tower block are built to suit.

During my research, all I have been able to find is that they must meet the same 40 pounds per square foot loading as residential homes. I have personally seen large aquariums over 120 gallons in offices and workplaces with no problems, but that doesn’t mean anything!

Two things to consider with tower buildings:

  • Have a structural engineer come and survey your space if you’re planning a big aquarium
  • Check with the rules and regulations of the tower block owners. They may limit the size of the aquarium you can install and may require you to have additional insurance to cover any leaks or damage.

Other Considerations

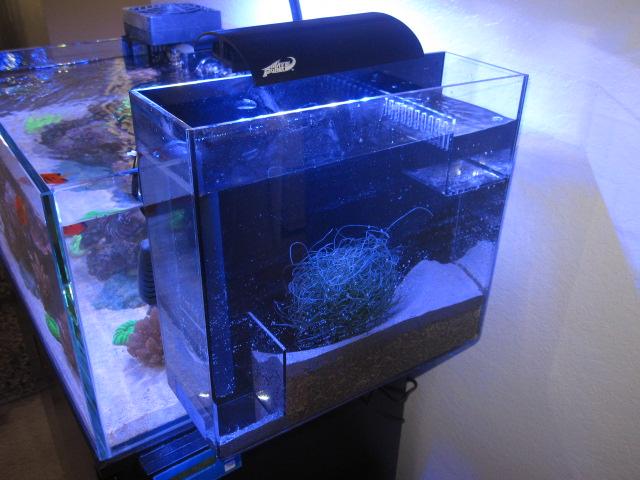
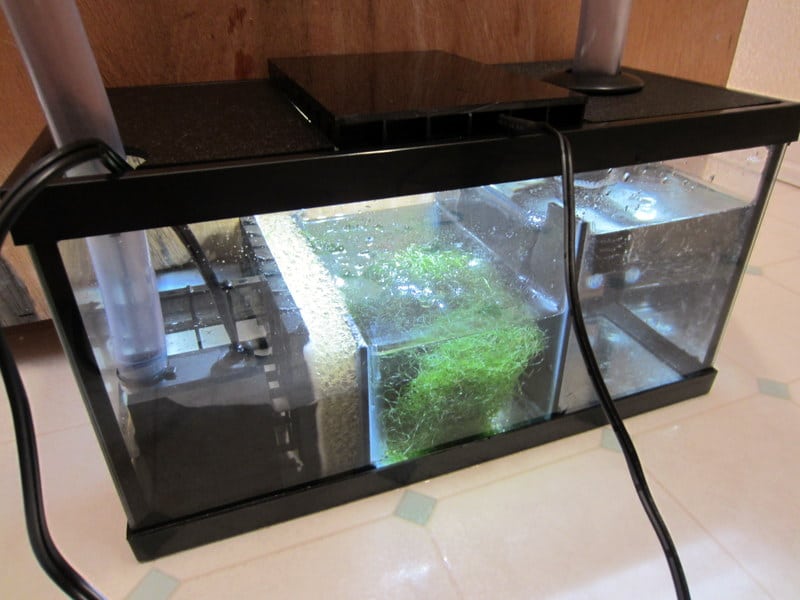
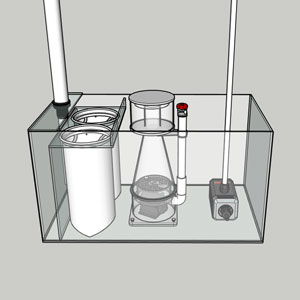
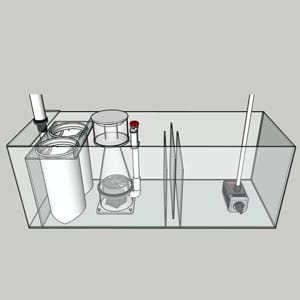
Many aquarium owners add a sump to their aquarium and where do many of these sumps get installed? In the stand, under the aquarium!

Now you have just added another 50 gallons of water and 400 lb. to your 150 gallon reef tank system!

In all my years in this industry, I have not come across anyone who’s floor has collapsed, but that’s not to say it has not happened. Like everything else in this hobby, Planning Is King!

The bigger the tank you can afford to run, the healthier and more stable it will be for its inhabitants but, make sure your floor is able to take the load. The last thing you want is to find out 5 years down the line the floor joists have started to split under your tank!

One last thing to consider is if you are in an earthquake zone. Is your tank stable, will it rock, will a dynamic load of a rocking tank add additional stress to your stand and floor structure?

These are just somethings you might want to consider when planning your next tank, as we all know we don’t go down in tank sizes ;D

Further Reading

You may find the following articles helpful too:

Refugiums: What Are They For?


Many times I see on the forums and Google Searches of beginners to saltwater aquariums asking ‘What is a Refugium’ and ‘What Does It Do?’

Refugiums are small tanks added to a reef aquarium that are used to grow micro-fauna and macro-algae that feed the livestock and help consume excess nutrients that nuisance algae use to grow. They can be easily installed in a sump or hung on the side of the aquarium.

These ingenious add-ons to your aquarium provide an area to grow algae out of sight of the main display and help prevent your glass turning green or have nuisance algae overtaking your beautiful aquarium.

What Is An Aquarium Refugium?

A refugium is an area dedicated to growing algae and microorganisms in a controlled way. The goal of a refugium is to replicate the natural reed beds found in most reef colonies in the wild.

Most reefers with a sump will dedicate an area specifically to a Refugium or ‘Fuge’ as it is most commonly known, or, for those aquarium owners without a sump, you can purchase ready-made Refugiums that can hang onto the side/back of a tank.

Hang On Refugium
Hang On Refugium
In Sump Refugium
In Sump Refugium

The Fuge is usually filled with either a Deep Sand Bed, ‘Miracle Mud’ or Ceramic Bio-Media Plates with various forms of macroalgae placed on top. The refugium is lit with a light that is of the correct light spectrum to encourage plant growth, thus allowing the algae in the Fuge to grow and consume nutrients at a rapid rate.

The more algae you can grow out of sight in the Fuge, the less nuisance algae you will have growing in your main display tank. The other main objective is to act as the ‘Refuge’ to the Microfauna. Microfauna are microscopic organisms that can play a vital role within the aquarium system.

They help to clean the water, consume nutrients & detritus, and feed the inhabitants in your display tank when the water flow catches them and flushes them into the main display tank.

Some examples of Microfauna are:

  • Copepods
  • Amphipods
  • Rotifers
  • Phytoplankton

What Do You Put In A Refugium?

There are 3 main things that go into a Refugium:

  1. Base/Substrate/Rock
  2. Macroalgae
  3. Microfauna

Lets talk about each one so you understand it’s role.

Base/Substrate/Rock:

Deep Sand Bed – This is a layer of sand approx 6-8″ deep in the bottom of the Refugium. It allows Anaerobic Bacteria to colonize and convert Nitrates into Nitrogen gas which is slowly released.

This is an old school way and is slowly becoming less popular due to the fact that the sand bed will trap detritus over time and if the gas doesn’t escape, it could potentially build up to become toxic.

Live Rock Rubble is usually added on top of the sand to help provide additional surface area for the bacteria to colonize.

>> Find Substrates Here at Amazon.com <<

Refugium/Mineral Mud – This is a thick mud that you place on the bottom of the refugium. It is a great product for when you want to plant sea grass or mangroves into your Fuge. The mud is full of trace elements that help to promote the growth of the plant inserted into it.

>> Find Refugium Mud Here at Amazon.com <<

Bio-Media Blocks, Balls & Plates – These are a relatively new product released in the last 5 years and are really growing in popularity. They are a ceramic media that is full of tiny holes and passageways throughout each piece.

They are extremely porous and provide an enormous surface area for Anaerobic Bacteria to colonize, just like in the Deep Sand Bed. These, however, do not trap detritus like a Deep Sand Bed.
These are my recommendations for a refugium substrate.

>> Find Bio-Media Here at Amazon.com <<

Bare BottomMany Reefers like to keep their Refugium clean and have no substrate. The use of just Live Rock and a ball of Cheato is enough for them. While doing weekly maintenance they just blast off any settled detritus on the Live Rock using a turkey baster and that is all.

Macroalgae:

Cheatomorpha ( Click to see more at Amazon.com ) – More commonly known as Cheato, is a great algae for your Refugium. It is a fast-growing, high nutrient-absorbing plant. It grows into a thick mass similar to Wire Wool which creates a great habitat for growing Pods ( Microfauna ). Be sure to shake out the pods before disposing of half the algae ball – More on that later 😉

Cheatomorpha

Caulerpa ( Click to see more at Amazon.com ) – Another very popular algae to add to your fuge. It is fast growing but will stick to your glass and Live Rock. It can come in many forms; Ferns, Grasses, Grapes etc. This plant, however though can stop reproducing and release the nutrients back into the water. Be sure to keep harvesting it to encourage it to stay sexual.

Caulerpa

Mangroves ( Click to see more at Amazon.com ) – These are rapidly growing in popularity due to the high nutrient consumption abilities. Used with sand or the mud, they grow fast and are one of the most recognized aquatic plants in the wild. Just insert, let them grow and keep salt creep off their leaves and they are happy. No disposing of them.

Mangroves in Sump

There are many, many types of marine algae you can add to your refugium with great results. Above are the most popular within our hobby.

Microfauna:

Microfauna are microscopic creatures that grow and populate with your aquarium and Refugium. You will see these little critters scurrying around or swimming, especially at night. A healthy microfauna population is a great thing to encourage in your system!

Copepods ( Click to see more at Amazon.com ) – These guys are by far the most common critter in our worlds oceans. They range from 0.2mm up to 10mm and there are 1000’s of species.
Copepods are great for consuming plant matter, decaying fish waste and nuisance algae such as diatoms.

They also get eaten by your inhabitants and a healthy ‘Pod” population is an absolute must if you wish to keep Mandarin Dragonette’s. It is all they eat and they consume Pods at a rate of one every 5 seconds, if they can find them!

Copepod

Amphipods ( Click to see more at Amazon.com ) – Amphipods in your aquarium are the prawn-like looking creatures that grow up to about 10mm. These guys also feed on algae and detritus and help to reduce Nitrates in doing so. These are good meaty meal for any passer-by, they breed fast and are a great addition to your Fuge Pod Community!

Amphipod

Rotifers ( Click to see more at Amazon.com ) – Rotifers are one of the tiniest critters you may find in your tank. At 0.5mm in length they will appear as tiny specs of dust, but they are working! Their diet of dead and decaying matter make them a super janitor in all those microscopic places in your aquarium system.

Rotifers

Phytoplankton (Click to see more at Amazon.com ) – This species of marine fauna is made up of simple celled plant life on a microscopic level. Because they are plant based they photosynthesize so they consume Carbon Dioxide and expel Oxygen when subjected to light. They are fed on by the organisms listed above as well as filter feeding corals within your aquarium.

Phytoplankton

How Does A Refugium Work?

Water from the display tank is fed through the refugium part of the sump or is pumped into the ‘Hang-On’ Refugium, then fed back to the display tank.

The algae that is most commonly used in a Refugium is a Macroalgae called Cheatomorphia or ‘Cheato’ for short. This algae grows quick and does not stick to the glass. The algae that sticks to your rock and glass is a form of Microalgae.

The idea is to place a ‘Ball’ of this Cheato in your Fuge and let the water flow through it to allow the Cheato to consume the same nutrients that your nuisance Microalgae is also trying to consume.

A plant growing light is suspended over the Refugium, or placed against the glass in an All-In-One system (DIY modification required like this at Nano-Reef.com) to encourage the Macroalgae to grow as fast as possible to consume as many nutrients before the nuisance algae have time to consume them.

As the algae grows, you harvest and remove half of the ball or mass of Cheato and dispose of it. What you have now done is allowed the Cheato to consume the nutrients used by the nuisance algae and then physically removed them from the system. The Cheato now has more room to grow again and consume more nutrients.

Repeat and Repeat…

The Microfauna side of the Refugium is allowing these tiny organisms the space to reproduce without being picked off by fish, shrimp, crabs, and corals. Think of this as an organism factory. If you can keep a steady stream of organism growth, you will have tiny critters constantly working on cleaning the water, aiding the beneficial bacteria in your biological filter and then finding their way into the display tank as free food.

Does Every Aquarium Need A Refugium?

No, you do not! There are many successful saltwater aquariums out there that do not use a Fuge. Many argue a Fuge is not required and they may be right. BUT, there are many, many experienced aquarists out there who disagree.

I for one am an advocate of installing a Refugium because of the benefits it does bring. Many people say you need a ‘HUGE’ refugium for it to have any effect, but to me, having one is better than not having one and I had the room to easily add one.

There are some other benefits that having a Fuge will add to your system:

  1. The Cheato will consume Carbon Dioxide from the water and release Oxygen as part of its natural photosynthesis. Oxygen is always welcomed in a reef aquarium.
  2. It provides a safe haven the microfauna to populate and multiply without being eaten by your fish. As the pods get dragged out of the Cheato by the water flow, they end up in the tank as free food, or an endless supply of food if you have a Mandarin Fish and a healthy Pod population.

Can You Buy Or Make A Refugium?

You can do both! There are some awesome manufactured Refugiums out there in many shapes and sizes depending on your requirements.

You can view a good selection of Easy-To-Install Refugiums HERE at Amazon.com


These are super easy to install, light & run and will be a great benefit to your system.

As for DIY, the designs are endless! If you have an All-In-One system like a Biocube, Redsea Max or similar you can scrape off the paint off the back glass and install a light as these owners have done here at Nano-Reef.com.

You can purchase a sump with an area dedicated for a Refugium and use a small pump to move water to it or tap off a Return Pump Manifold to feed it.

or

You can create your own Fuge in your sump by having a glass piece cut and silicone it in to create your Fuge area. This is how I created mine, then I fed it off my manifold.

A Fuge does not need to be complex. Just a separate area with a little flow to grow Cheato and push your critters out into the main display tank.
You could even use a Rubbermaid container and have it drain into your sump. Anything will work!

What Kind Of Light Do You Need For A Refugium?

As with everything in this hobby you can find a cheap solution or an expensive solution to accomplish a given task. I have seen $10 setups work just as good as $300 setups, so it is up to you on how you want to install your Fuge. Some people want nice and shiny, and some people prefer Duct Tape and Ty-raps!

Many of the aquarium lighting manufacturers have lights dedicated to growing algae and they come in many shapes and sizes. Some will sit on top, some will be suspended over top and some can be stuck to the glass. Depending on your design, you will be able to find a solution that fits your layout and budget.

For my installation, I have a shelf sitting above my sump that holds my Aquarium Controller and all the items I need to keep out of reach of my children. This provided me the perfect place to install a fixed hanging light. I bought my fixture from Ikea for $15.

The bulb I use is a plant growth bulb which you can find HERE at Amazon.com and it works awesome. I get great growth from my Cheato. I then have my light on from 8pm to 8am using just a simple Plug-In-Timer like this:-

Plug-In Timer

Refugium Reverse Lighting Period – What Is That?

Photosynthesis is the natural cycle of plant life. Just like plants, when your aquarium inhabitants are awoken by the sun (Lights) they begin to consume nutrients and expel waste. Corals, aquarium inhabitants and algae are just the same.

During the day when your aquarium lights are on your tank life is consuming and expelling at a large rate, just as mother nature intended. Once the lights go out and everyone goes to sleep, the consumption rate reduces. What many aquarists see then is a rise in the Ph of their aquarium water.

By placing the lighting schedule of your refugium to be lit during the night it will allow photosynthesis and the awoken period of the microfauna to be alive and kicking. This will help to prevent the Ph from dropping as much. You will still get a Ph drop because your Fuge is nowhere near the size of your display tank, but again every little helps!

How Do You Install A Refugium?

The Fuge is meant to be as simple as possible. If it is a Hang-On type purchased from the store, you just hang it on the back of your sump or display tank, fill it, prime the pump, put the light on the timer, fill it with the goodies mentioned earlier and leave it to do its thing.

If its part of your sump then it even easier, just put in the goodies, light it and you are done!
It really is that simple and they add great benefits to your system.

Do You Need To Maintain A Refugium?

The only thing you need to do is every 2 weeks/month depending on how fast your Cheato grows is to rip the algae mass in half and throw that half away, that’s it, Finnito!

This is why adding a Fuge is an easy addition to make with great benefits and minimal work to you!

Further Reading

Are you looking to install a sump so you can add a Refugium? You can read all about sumps in my article:
Everything You Need To Know About Aquarium Sumps

Are you looking to add a sump to help reduce your Phosphates or Nitrates? These articles are full of great tips to help you lower both:
12 Ways To Reduce Nitrates In A Saltwater Aquarium
How to Lower Phosphates In Your Saltwater Aquarium
They worked for me!

Fish Compatibility Chart


Fish compatibility is a very important decision that needs to be made anytime you wish to add a new member to your aquarium. Fish that are enclosed in a small space with a species that is not compatible will lead to fights and squabbles that could lead to death or stress. Stress is a sure fire way to allow ‘Ick’ to creep into effect and spread to every member in your aquarium!

Aggressiveness also needs to be considered. While your aquarium is cycling it is a great time to plan your stocking wish list. You should always stock using your least aggressive fish first and your most aggressive fish last.

Always research any new fish before buying so you can provide the best habitat for that fish to thrive. Use the chart below to help you with your planning.

Saltwater Fish Compatibility Chart

Reef Tank Test Kits – Which Ones Do You Really Need?


If you are looking into test kits you must be well on your way to an amazing reef tank! Congratulations!

One of the first things you are GOING TO NEED when you set up your new aquarium is test kits. You will need these to monitor your water parameters during your tank cycle so you will know when it is ready for adding livestock. You will also need them to test weekly when you start adding corals.

Ammonia, nitrate, nitrite, pH, salinity & temperature test kits are needed to cycle a reef saltwater aquarium. Once corals begin to be added then calcium, magnesium, alkalinity, and phosphate test kits will be required to maintain perfect water parameters essential for a healthy saltwater aquarium.

I never had test kits when I was into freshwater as I never really needed to know what was going on with my tank. Just doing the regular weekly water changes kept everything in line. However, that all changed when I got into saltwater aquariums and the high cost of livestock came into play.

Salifert-Nitrate-Test-Kit

Salifert-Ammonia-Test-Kit

Salifert-Nitrite-Test-Kit

I personally love the Salifert range of test kits as they are PERFECT for knowing what is going on in your tank.

There is a test kit for every parameter you could ever need to monitor in your water, they are super simple to use and are explained very well in their instructions. These are the only kits I use!


Salifert test kits are recommended as the best test kit for saltwater aquariums by a vast majority of experienced reef keepers and myself. It’s the only brand I use!

You can find the Salifert Range of Test Kits Here at Amazon.com


I have tried other kits and found that they were either not accurate enough, too expensive or were a hassle to use.

Which Test Kits Do You Need When First Starting A Saltwater Aquarium?

When you first fill your reef tank with water you are about to enter into the ‘Cycling Stage’ and you will need to monitor every day or two to see how your bacteria are building and how the biological filter is growing.

I recommended 5 things you will need to buy to monitor the progress of your tank when you first set it up and begin its cycle:

Digital Thermometer

To ensure your tank temperature remains constant at the set temperature. Most saltwater tanks are in the 78-80°F or 25-27° C range. The is the best time to get your temperature steady before adding livestock.

I prefer a simple digital one like this one Here at Amazon.com

Refractometer

This simple tool is in every experienced reefer’s toolbox. It is used to monitor the salinity of the water daily, weekly to ensure the specific gravity of the water never fluctuates. You will need this when adding your salt to your batches of freshwater for your water changes.

You can find an inexpensive Refractometer Here at Amazon.com

Ammonia Test Kit

This is the first peak you will look for when cycling a tank. Ammonia is the source of food the bacteria will need to feed on and then multiply. You should start to see the Ammonia start to peak around the 7-10 day mark.

Find the Ammonia Test Kit Here at Amazon.com

Nitrite Test Kit

This will be the next spike you are looking for. This is the bacteria turning the Ammonia into Nitrite. You can see on the chart, as Ammonia begins to decline the Nitrite is rising.

Find the Ammonia Test Kit Here at Amazon.com

Nitrate Test Kit

The Nitrates are beginning to build and break down the harmful Nitrites into less harmful Nitrates. As you are testing every day or two you are waiting for the Ammonia and Nitrites to drop to zero, and then in a few weeks, the Nitrates should drop to zero as well.

Find the Ammonia Test Kit Here at Amazon.com


For more information on the Nitrogen Cycle of an aquarium please read my article Here.


Which Test Kits Will You Need When You Begin To Add Corals To a Reef Tank?

Not all corals will need you to monitor any extra water parameters but once you start to get into corals that grow by creating a hard shell or skeleton, you will need to start monitoring a few extra water parameters.

Here are a few coral types you will need to start monitoring for element consumption:

  • LPS – eg: Frogspawns, Hammers & Torches
  • SPS – eg: Montipora, Acropora, Millipora & Chalice
  • Clams – eg: Derasa, Maxima, Squamosa

Soft Corals like Ricordia, Mushrooms, Zoanthids, Toadstools do not really require monitoring. They consume very little of the elements and regular water changes will keep these happy.

The corals bulleted above, especially SPS, consume Calcium, Magnesium, and Carbonate (Alkalinity) to build their skeletons. They can only get these elements from the water and once your corals start growing and you buy more, they can consume at a rapid rate.

Up to a certain point, your water changes will keep up with the demand but you will get to a point where you need to add these elements by dosing to your tank daily to ensure the prime levels are maintained to allow your corals to continue to grow.

When adding corals to your aquarium you will need to monitor:

  • Ph
  • Alkalinity
  • Calcium
  • Magnesium
  • Phosphate – If this is high it will prevent your corals from growing. Important to monitor with SPS Corals.

How Often Do You Need To Test Aquarium Water?

When the aquarium is brand new testing water parameters should be done every day or two during the nitrogen cycle. Once the cycle is complete most aquarium owners will test at the same time once a week. If livestock begin showing signs of illness or stress then daily testing may be needed again.

During your tank cycle, test every day or two until you see both Ammonia & Nitrite spike and then drop to zero and Nitrates rise then fall below 5ppm, preferably at zero. Nitrates in reef tanks are not good and you should always try to aim for zero or as close to it as you can.

When my reef was running without any hard corals I would just test for nitrates once a week before the water change.

Once I started adding LPS and SPS I would test once per week to monitor Nitrates, Calcium, Alkalinity, and Magnesium. If I found the alkalinity was being consumed rapidly I would test Alk and CAL every day for a week to monitor the drop each day. This would then show me an average of what each element is being consumed each day how much I needed to supplement between water changes.

Do You Test Aquarium Water At The Same Time?

Everything to do with your Coral Reef Aquarium is aiming for stability. Your testing regime is an important part of this stability program. Your main aim of water testing is about getting accurate results. When I test my reef, it is on Tuesday evening around 8pm each week. This provides me with a consistent benchmark.

Just like plants, your fish, coral, and bacteria all work on a daily cycle of activity. By testing at the same time of the day each week, you are testing in the same activity period as the last time. Your parameters can fluctuate throughout the day, so by testing at the same time you get the most accurate result.

For more information on this please see my article:

What Is The Best Time To Feed Your Saltwater Fish?

How To Test Aquarium Water If You Are Color Blind?

Many people find matching colors on fluid-based aquarium test kit comparison cards very difficult, especially if their eyesight is not very good or they are color blind in the color range the test kit is using. Luckily there are some great test kits to help.

For aquarium owners who are colorblind, digital testing equipment can be used when testing water parameters. Hanna Checker, Pinpoint, and Neptune Systems Trident are some of the most popular digital testers that show the results in a numerical readout rather than a color comparison chart.

These are Awesome but are more expensive to purchase in the beginning. You can buy the refill kits to keep testing when your fluids run out thus preventing you have to buy the whole tester again. These are becoming very popular as there is no mistaking the reading given.

Hanna Digital Alkalinity Tester

Hanna Digital Calcium Tester

Hanna Digital Phosphate Tester

Click Here to see the Hanna Checkers at Amazon.com

Do Aquarium Water Test Kits Expire?

YES, Test Kits Do Expire!

Most aquarium test kits have a shelf life of several years. Each test kit box will have a label with a ‘Use Before’ date printed on it. When shopping for a new test kit try and pick the kit with the longest remaining life on the label. Out-of-date test kits could give inaccurate results.

Overdosing your reef can kill it! It has been done! Have a Google around the forums for people overdosing Alkalinity. It is more common than you would believe!

For most owners, they will use all of the test kit before it expires especially once they get into SPS and begin testing very regularly!

Aquarium Water Testing Tips:

Have a book or a whiteboard and write down all your test results each time you test. This will give you an easy way to track trends in any parameter. This has saved my butt more than once in identifying a problem early.

1. DO NOT Drink Beer or Wine While Testing! Seriously!
I like to have a beer AFTER I have done my testing and maintenance. I used to have a beer or 3 while doing my Tuesday night maintenance until one night I almost crashed my tank by getting my alkalinity results wrong and started to adjust my dosing pump to suit.
Luckily I caught the mistake the next day but it could have been fatal for my aquarium.

2. Test, Test & Test! All the tanks I have been to rescue have been mostly because of lack of testing. When I get a blank look off the owner as I ask what their Specific Gravity usually sits at or what’s the normal Alk level and I get the ‘Deer in the Headlights Look’ I know where to start.

3. Test at the same time, every week – Keep your results consistent.

4. Buy your test kit replacements before you run out. You never know when you may have an issue and need to test every day to prevent a tank crash. This saved my reef once!

5. Try not to be distracted when doing your testing – Distractions cause mistakes.

6. If a parameter looks off, test again. If it still looks off try a friends test kit in case you have a bad kit or a kit that has developed an issue.

7. If you mix batches of saltwater for big water changes, always test your batch before adding it to the tank, especially if you have just opened a new salt bucket.
There have been times when a salt batch was wrong and testing was the only way to avoid a tank crash when adding your new water.

8. Ensure your new water going in matches the water coming out. Especially for Temperature and Salinity.

9. If you are heavy in SPS, match the Alkalinity, Calcium and Magnesium in the fresh batch too and give it time to mix before doing the water change.

To Finish

Salifert, in my opinion, makes the best test kits for saltwater aquariums with Hanna coming in closely behind with their digital checkers. However, their digital checkers are only available for a set range of parameters at this time.

The Salifert range is vast and you will find they have a test kit for almost any parameter you wish to test. Their instructions are super simple to follow, The results are easy to read and best of all they don’t take long to do.

Testing is an important part of monitoring your water to ensure your inhabitants are living in the best possible habitat that you can provide. Regular testing will alert you to declining trends which you can address early and prevent a disaster.


To help you even further I have created these FREE handy guides for you. If you would like them, and more please Click Here


To find all the products you will need during your cycle CLICK the image below to go to my recommended products guide:

Aquarium Cycle Essentials Header

Further Reading

You may find the following articles useful after reading this:

Fish Tank Cycle: How To Know When its Finished!


Congratulations on the first steps to a beautiful aquarium! The cycling of an aquarium is one of the most important parts to a great start and it is one that cannot be rushed. The tank cycle is the natural bacteria of your biological filter growing and establishing itself ready for you to add fish, but when does this cycle actually finish?

A fish tank cycle is complete once ammonia & nitrite have dropped to zero & nitrates are starting to rise. At this point enough beneficial bateria have established to begin slowly adding fish & invertebrates. From this point keeping nitrates low can be acheived with regular water changes & cleaning.

To help you understand abit more about what the cycle is, why it is so important and how to know when its finished keep reading and find out what the heck Ammonia, Nitrites and Nitrates are too!

Hint: They are toxins to aquatic inhabitants 😉

When is the Aquarium Cycle Complete?

The only way you can truly see what is going on in your cycle is by testing your Ammonia, Nitrites, and Nitrates every day or two and record the results.

You can see the spikes in the diagram above and once your Ammonia & Nitrites are at 0ppm and your Nitrates are below 5ppm for saltwater aquariums and 20ppm for freshwater aquariums you are good to SLOWLY start adding your first fish. (ppm = Parts Per Million)

To help you track the progress of your aquariums cycle feel free to download this FREE tool I created for you. Just put in the readings from the test kits and the results are plotted on the graph for easy analysis!


If you are wondering which test kits I recommend you can find out all about my preference in this article:

Best Test Kits For Aquariums


How Long Does An Aquarium Cycle Take?

Most aquariums take between 6-8 weeks to cycle. The larger the water volume, the longer it can take. Using a live bacteria starter culture can dramatically speed up the process to only several weeks by introducing a large number of nitrifying bacteria to the aquairum and boost the reproduction rate.

The TV shows where they introduce fish with a ‘Cycle Enhancing’ liquid is just pure TV. What they don’t show you is the large number of fatalities in the weeks that follow. It takes time for the nitifying bacteria to mulitply enough to process the bio-load in the aquarium.

Everytime a new fish or fishes are added to the aquarium it take a set amount of time for the bacteria to reproduce in enough numbers to handle the increase in bio-load. At best it may take a week if a live culture is added at the same time.

Some of the most popular bacteria cultures are listed further in this article.

What Is A Fish Tank Cycle?

A tank or aquarium cycle is commonly known as ‘The Nitrogen Cycle’ and it is the process where various strains of nitrifying bacteria consume dangerous toxins in the water and convert them into safer compounds that fish and aquatic livestock can tolerate.

In the wild these toxins are diluted by the huge body of water the fish are living in, however, in an enclosed environment like an aquarium, these toxins can rapidly build and poison all of the tank’s inhabitants. As aquarium owners, it is our job to maintain the balance of having enough bacteria to convert the waste introduced into the water.

Thes toxins are known as Ammonia and Nitrite (Highly toxic to aquatic life) and Nitrate (Far less toxic to aquatic life)

The Aquarium Nitrogen Cycle

What is Ammonia?

Ammonia is released during the breakdown of dead and decaying material, fish excrement, uneaten food, rotting plant matter, etc. Think of this in human terms as going to the bathroom or placing something in the garbage. Luckily we have toilets and garbage cans to dispose of our waste.

Your aquarium does not, as these items break down they release Ammonia into the water of your aquarium. If it is not taken care of, it will cause problems as Ammonia is highly toxic to your fish.

Luckily, you have Nitrosomonas Bacteria that will naturally grow as part of the biological filter matures, this strain of bacteria metabolize Ammonia and turn it into Nitrite.

What is Nitrite?

Nitrites are the next part of the Nitrogen Cycle. As the Nitrosomonas Bacteria consume the Ammonia compounds, they convert it to Nitrites, but Nitrites are still highly toxic to fish.

As your Nitrogen Cycle continues, you will eventually have Nitrobacter Bacteria begin to grow and multiply within your tank which then consumes and metabolizes the Nitrite compounds and converts them to Nitrates.

What is Nitrate?

During the 3rd part of the nitrogen cycle, the Nitrobacter Bacteria are now consuming the toxic nitrites and converting them into Nitrates. Nitrates are much less toxic for fish and we are nearing the end of the nitrogen cycle.

As the Ammonia has begun its spike and begin to drop to 0ppm, the Nitrites have spiked and dropped to 0ppm and you are starting to see the rise of Nitrates, your cycle is nearing completion.

Nitrates help to feed algae, which are then fed off by fish, snails, and invertebrates which then return this back to the water via excretion, uneaten food decays and all this releases ammonia back into the water and the cycle begins its loop again, but in a much smaller quantity.

The final part of the Nitrogen Cycle is the Nitrates being turned into Nitrogen gas. This is a slow process and usually will require the nitrates to be removed before they have a chance to build up. The best way for Nitrate removal is regular water changes.

Why Do You Need To Let An Aquarium Cycle?

The nitrogen cycle is in a constant cycle within your aqaurium, it never stops. The initial cycle needs to be completed before adding livestock to ensure there is enough bacteria to cope with the excrement and uneaten food the fish will add to the tank.

Think of it like you are going to a concert with 50,000 people. If you get there and there are only 5 Porta-Potties it’s going to get ugly! However, if you arrive there and there are 1,000 Porta-Potties then everyone is going to be accommodated for.

This is what is happening during your tank’s cycle. The building of enough Porta-Potties to support the livestock that has just arrived. The more fish you add, the more bacteria need to multiply.

This is the reason you want to add your livestock slowly, or you could risk having a bio-load too large for your bacteria to cope with.

When you begin a new aquarium you need to let the tank cycle and build this natural biological filtration before you add any fish! The biological filtration is everywhere in your tank, not just the physical filter item. The bacteria will colonize everywhere – Rock, Sand, Glass and Filter Sponges.

This is why you hear ‘Patience’ mentioned a lot in the saltwater aquarium hobby. Patience gives your tank the time it needs to multiply the bacteria to maintain a healthy balance.

How Do You Begin An Aquarium Cycle?

To begin an aquarium cycle many aquarists use Live Rock from a matured aquarium and let the bacteria multiply to their new size tank and bio-load, or if starting with a dry rock and new sand, a live bacteria culture like Dr Tim’s One & Only can be added to seed the sterile aquarium and boost the cycle.

Below are the most popular live bacteria cultures for initially starting an daquarium cycle, but also help increase bacteria when adding new fish or after a long power outage when bacteria has died off.

All Links to Amazon.com

A further option is to add a raw shrimp to the aquarium and allow it to decay and breakdown. This will release ammonia and begin the cycle. This is how I started the cycle on my reef tank:

Shrimp For Aquarium Cycle
My Shrimp For Starting My Aquarium Cycle

Any of these ways will begin to get the ammonia increasing and begin the cycle.

Can You Use Fish To Cycle An Aquarium?

A lot of people recommend using some ‘Hardy Fish’ like Guppies if you are setting up a freshwater aquarium or Damselfish for a Saltwater aquarium. This is an old and cruel method. High levels of ammonia and nitrite will stress the fish and potentially kill them. A bacteria culture is more humane.

The other main problem with using fish like Damselfish especially, is that they are a VERY territorial species and very hard to catch. If you put in two Damselfish as your first two fish they will terrorize any new fish you add in until they are dead.

Yellow Tail Damselfish – Mean Little Buggers!

I can guarantee you will have to remove all of your aquascape to catch and remove them, so it is just not worth it. Use one of the methods above and be patient. Patience will always give you the best long term results in this hobby.


If you are reading this AFTER adding in some Damselfish, I highly suggest you take of read of this article:

How To Catch Fish In An Aquarium? The Best Methods!


How Often Can You Add Livestock To A New Aquarium?

You can begin to slowly add fish to a new aquairum once ammonia and nitrates are zero and nitrates are slowly rising. Only add a few fish at a time with a week or two inbetween each addition to allow the nitrifying bacteria to multiply to meet the increased bio-load that has now been added.

Once you get the results confirming the nitrogen cycle is complete you can start SLOWLY introducing your first livestock.

In my experience and that of many other seasoned aquarists, I find it better to be little and slow. I recommend you add 2 or 3 hardy, non-territorial fish to begin with.

Below are some great fish suggestions for a saltwater aquarium:

  • Green Chromis
  • Ocellaris Clownfish
  • Firefish Gobies
  • Bangaii Cardinals

I would also recommend slowly adding some Clean-up-Crew to help keep the tank clean.

  • Nassarius snails are a great snail as they can flip themselves if they tip over
  • Turbo Snails are great for algae but cannot flip themselves
  • Hermit Crabs are fun to watch but beware of larger snails with them. They will overturn them and steal their shell!
  • Cleaner Shrimp are good for clean up and are hardy

I would only add a couple of animals no more than once per week MINIMUM.

I have an article HERE on the Best Reef Tank Algae Eaters


Here is an example of how I would begin to stock a saltwater aquarium over 30 gallons:

Week 1:

2 Clownfish
5 Nassarius Snails

Week 2:

2 Firefish Gobies
1 Cleaner Shrimp

Week 3:

1 Yellow Watchman Goby
1 Six Line Wrasse
5 Turbo Snails

And so on.

While your tank is cycling it is a perfect time to begin planning your livestock list depending on the size of the aquarium you have. You can then see which are the best to add first with the most territorial species last.

Take your time and you will give the biological filter time to catch up and stay on top of the nitrogen cycle. Once you start adding livestock, begin your regular water change schedule of 10% volume every one or two weeks depending on how high your Nitrate levels become in that time. No more than 5ppm will keep your water and livestock happy and healthy.

Recommended Aquarium Water Parameters

To help you in the first few months of your new aquarium here is a table of the recommended water parameters you should try to maintain for optimum fish health with regular water changes:

PARAMETERFRESHWATERSALTWATER
TEMPERATURE75 – 80°F or 24 – 27°C78 – 80°F or 25 – 27°C
PH7.0 – 7.88.1 – 8.4
SALINITYN/A1.023 – 1.025
AMMONIA0ppm0ppm
NITRITE0ppm0ppm
NITRATE<50ppm<5ppm
ppm = Parts Per Million

Further Questions

My readings seem to be good after 2 weeks. Is my tank cycled?

From experiance, probably not. If you have a used a Nitrifying Bacteria like Dr Tim’s to speed up your cycle then you may be nearing the end, but its alywas better to wait a couple more weeks and keep testing every day or so to make sure.
Once you see no Nitrites and Ammonia and some Nitrates, then you are good to go.

Do I have to use a commerical product to begin my cycle?

Not at all. I used the frozen shrimp method but it took a long time for my tank to cycle. On my next reef tank I will use Dr Tim’s and see how fast it really cycles.

Aquarium Return Pumps – Step By Step Selection Guide


When I built my aquarium system and I decided to put my sump in the basement, I knew a regular return pump was not going to be strong enough to push the water back up to the aquarium at the correct flow rate.

The task of selecting a new pump took me into an area of aquariums I had never really paid much attention to before!

Return pumps flow should be 5-10x aquarium volume every hour. The pump flow should match the flow rate recommended for the protein skimmer to ensure maximum filtering efficiency. Return pipe bends, diameter & pumping height all reduce flow rate which must be accounted for, but is easily calculated.

In this article, I am going to talk about many types of Return Pump and how to size & select the correct pump to perfectly match your system.

What Does An Aquarium Return Pump Do?

A return pump is used to move water back to the main display part of the aquarium after it has drained into and ran through the filter section. Return pumps can be installed in rear compartments of All-In-One aquariums or located in a sump mounted below the main aquarium.

As water drains from your display tank and into your sump you need a way to move that water back into the display tank, this is where the Return Pump comes in. However, it is not just a matter of taking a pump off the shelf, connecting it to the plumbing and turning it on.

There are numerous things that you need to take into consideration before buying. Keep reading to find out what those considerations are.

To find out more about Aquarium Sumps you can read my article HERE.

How To Size An Aquarium Return Pump?

Aquarium return pumps should pump between 5-10x the aquarium volume every hour. A 30 gallon tank would need a pump with a minimum of 150 gallons per hour flow. For tanks with protein skimmers, the pump flow should match the protein skimmer flow rate to ensure maximum filtration efficiency.

Having a flow rate through the sump that is higher or lower than the recommended protein skimmer flow rate will just cause it to work less efficiently.

We all know the saying about planning etc and this is no different. Finding the correct return pump is not that difficult and I think the best way to teach you is by going through a pump selection.

We are going to base this example on the following:

  • Aqueon 75G Reef Ready Aquarium
  • Aqueon 20G Long Aquarium for Sump
  • Reef Octopus Classic 150 SSS Protein Skimmer
75 Gallon Aquarium
75 Gallon Aquarium

20-Gal-Long-Sump
20 Gal Long Sump
Reef-Octopus-150SSS
Reef Octopus Skimmer

All Values & Specifications found on manufacturers websites or within product instructions

Setup Example #1
Sump in Stand
under Aquarium

Max Flow Rate of Reef Ready Overflow: 600GPH

Max Flow Rate of Protein Skimmer Pump: 198GPH

Height from Return Pump to Outlet Nozzle: 26+21 = 47″

  • Stand Height: 30″ -4″ for feet and Base: 26″
  • Height of Aquarium: 21″

Flexible Braided Hose from Pump to Tank – Easy to install within the stand and minimal pipe friction.

We need to find a pump that will give us 200GPH through sump at 47″ (4ft) Head Loss:

Internal Submersible Pump
(Amazon.com Links)

$:
Sicce Syncra Silent 1.0 251GPH @ 5ft

$$:
Eheim CompactON 2100 369GPH @ 7.8ft

$$$:
IM MightyJet Midsize 538GPH @ 8ft

Return pumps should have a valve installed on the return line to throttle the flow down a little. It is always better to buy a bigger pump and throttle down than to buy an undersized pump and never reach your target flow rate. This example is 200GPH.

Setup Example #2
Sump in Basement under Aquarium Stand

Max Flow Rate of Reef Ready Overflow: 600GPH

Max Flow Rate of Protein Skimmer Pump: 198GPH

Height from Return Pump to Outlet Nozzle: 30+21+48+12 = 111″ (≈9ft)

  • Stand Height: 30″
  • Height of Aquarium: 21″
  • Sump Located on a Counter 48” from Ceiling
  • Floor Joists & Ceiling Void: 12″

Schedule 40 Rigid PVC Plumbing with manifold to supply:

  • 1/10HP JBJ Arctica Chiller Min   240GPH
  • Carbon Reactor Single Stage       295GPH
  • GFO Reactor Single Stage            295GPH

The limiting factor with these figures is the reactors are recommending almost 300GPH. You will find that the pumps that can lift water to a 9ft head height will easily deliver this flow rate to all the manifold and the sump with flow to spare.

∴ We need to find a pump that will give us 300GPH AND can lift to over 9ft:

Internal Submersible & External Pumps
(Amazon.com & AquariumSpecialty.com Links)

$
LA Quiet One Pro 5000 594GPH @ 9.8ft

$$
Eheim 1262 Universal   300GPH @10ft

$$$
EcoTech Vectra S2      1400GPH @11ft

All outlets on the manifold and the return lines will need to have valves installed to correctly set the flow rate required for each piece of equipment.

Where Do You Place An Aquarium Return Pump?

The return pump will go somewhere in your sump. Depending on the design or type of sump you have, will determine which section it goes into. Most sumps will have a section called the ‘Return Section’ that is specifically designed to house your Return Pump.

Basic-Aquarium-Sump
No Return Section

Aquarium-Sump-w-Return
With Return Section
Aquarium-Sump-Return-Fuge
Return Section & Refugium

If you have an All-in-One aquarium, the setup will already include a Return Section with a pump pre-installed.

AIO Aquarium Filter Compartment

What Is Aquarium Plumbing Friction & Head Loss?

Plumbing Friction & Headloss! What the heck does that mean?? Let’s tackle these one at a time:

1. Plumbing Friction

When water travels through a pipe it is subject to the friction created by the inside walls of the pipe. The smoother the pipe, the easier it is for the water to flow through it.
Think about how easy it is to slide down a water slide compared to a fiberglass slide on a playground. Each time you add a bend, valve or a junction in the plumbing it creates friction and this friction adds up. The size of pipe and type of pipe also affect this.

If you are running a sump in the stand below your aquarium, most people will plumb the return pump to the aquarium with flexible vinyl tubing like THIS from Amazon.com 
Flexible PVC hose allows you to smoothly route the pipe to the tank connections and allows for the least amount of plumbing friction and the braided type of hose prevents the pump pressure from bursting the hose.

If you are running a remote sump, most people will permanently plumb the route in Schedule 40 PVC Solid Pipe. White is the color it comes in at the hardware store but Amazon.com has managed to find it in a range of colors which you can find here:

Colored Pipe Here
Colored Fittings Here


There are some really nice plumbing installations using the colored PVC pipe.

Colored Aquarium Plumbing

This type of pipe allows for a really neat and permanent installation, but the addition of elbows, tee’s and valves will all add a little to the friction.

Here are some ballpark figures for flow loss per fitting:
• A loss of 50 to 75 GPH for each 90° elbow
• A loss of 30 to 50 GPH for each 45° elbow
• A loss of 50 to 75 GPH for each swing check valve
• A loss of 20 to 40 GPH for each ball valve
• A loss of ~ 3 to 5 GPH for each union

2. Head Loss

Head Loss is the pressure created when water is pumped vertically upwards. Most pumps will have a ‘Head Loss Chart’ that you can use to see what the flow rate would be at a certain height above the pump.

As a Rule-of-Thumb you can expect a loss of 75 to 125 GPH for each foot of height (from the return pump to the display tank return nozzle/s). This is the chart I used for my Reeflo Pump when I was designing my system installation:

Reeflo-Pumps-Head-Pressure-Chart

I have the Reeflo Dart and the top lip of my display tank sits 12ft above the pump. Using this chart it gives me 800 gallons/hour (GPH), which is plenty to run my sump and manifold with attached equipment.

When you are designing your system you want to have as little plumbing friction and head loss as you can.

Friction & Head Loss = Reduced Flow

This handy calculator from the guys at Reef Central is a great tool for totaling up all your fittings, height and plumbing size to give you an estimated flow rate at your display tank.

==> Click Here for Reef Central Calculator <==

Plumbing Friction & Head Loss is not a problem, it is just something you have to think about when you are looking at which pump to purchase.

If the calculator gave you a flow rate of 320GPH after you put in your details, this is the flow rate you will be getting at the end of the pipe in your display tank.

What Are Aquarium Manifolds?

An aquarium manifold is a series of pipe fittings glued together to allow additional equipment to run using just one pump. A manifold is usually Tee’d off the return pump’s main pipe heading back to the display tank. The manifold has branches with valves on each to feed water to other equipment.

Typical equipment fed off a return manifold are:

  • Refugium
  • Chiller
  • GFO Reactor
  • Carbon Reactor
  • Calcium Reactor
  • Bio-Pellet Reactor

Installing a manifold allows you to easily add equipment in the future, BUT each item you add will require a certain flow rate to operate at its maximum efficiency. All of this needs to be taken into account when selecting your return pump.

The other point you need to keep in mind is that all the equipment running off your manifold should be constantly running equipment, ie always having water run through them.

If you have an item that turns the flow on and off it will cause the pressure in your return line to fluctuate and this will cause your return outlets to surge causing splashing and bubbles.

Internal vs External Aquarium Return Pumps – What’s Different?

A good majority of the pumps are available to be installed within the sump or plumbed externally of the sump. There are pros and cons to both installation methods and your setup location will dictate which method you can use.

The internal method is great for sumps installed in the stand as all the return pumps will be all exceed that head loss. You will need to look at external pumps once you need to pump from a remote location and you are pumping up high.

The only real drawback with internal pumps is that it will put all the heat it creates back into the water, whereas most of the dedicated external pumps will have a cooling fan.

AC vs DC Aquarium Pumps

All of the pumps mentioned above, apart from the EcoTech Vectra, are all traditional electrical AC pumps, ie: just plug them straight into the wall outlet.

In recent years there has been a tremendous development in DC Pumps. You still plug these pumps into the wall outlet, but they are now connected to a control unit that adjusts the electrical AC to DC.

The benefit to DC pumps is that the speed of them can be controlled. This allows you to set the flow rate being delivered by the pump by pressing a button or turning a dial.

Most of the DC pumps have their own App you can use to completely control your pump remotely or the pump controller can be linked to some of the advanced aquarium controllers such as a Neptune Apex HERE at AquariumSpecialty.com, which can give you some great additional features.

One of the best benefits to DC pumps, especially the EcoTech range, can have a battery backup installed so in the event of a power outage your sump and display tank will still turnover for a set amount of time.

The downside to the DC pumps is that they are expensive compared to their AC siblings, but the benefits they provide may make them preferable to you.

How Do You Calculate Aquarium Flow Rate?

Unless you have a flow meter handy this is an area that causes alot of aquarium owners some hassle, but there is an easy way to find it out!

If you need to find out the flow off a manifold outlet so you can adjust it to 150GPH, here is what you do:

  1. Get a large bucket or container
  2. Place the container under the manifold nozzle or attach a flexible pipe if space is limited, and pipe it to the bucket
  3. Open the valve 1/4 turn and fill the container for 15 seconds
  4. Turn off the valve at 15 seconds
  5. Using a measuring jug, meter out how much water was collected in the container and make a note
  6. Let’s say you collected 1.5 liters in 15 seconds
  7. 60 Seconds / 15 = 4, so 1.5 liters x 4 = 6 liters in 1 minute
  8. 6 liters x 60 Minutes = 360 liters per hour
  9. 1 liter = 0.264 US Gallons
  10. 360 liters x 0.264 = 95 GPH

We had opened the valve 1/4 turn to get these numbers, so opening the valve approx 1/2 way should give around 200GPH.

If 15 Seconds fills the container too quickly, try 5 seconds then multiply Step 7 by 12 instead of 4. (eg: 1.5 x 12) (60 Seconds / 5 Seconds = 12)

Aquarium Pump Operating Cost Comparisons

The cost to operate a pump is very rarely thought about by most aquarists. The rising costs of electricity can make people start to think about how to create a system that may be expensive to purchase initially but will cost less to run in the long term.

To find out how much your pump is going to run each year you need two numbers:

  1. Wattage of the pump
  2. Electricity price per Kilowatt Hour (KWH) where you live

Pump Wattage x 24 (hours) = Total Watts Used Each Day
Total Watts / 1000 = KHW Used Each Day
then
Total KWH Used Each Day x Electricity Cost per KWH = Cost Per Day
then
Cost Per Day x 365 = Total Cost to Run Each Year

Eg:  Electricity Cost @ 15¢ per KWH

55W Pump

55 x 24 hours = 1320 Watts Used Each Day

1320 / 1000 = 1.32 KWH Used Each Day

1.32 KWH x $0.15 = 19.8¢ Each Day

$0.198 x 365 Days = $72.27 To Run Pump Each Year

$72.27 x 5 = $361.35 to Run for 5 Years

95W Pump

95 x 24 = 2280 Watts Used Each Day

2280 / 1000 = 2.28 KWH Used Each Day

2.28 x $0.15 = 34.2¢ Each Day

$0.342 x 365 = $124.83 To Run Pump Each Year

$124.83 x 5 = $624.15 to Run for 5 Years

The main thing to consider here is pump cost over its running lifetime. I used 5 years here, but it’s not uncommon for a good quality aquarium pump to last 10+ years.

You can see that a pump with twice the wattage is going to cost twice as much to run each year.

When looking at return pumps it is usually very worthwhile to spend the extra $100, $200, $300 upfront when purchasing as you will easily recoup this cost back over many years of savings, due to the lower wattage.

How To Stop Aquarium Pump Noise & Vibrations?

With the majority of aquariums being in the Living Room and some in Bedrooms, the operating noise needs to be kept to an absolute minimum.

Return pumps can be noisy and if installed incorrectly can cause a humm to vibrate through your aquarium, sump and stand and make the noise amplified.

Here are some tips for reducing both noise and vibrations:

  • Internal pumps are generally quieter
  • Place the pump on a silicone or rubber mat Like This
  • Ensure the pump case is not touching the sides of sump, stand, pipework etc
  • When plumbing in rigid pipe, have a short piece (6″) of Flexible PVC pipe between the pump and rigid pipe

Aquarium Pump Maintenance & Backups

Maintenance is a main part of keeping an aquarium and a good bit of thought during the design phase of your system will always payoff in the long run. Trust me!

Any pump installed into your system, especially if your plumbing is rigid PVC needs to be done properly.

Each side of the pump needs an isolating valve and a union fitting. You can then easily isolate the water, undo the unions and remove the pump for maintenance, cleaning and replacement.

I regularly remove my return pump, disassemble the pump and clean the crud off the impeller. Even a slight buildup of fuzz can really reduce the pumping efficiency.

If your pump is external and has a cooling fan, give that a brush too and keep it clean.

The MOST IMPORTANT TIP I can give you about your return pump is this…Buy A Spare!

I know they are expensive but it will save your tank! You can bet if it fails it will be at that start of a long weekend when your local fish store is shut, or you have to wait for the replacement to be delivered!

Get the spare and plumb it EXACTLY the same so it’s a simple job to swap it out if it fails. It may not be you changing it either! What if you are on vacation and you have a fish sitter!

You will learn that when things go wrong, they go wrong fast. Prepare as much as you can and you will beat off the Grimm Reaper to your tank!

Aquarium Return Pump Selection Conclusion

As you have seen over this article there is a vast selection of pump types to pick from depending on how you are looking to design your system.

You can view a tremendous range of Return Pumps HERE at AquariumSpecialty.
You will be able to find one that will fit your system perfectly!

After deciding what kind of pump you wish to have I would go and read the reviews, keeping an open mind. There are some awesome pumps out there with a proven track record for reliability.

A return pump is not a place to skimp on cost and by following some of the ideas I have given you I hope that you can find the best pump for your setup.

Further Reading:

Are you looking to install a sump into your new system?
Read my guide: Aquarium Sumps – Everything You Need To Know for some great information on setting up the perfect sump for your system.

I really, really advise you to run a Protein Skimmer on your aquarium but if you are new to saltwater you may be wondering what the heck one of those is! Read my Article: What Is A Protein Skimmer & Do I Need One? to help you understand all about them.

Your aquarium needs 3 types of filter media to work properly and filter effectively. By reading my article: Types Of Aquarium Filter Media & What They Do you can find out what you need!